
I first heard about the Camino de Santiago in a college Spanish language course. A classmate presented on the topic at the front of the classroom after having learned about it herself while studying abroad in Spain. As I listened on with intrigue, I had no idea I would be partaking in the adventure myself only two years later!
What I cover here:
- The history
- The Portuguese Coastal Route by bike – maps, distance, elevation gain
- Pictures and descriptions of each day cycling
- What I packed
- Considerations for bringing your own bike
- Thoughts on the French Way by foot vs. the Portuguese Coastal Route by bike
The history
What is the Camino de Santiago, you ask? The Camino de Santiago, also known as the ‘Way of St. James’ in English, refers to multiple ancient pilgrim routes through Europe that come together in Santiago de Compostela, located in Galicia in north-west Spain. This is where tradition states that the tomb of the apostle St. James the Great resides. The relics of St. James were discovered at the beginning of the 9th century, which sparked a medieval Christian pilgrimage to this site throughout Europe. In 1492, Pope Alexander VI declared the Camino de Santiago to be one of the “three great pilgrimages of Christendom”, along with Jerusalem and Rome. The French Way is the most popular route, starting at the border of France and Spain. This route, as well as the other routes in Spain, were placed on the UNESCO World Heritage List in 1998 because of their historical and cultural significance. Individuals travel along these routes for many different reasons, including religious, spiritual or cultural.
One can choose to either walk, bike or horseback ride their way to Santiago de Compostela. If a Pilgrim (peregrino in Spanish) completes the last 100 km by foot or horseback, or the last 200 km by bike, they may be eligible to receive the compostela, or Pilgrim’s certificate. Other requirements to receive the compostela include making the Pilgrimage for religious/spiritual reasons, or at least having an attitude of search, and collecting the required number of stamps on a Pilgrim’s passport (credencial). Stamps can be collected at churches, hostels/inns or some small businesses along the way. These are how you prove you traveled by bike, foot or horseback.
I have had the incredible fortune of traveling along two of the routes of the Camino de Santiago: once by foot along the French Way in 2006, and once by bike along the Portuguese Coastal Route in 2019. This post describes my experience biking the Portuguese Coastal Route.
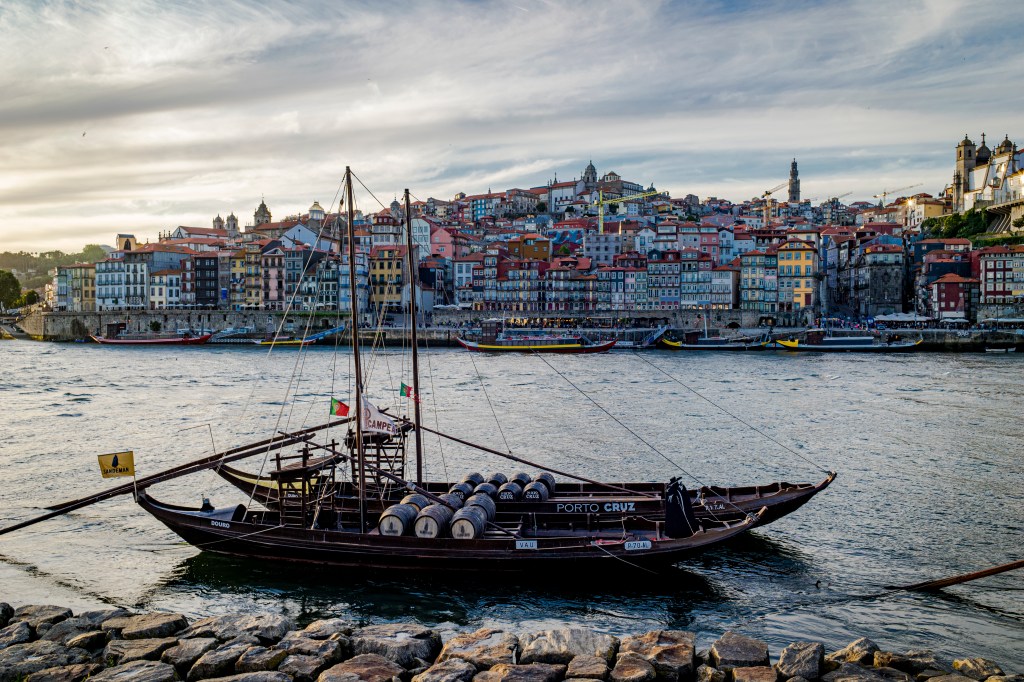
The Portuguese Coastal Route by bike – maps, distance, elevation gain

Scroll through the maps above which capture the route we took from Porto, Portugal to Santiago de Compostela, Spain.
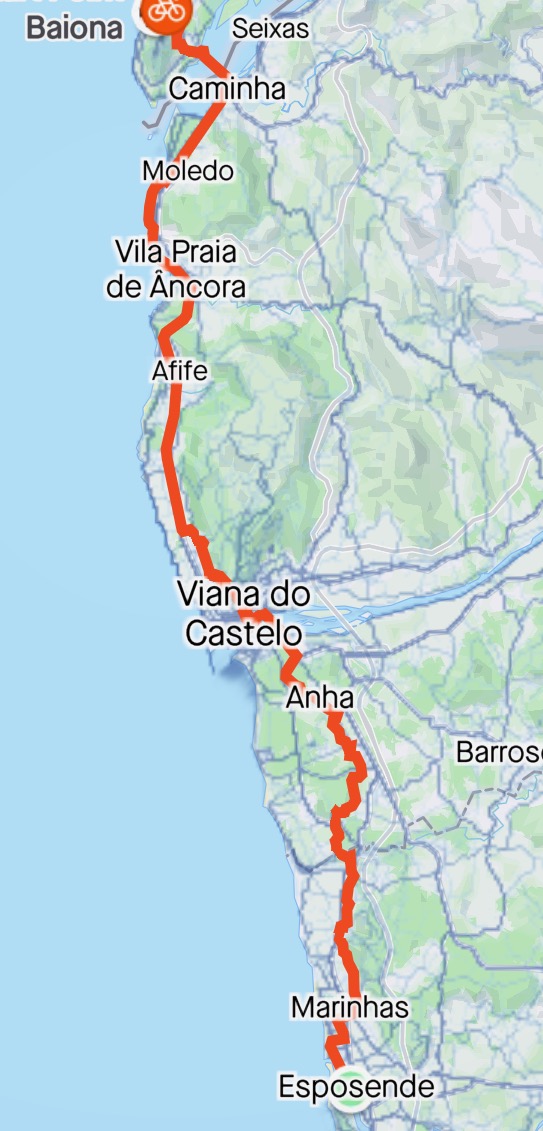
- Day 1: Porto to Esposende – 41 miles (66 km), 1,137 feet (347 m) elevation gain.
- Day 2: Esposende to A Guarda – 39 miles (63 km), 2,789 feet (850 m) elevation gain (with a ferry ride between Portugal and Spain)
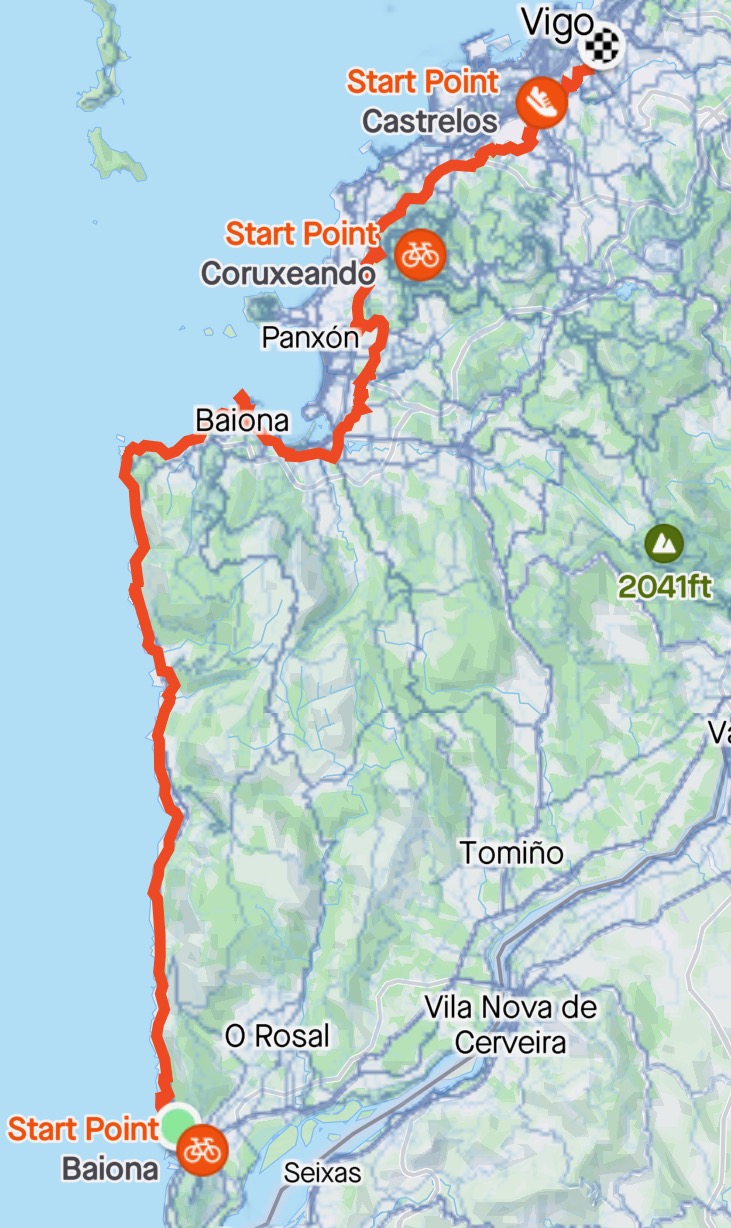
- Day 3: A Guarda to Vigo – 39 mi (63 km), 3,240 feet (988 m) elevation gain
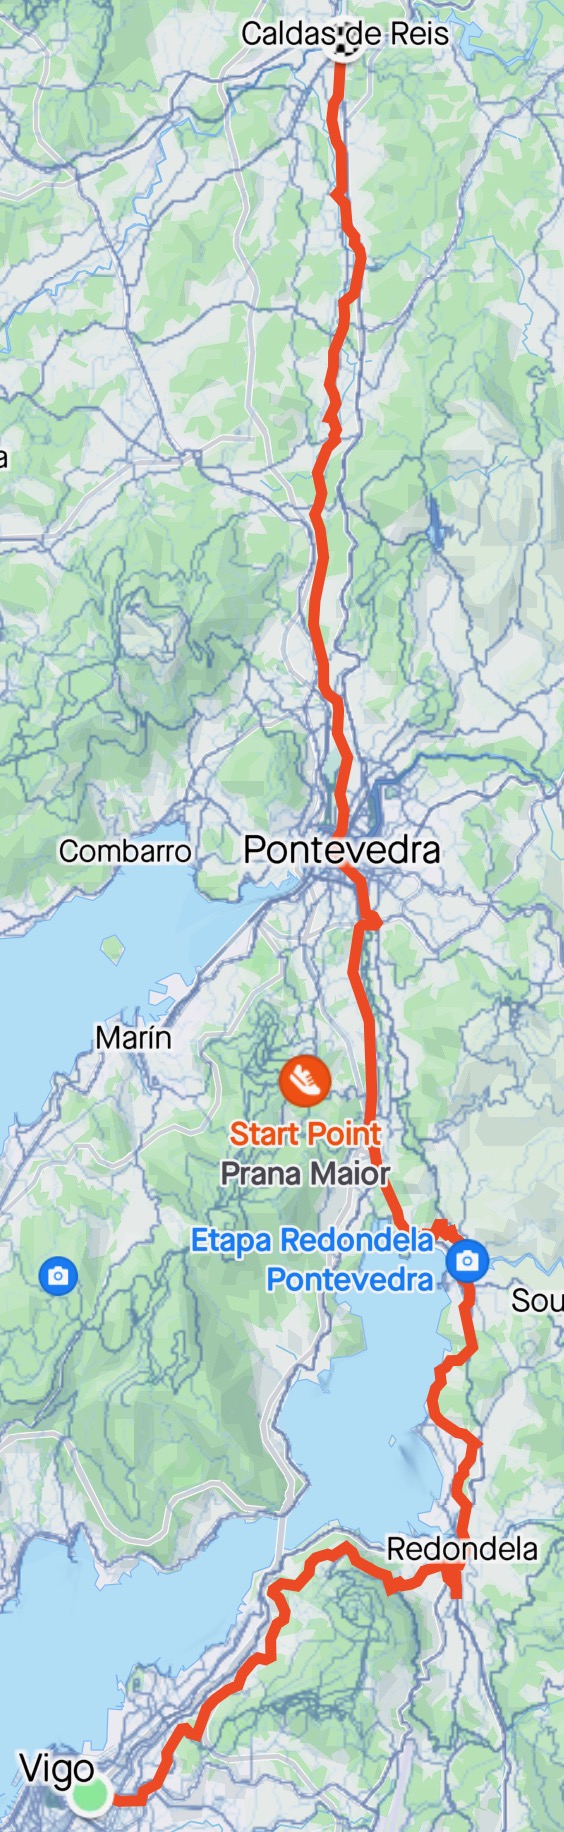
- Day 4: Vigo to Caldas de Reis – 39 mi (63 km), 2,708 feet ( 825 m) elevation gain
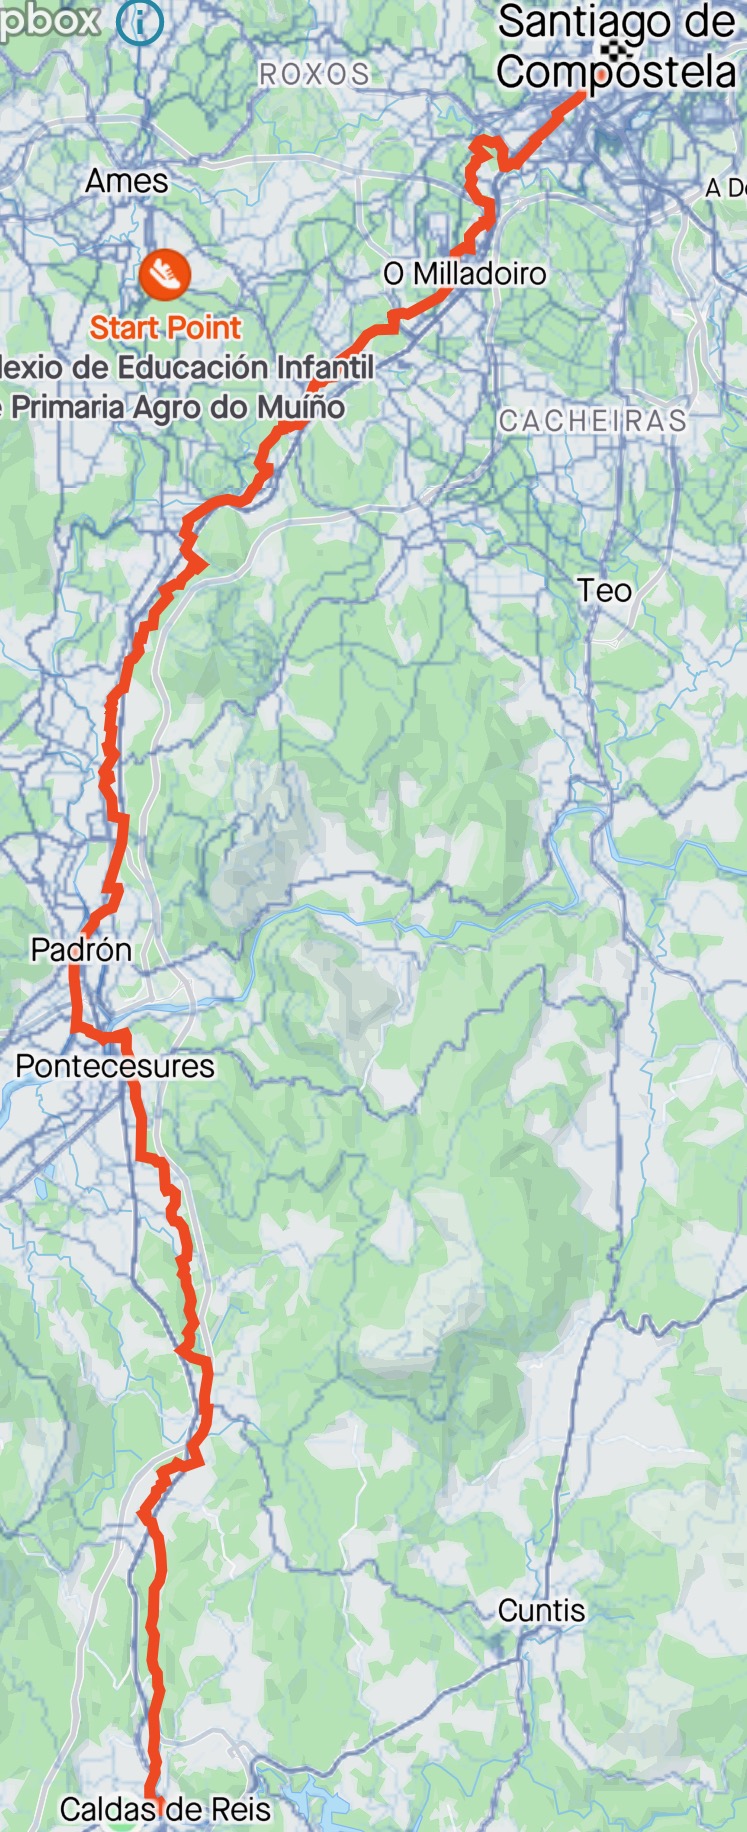
- Day 5: Caldas de Reis to Santiago de Compostela: 29 miles (47 km), 2615 feet (797 m) elevation gain
Pictures and descriptions of each day cycling
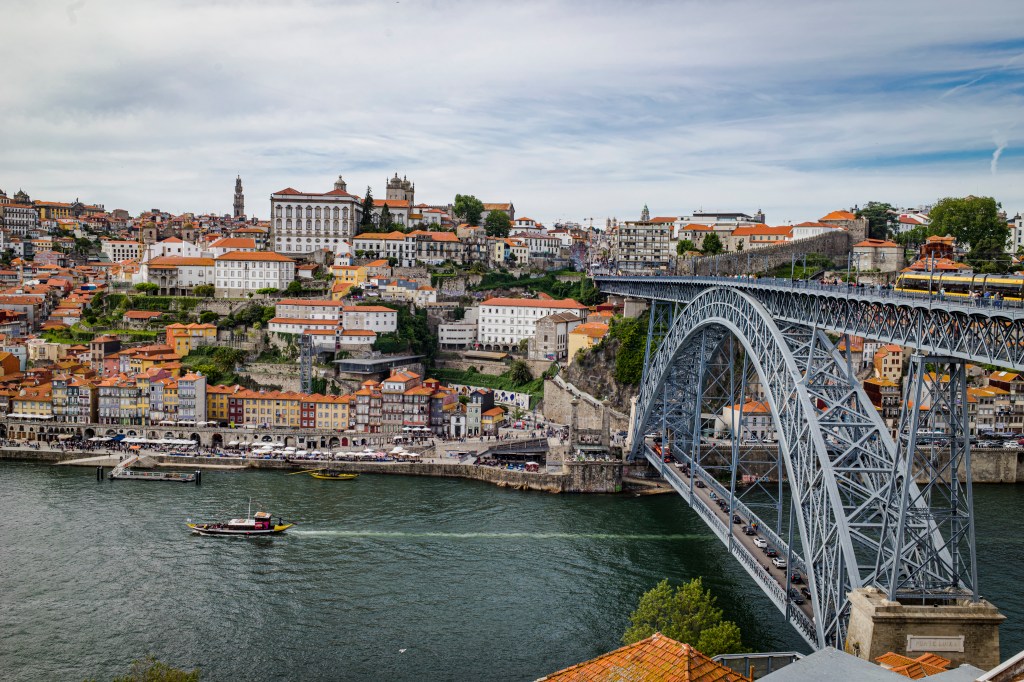

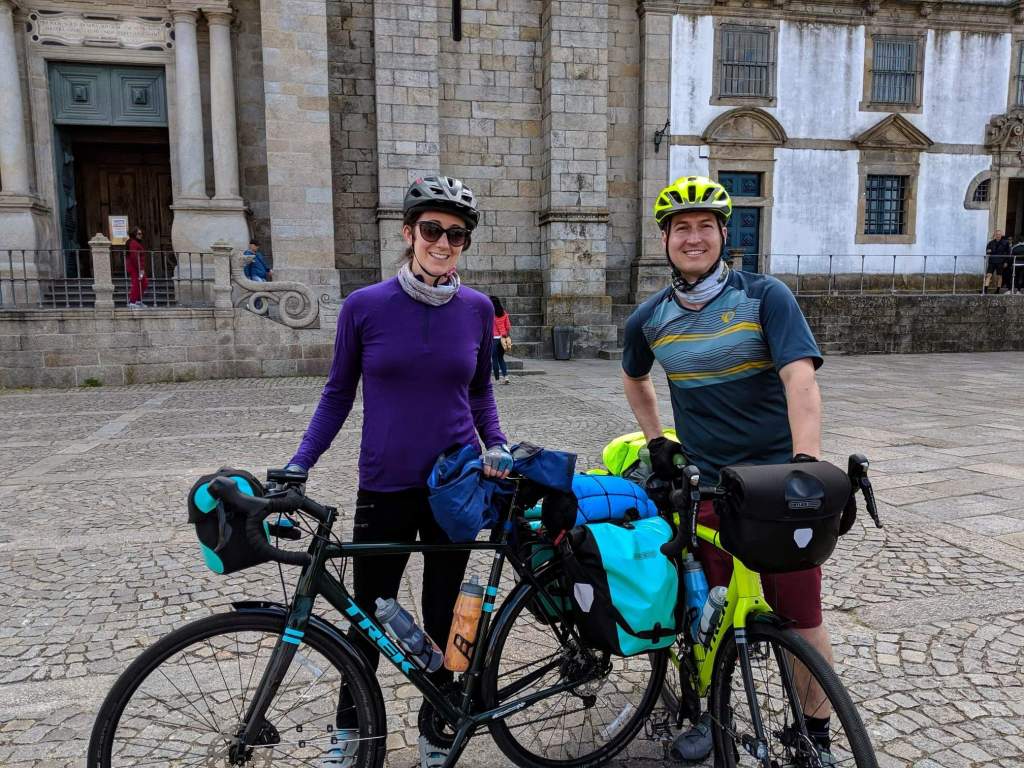
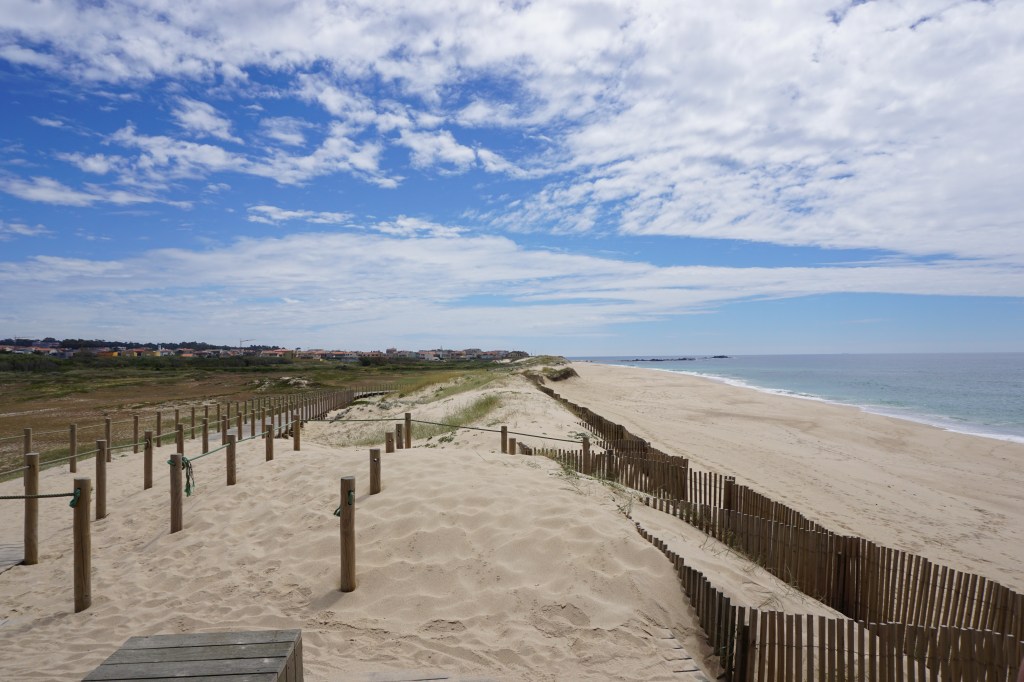

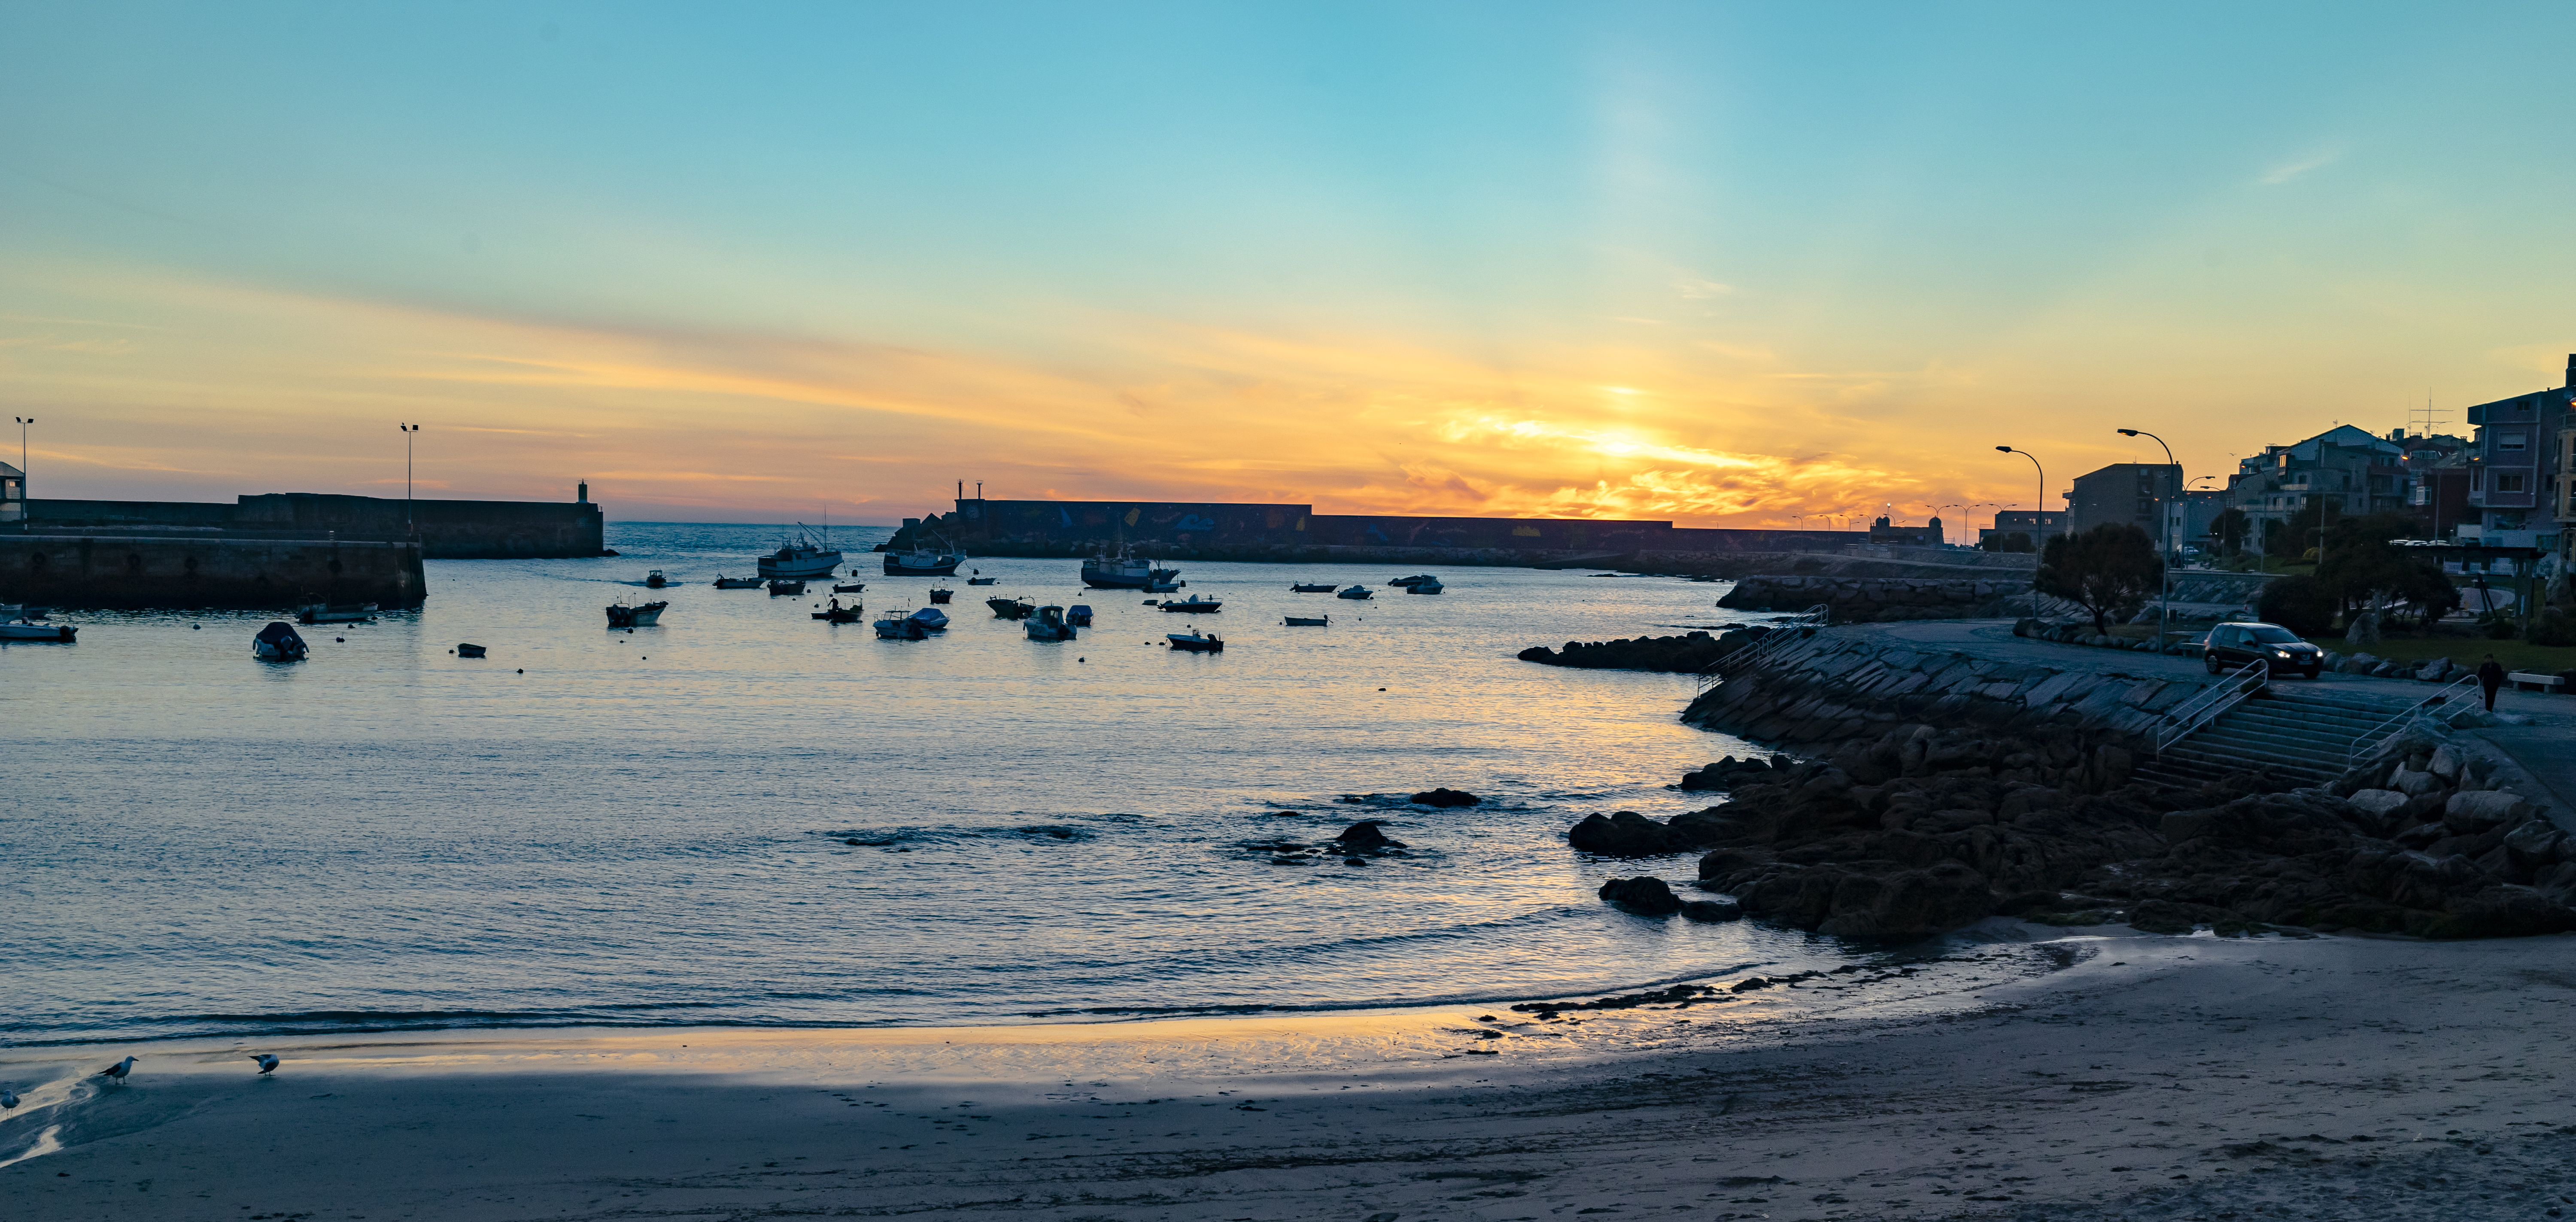
Day 1: Porto to Esposende When we first started planning the trip, we were trying to decide whether it was necessary to book places to stay in advance. I hadn’t done that for the French Way over ten years prior, but knew the Camino had grown in popularity. However, we were traveling by bike this time, which meant finding a place to stay would be logistically easier and quicker to do than if we were traveling by foot. Additionally, it was hard to gauge how far we might travel in a given day, or if we’d need a day to rest due to injury or bike repairs, so we decided to book along the way. This worked out just fine for us and given the advances in technology since my first trip, we could reserve a place to stay for the night while we were en route on our phones. Day 1 was the easiest of the five days. It was relatively flat so we were able to cover more distance than we had originally planned. The most difficult part of the day was along the shoreline through the sand early on. Large amounts of sand covered the path and we had to push our bikes through here. This took a lot of time and effort, but it was manageable for the short distance it lasted. The views of the ocean, fresh air and salty breeze made the ride unforgettable.
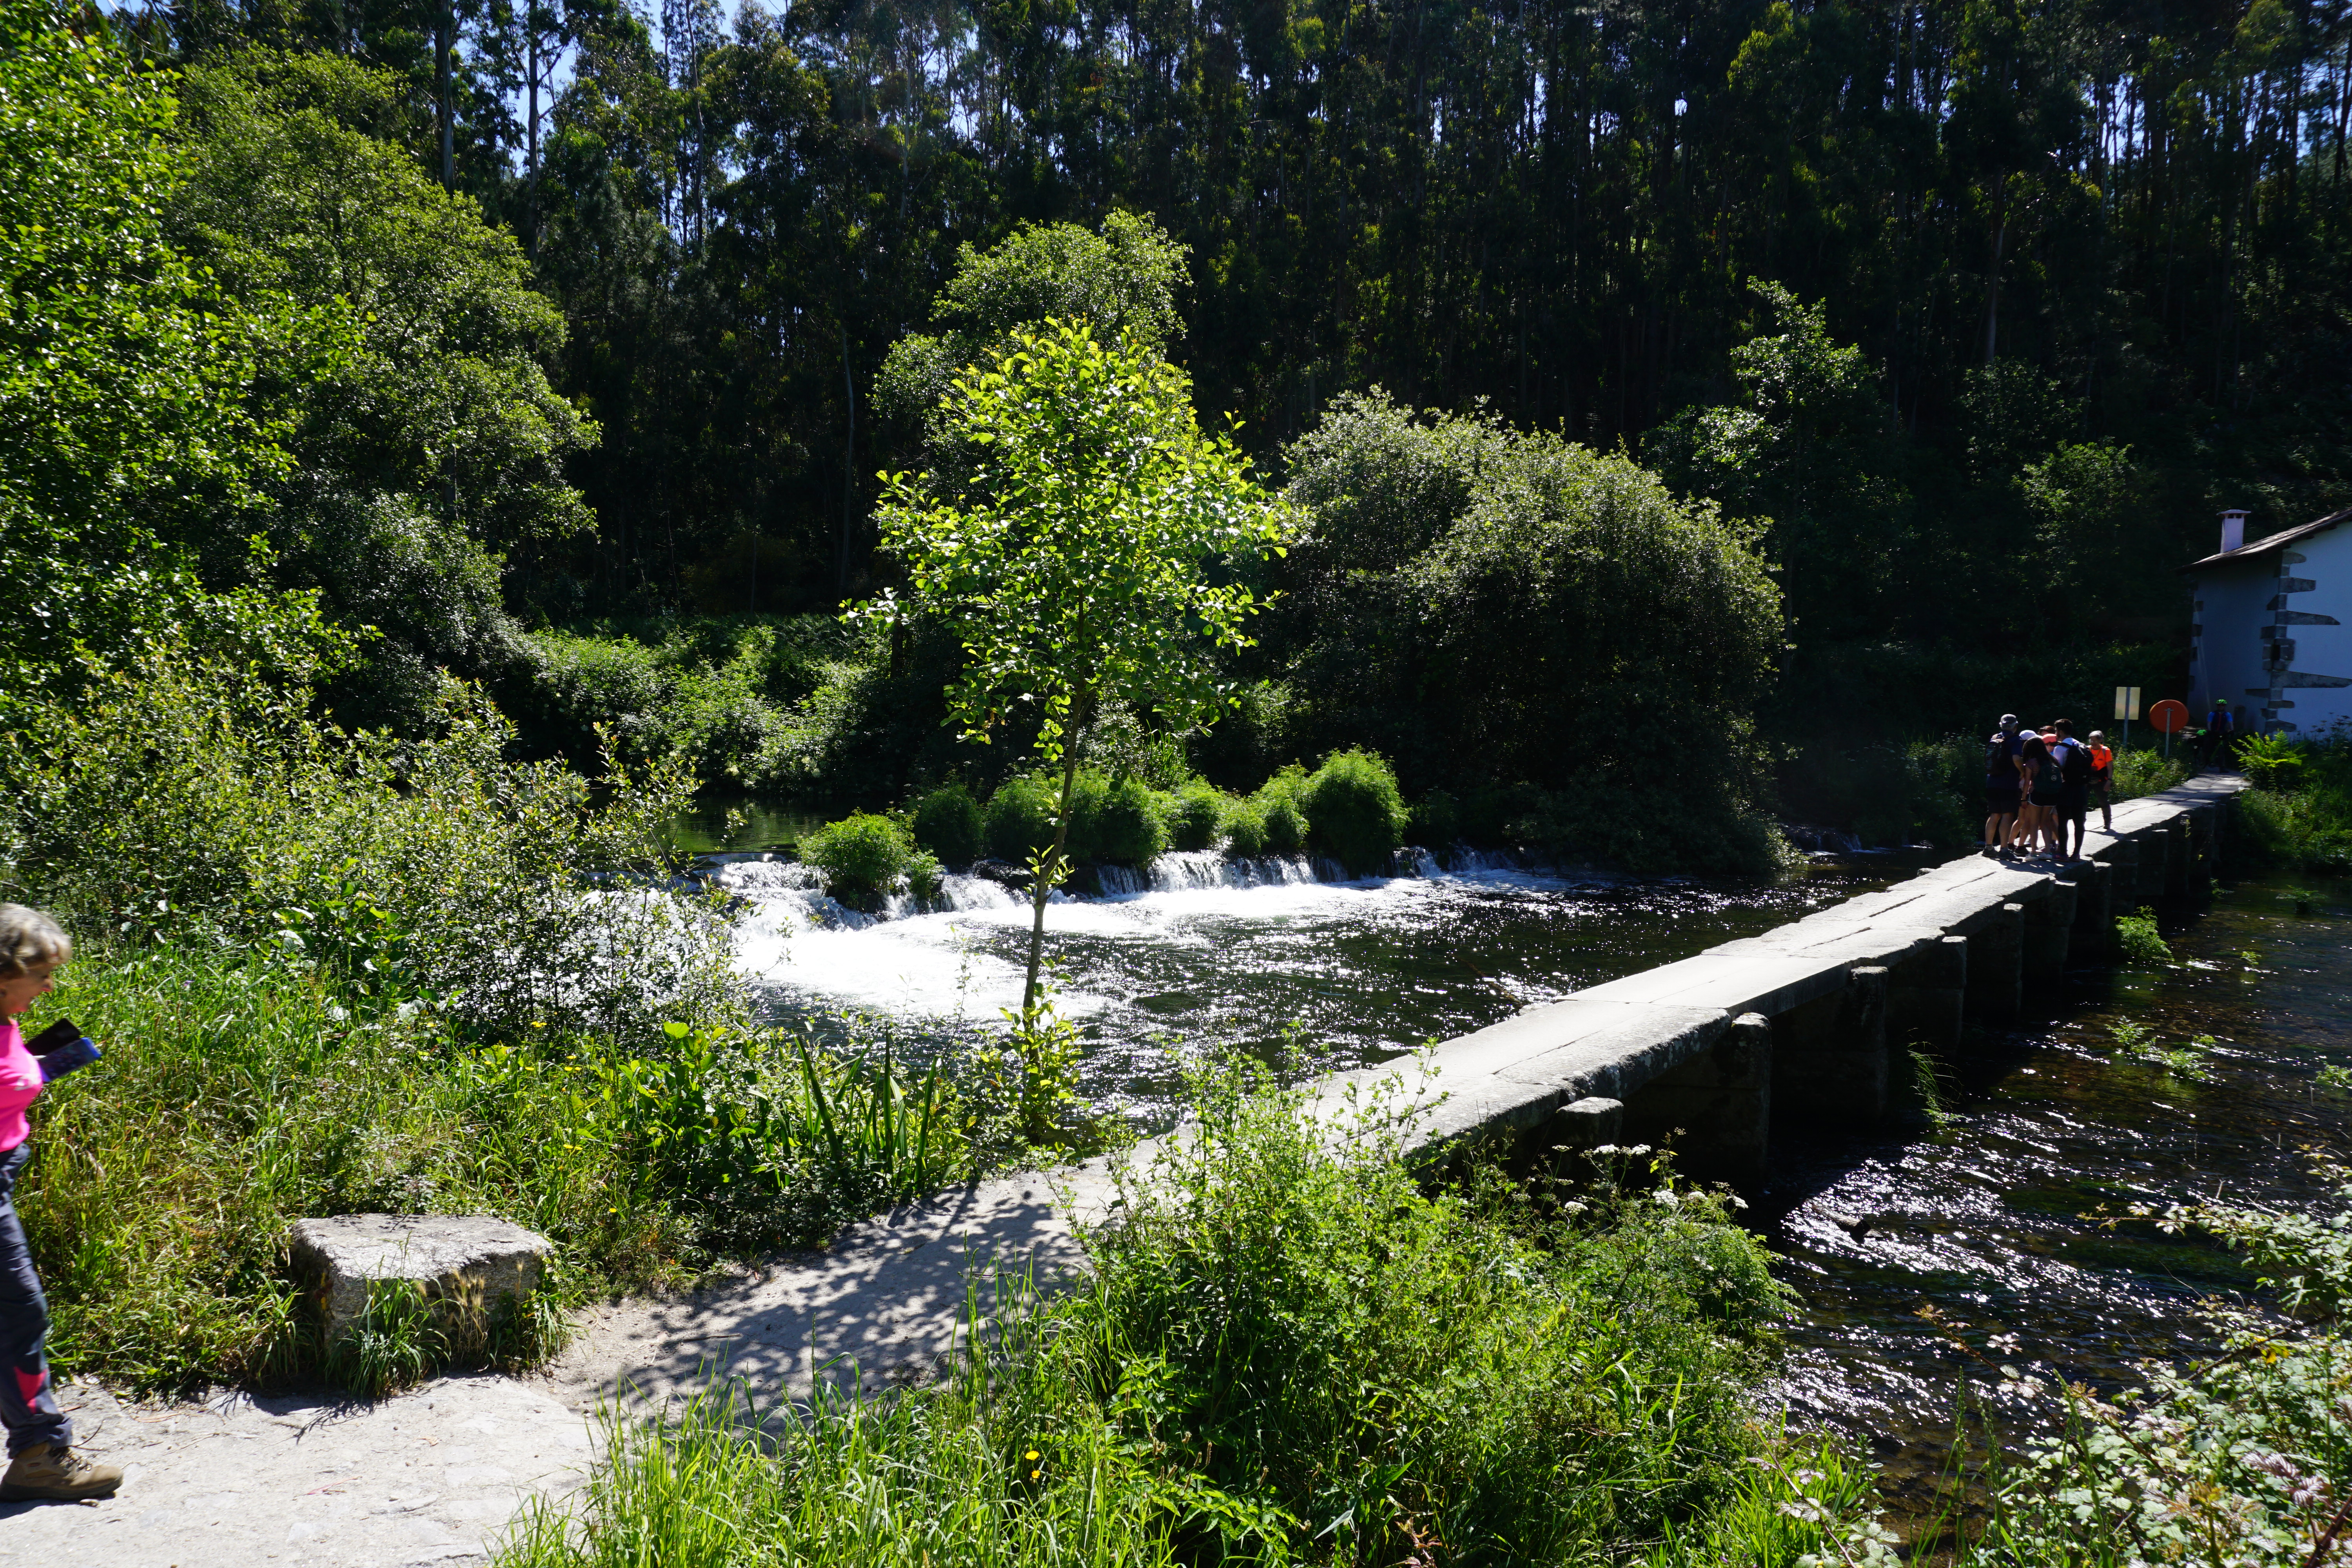
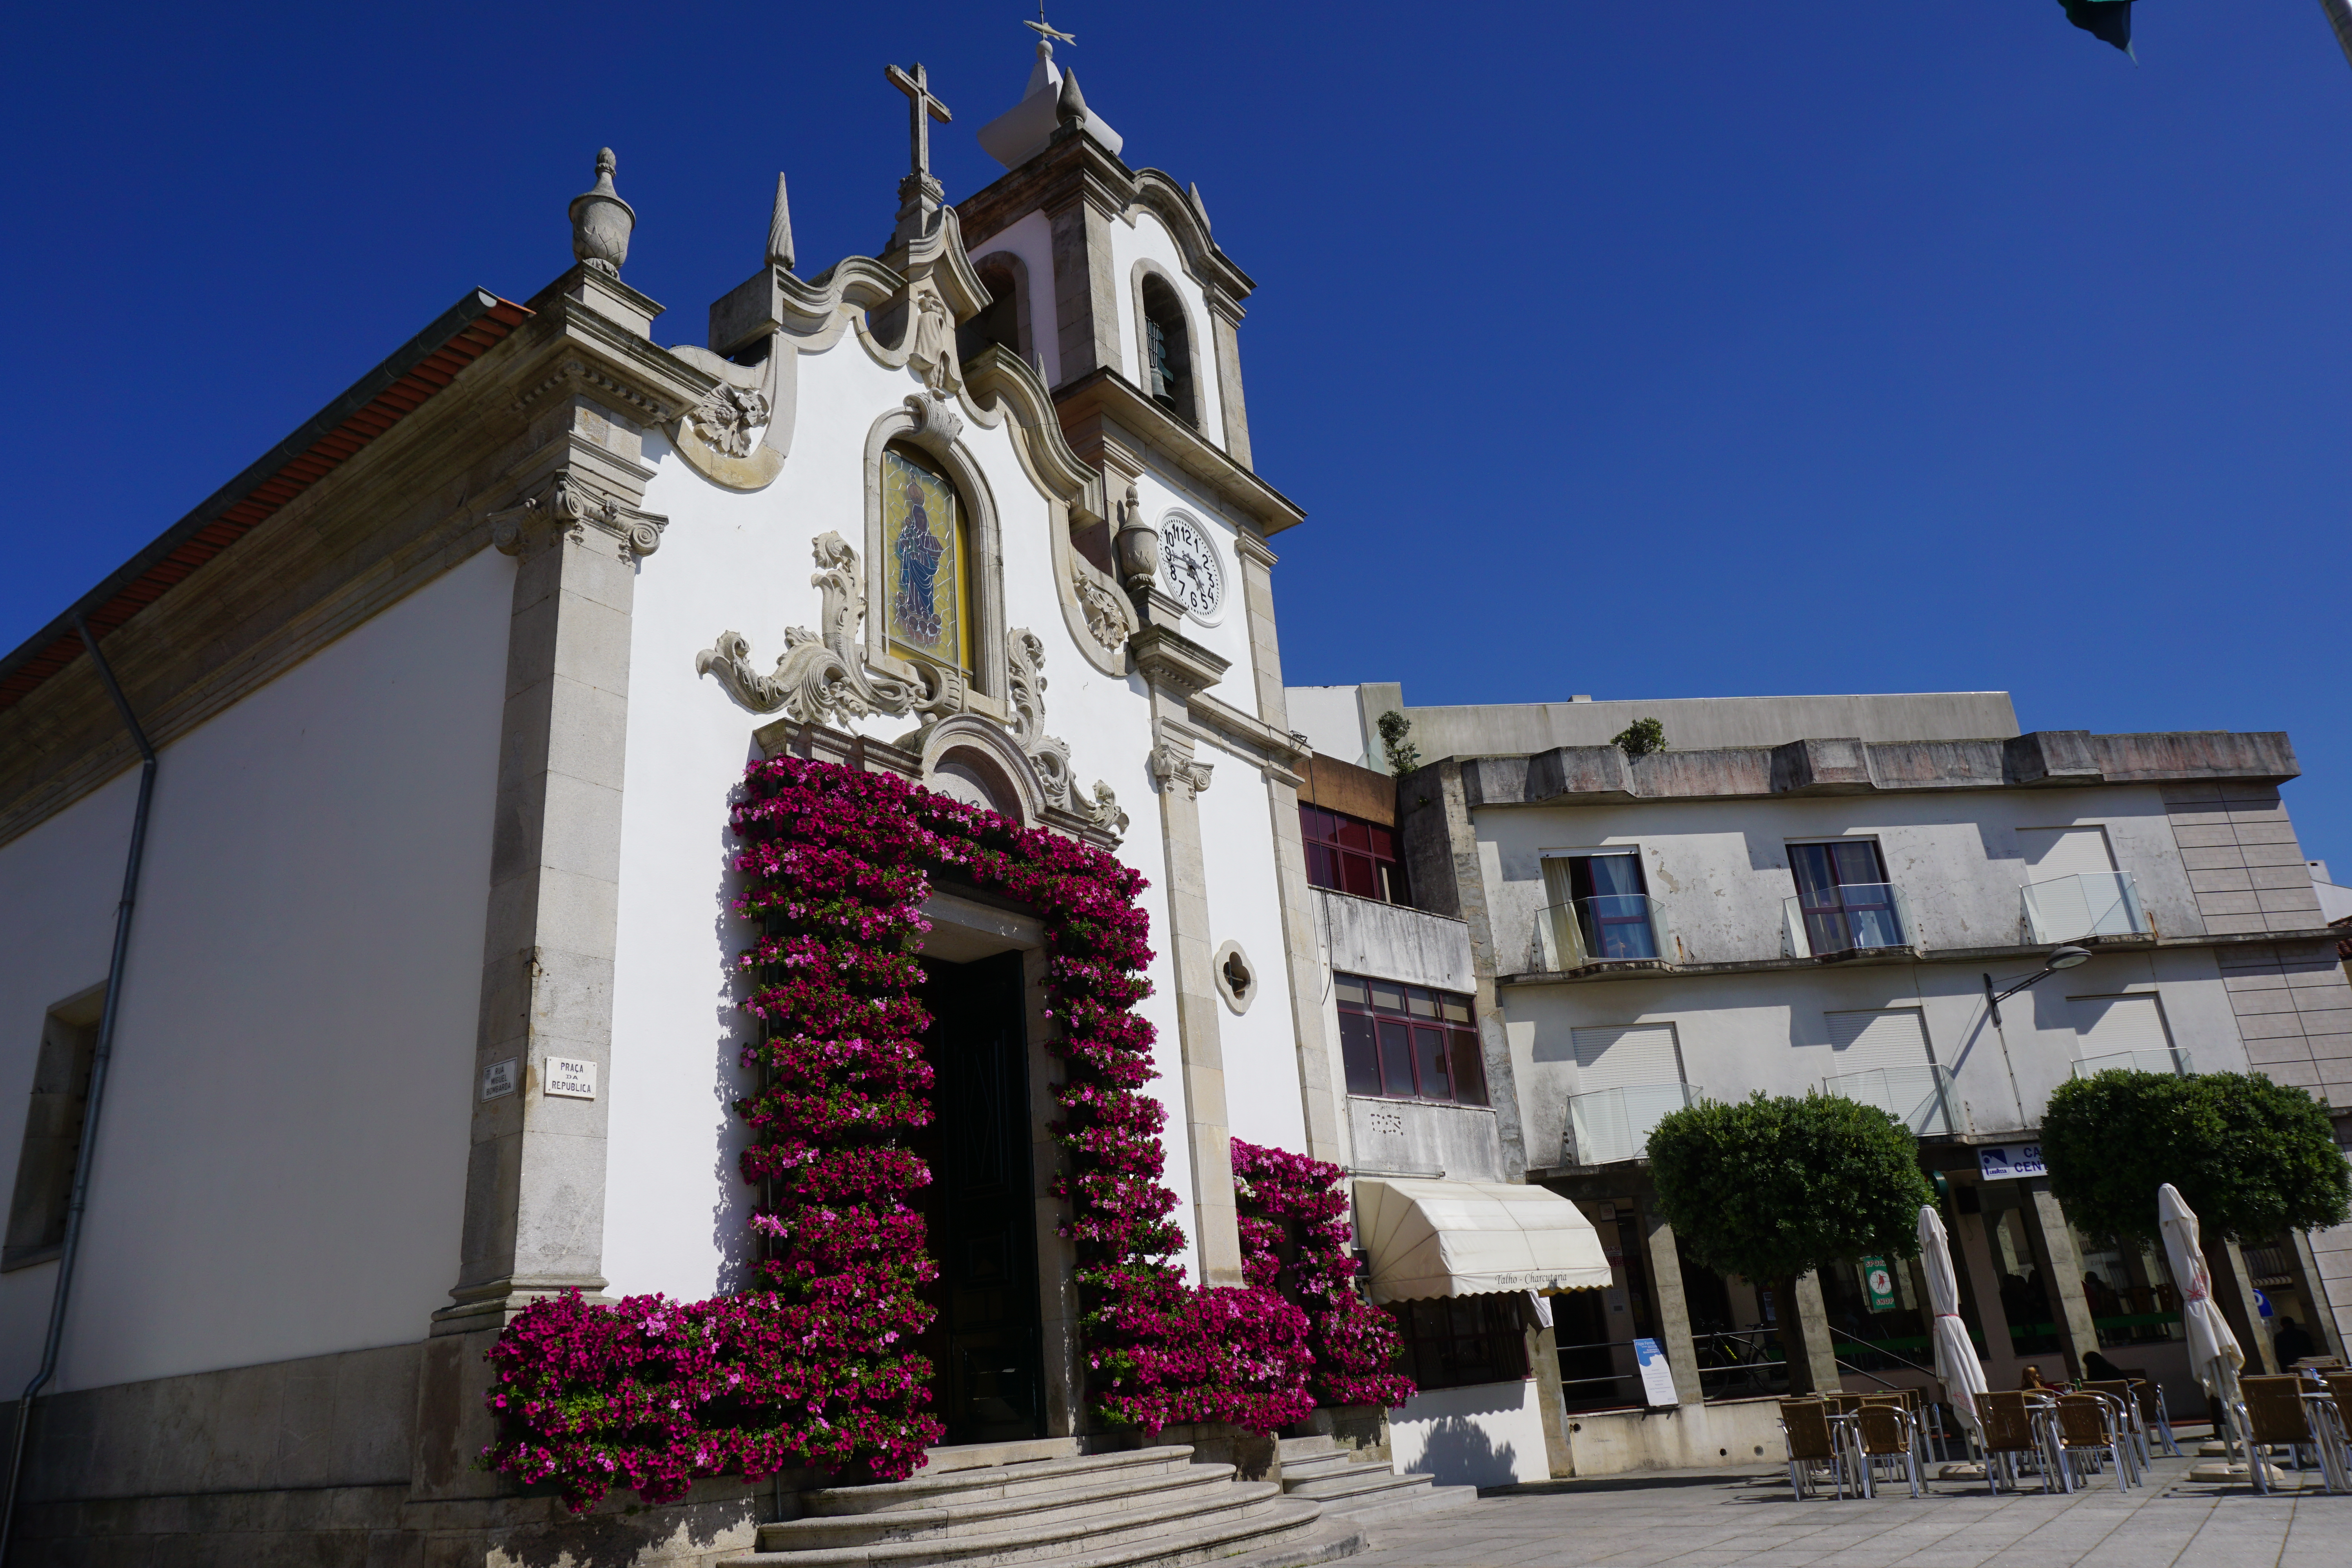
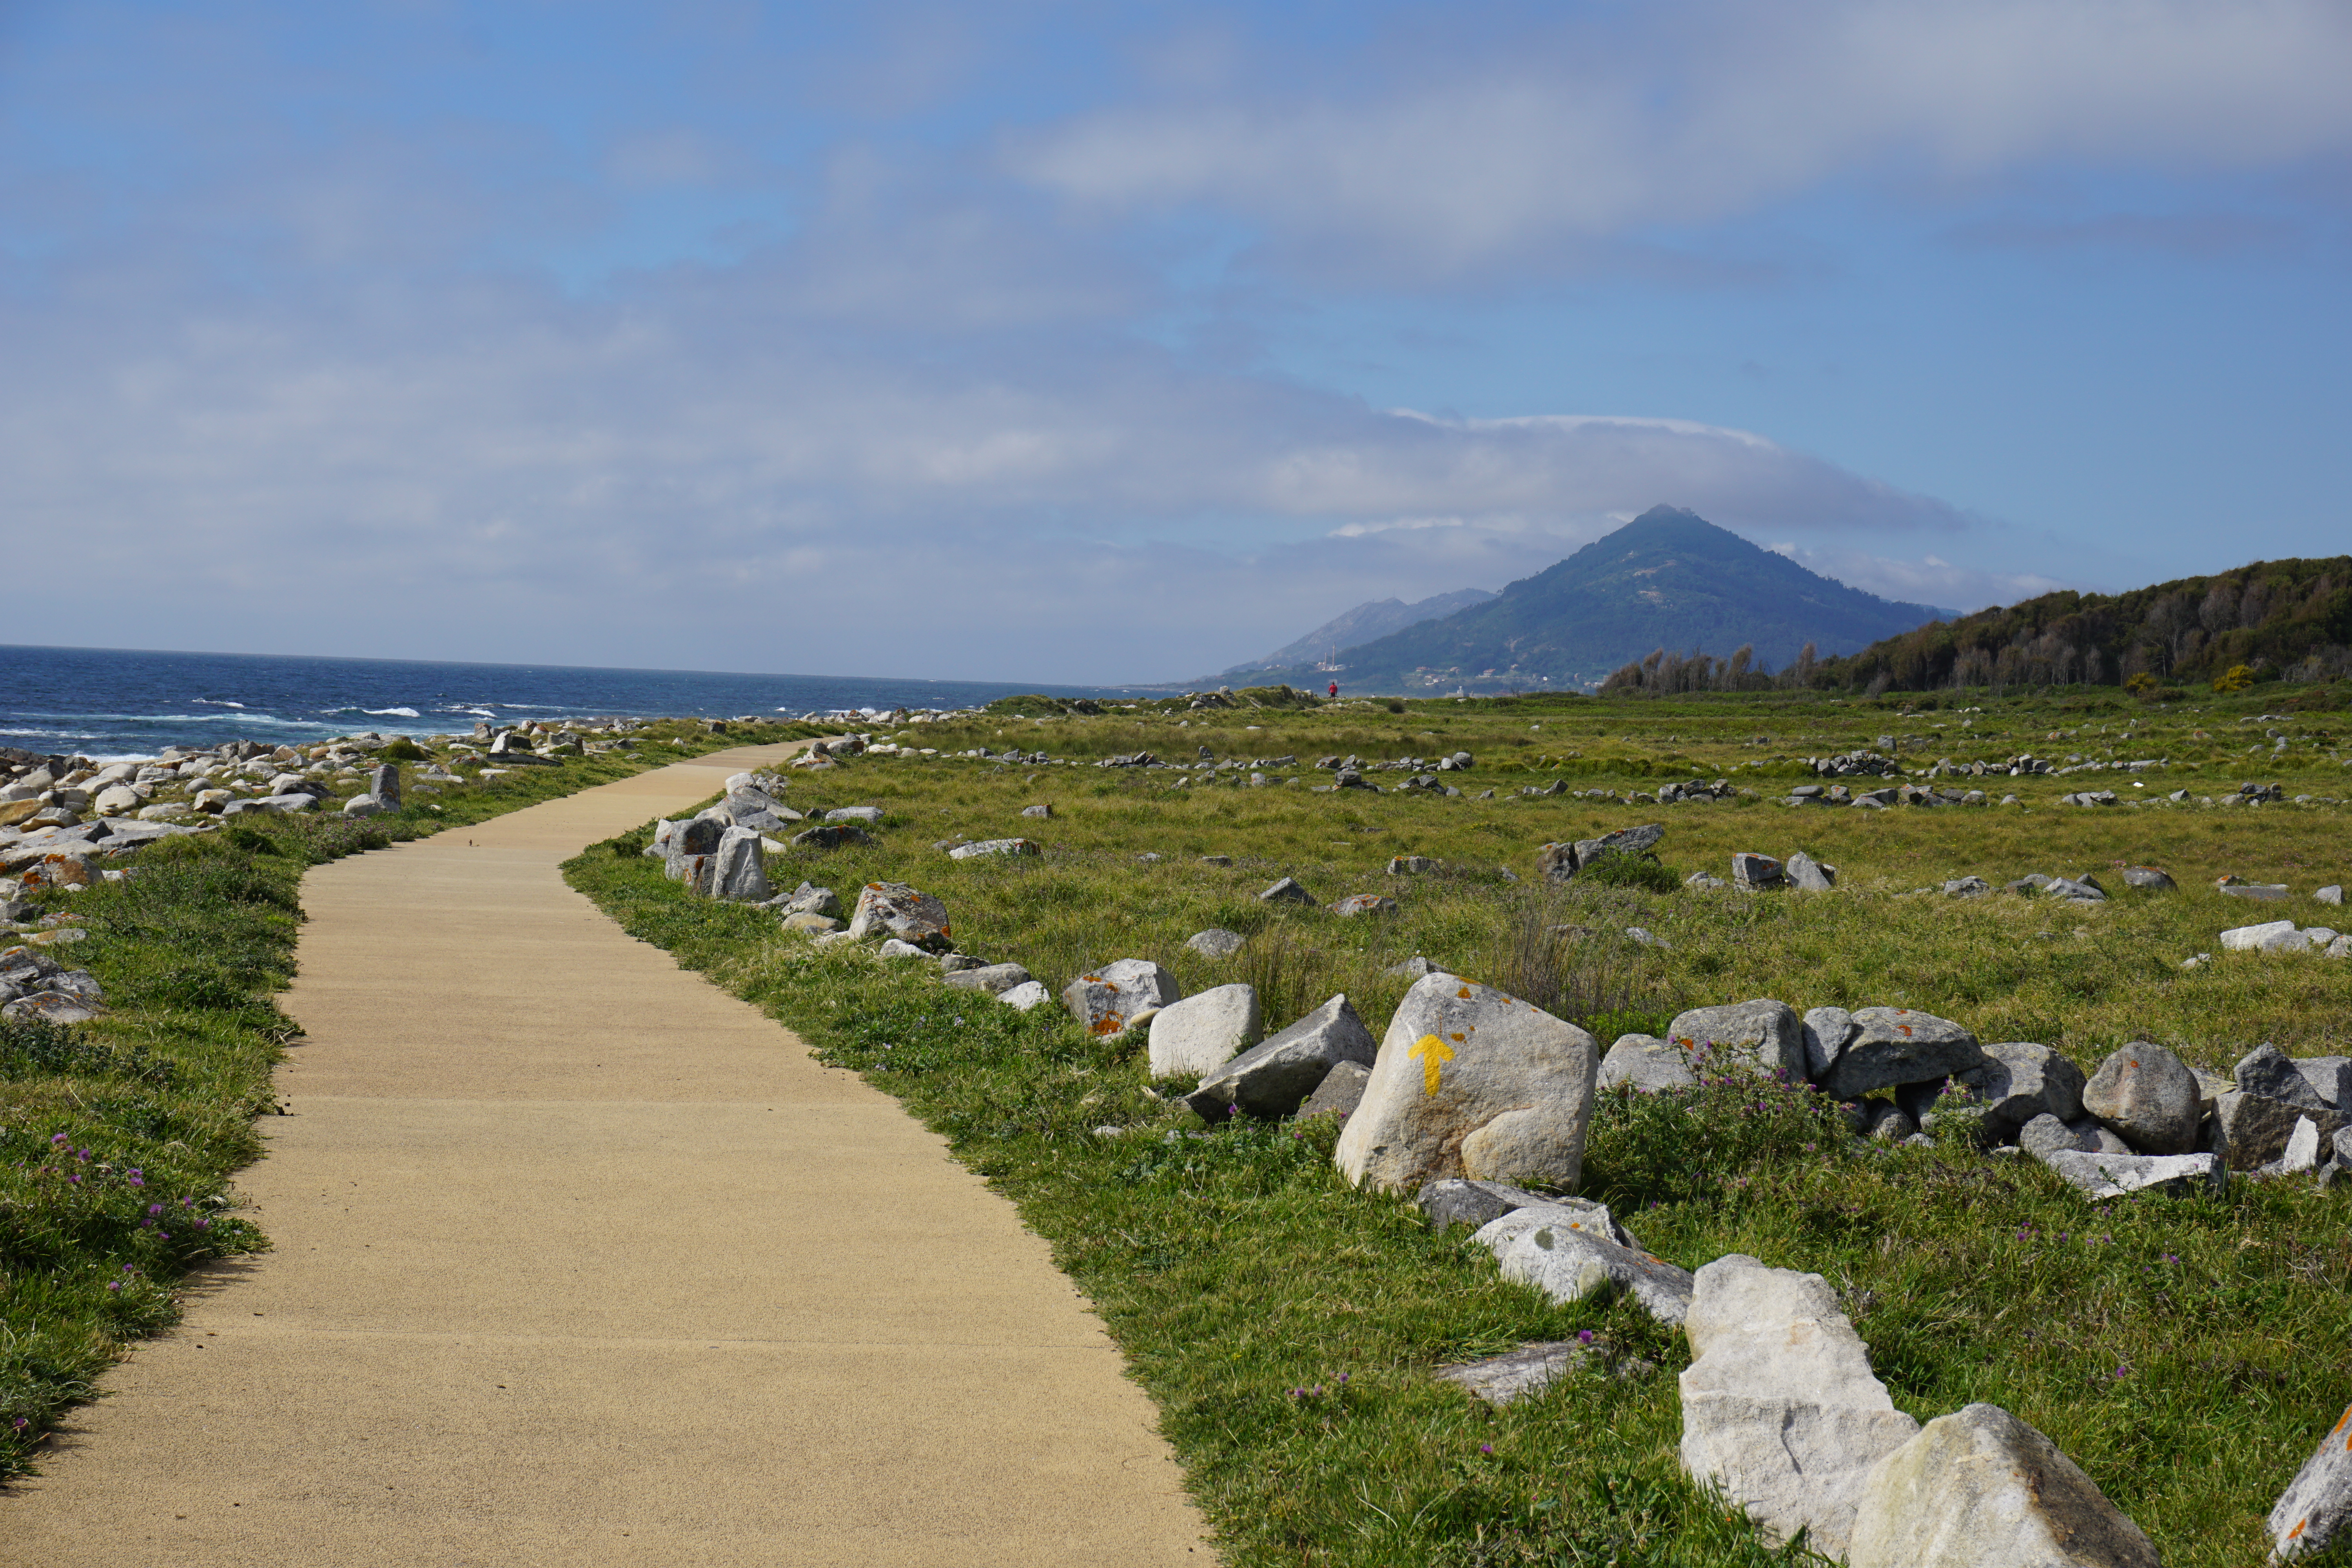
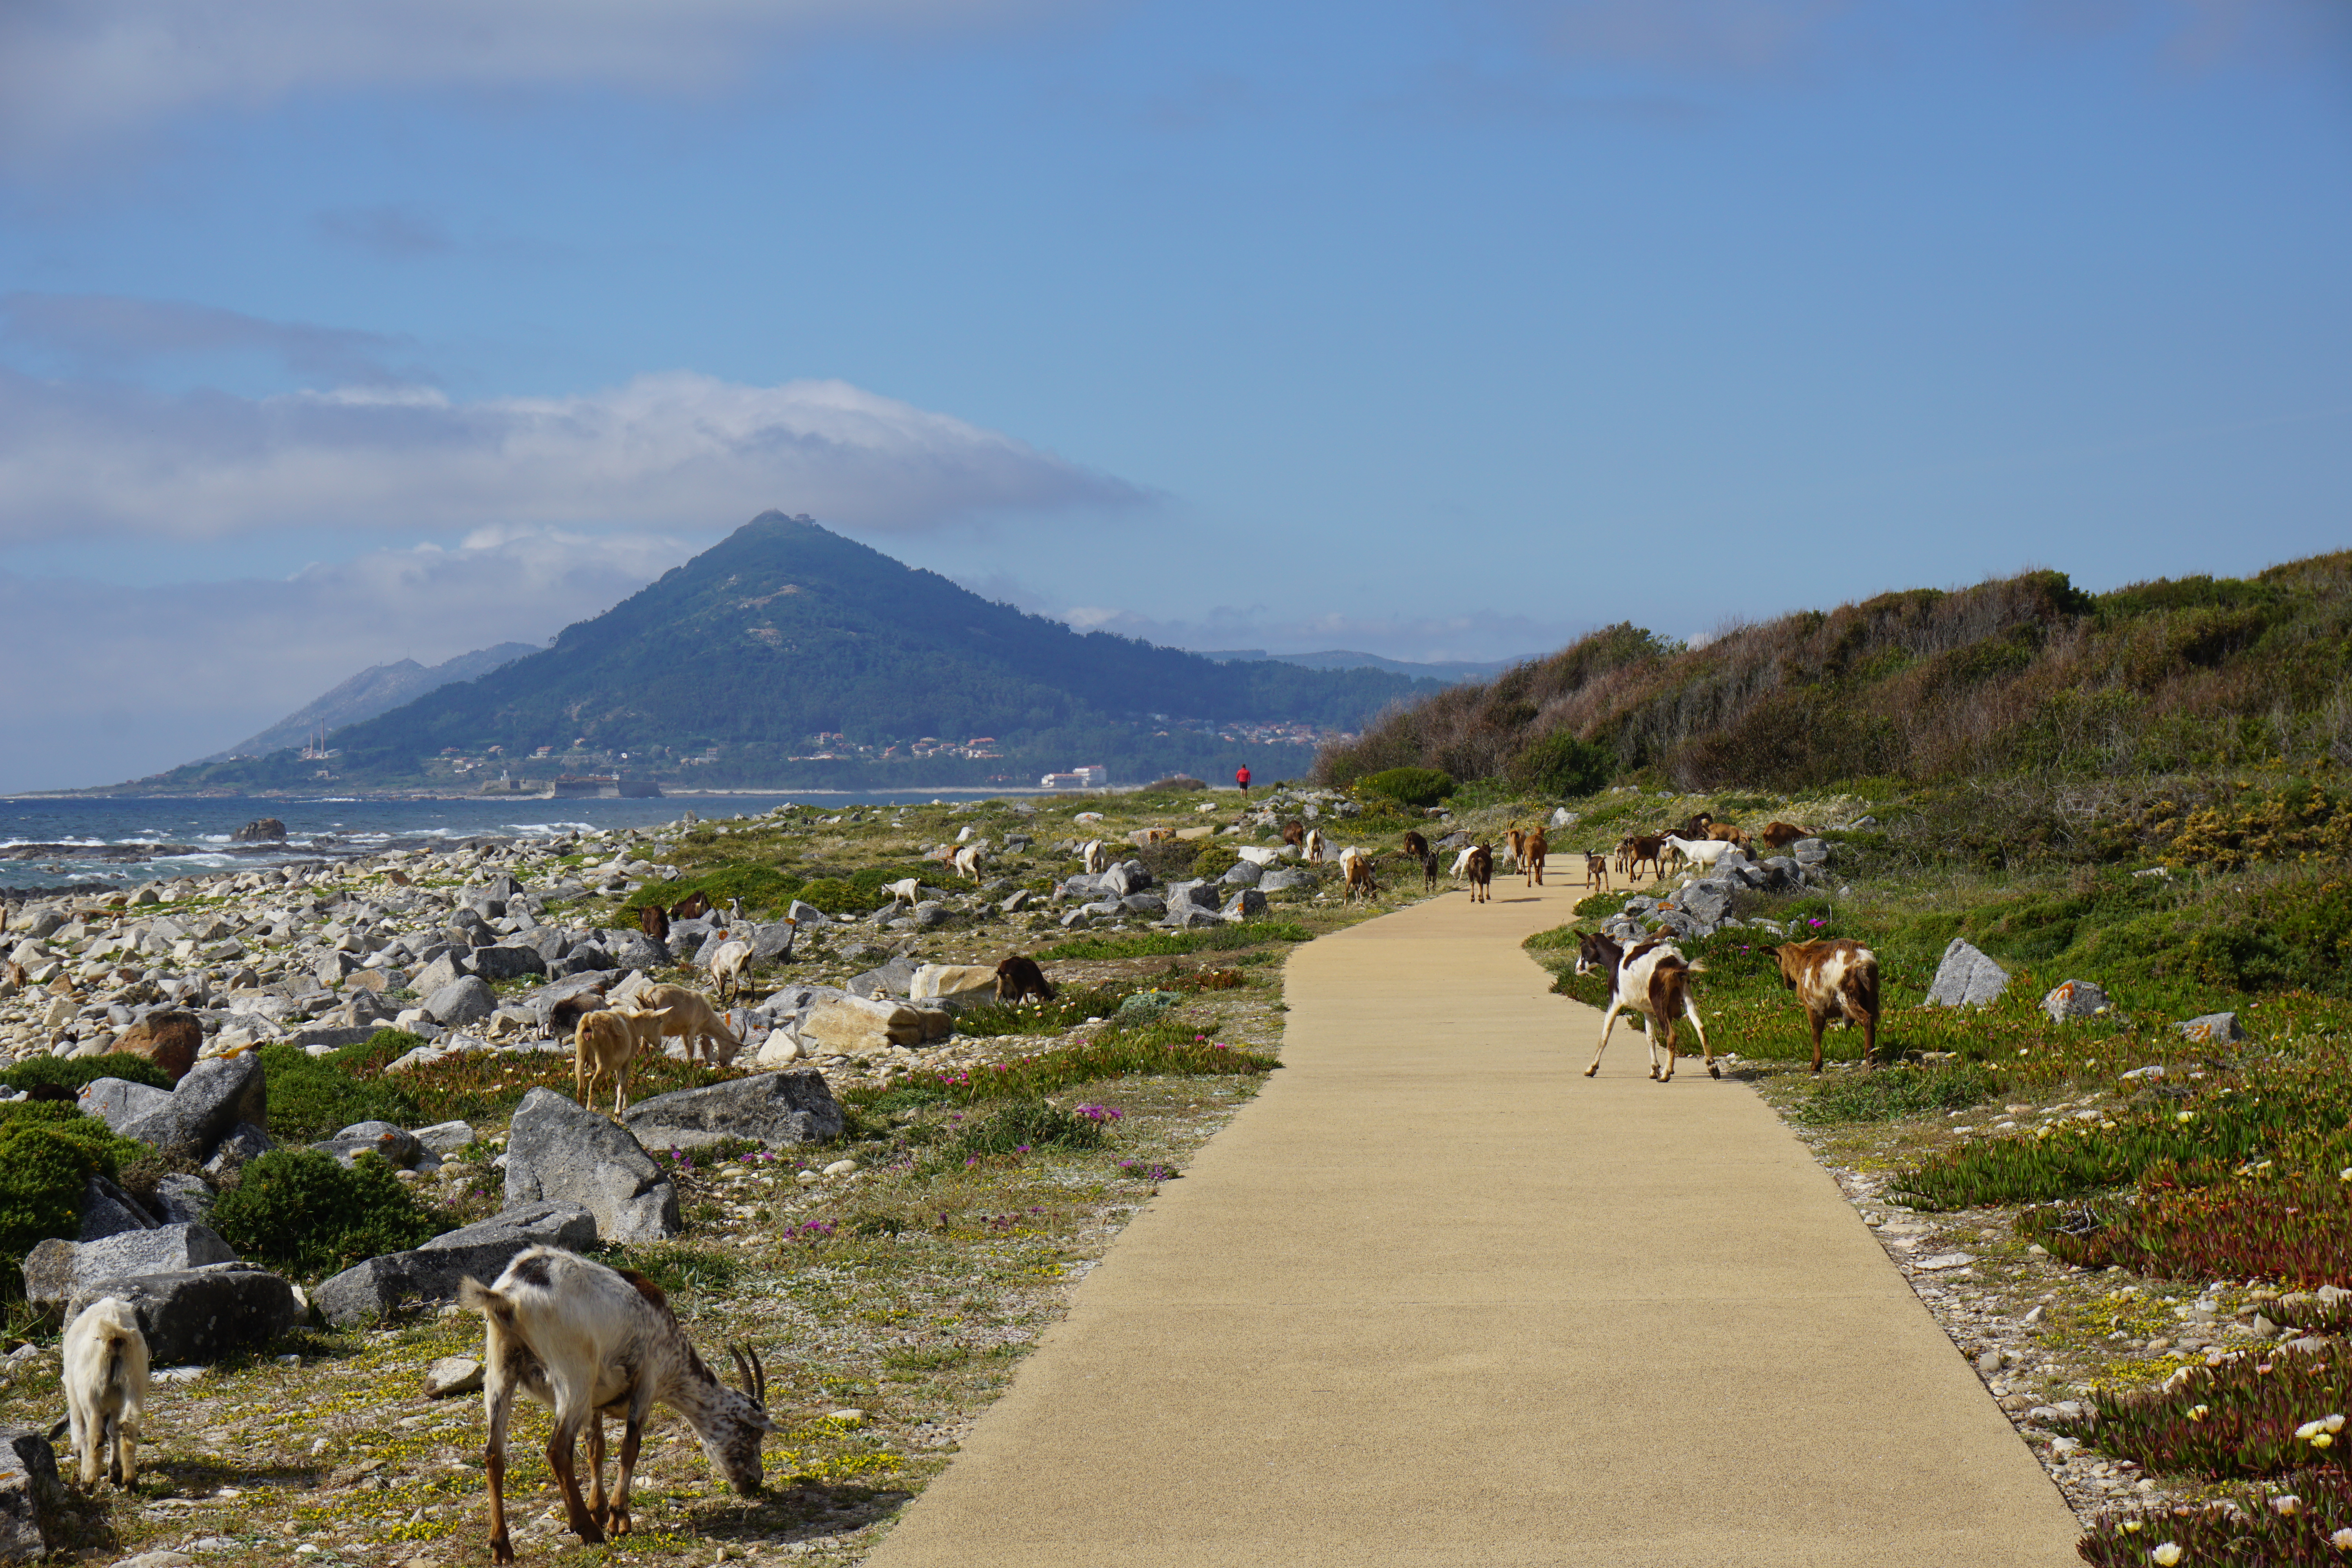
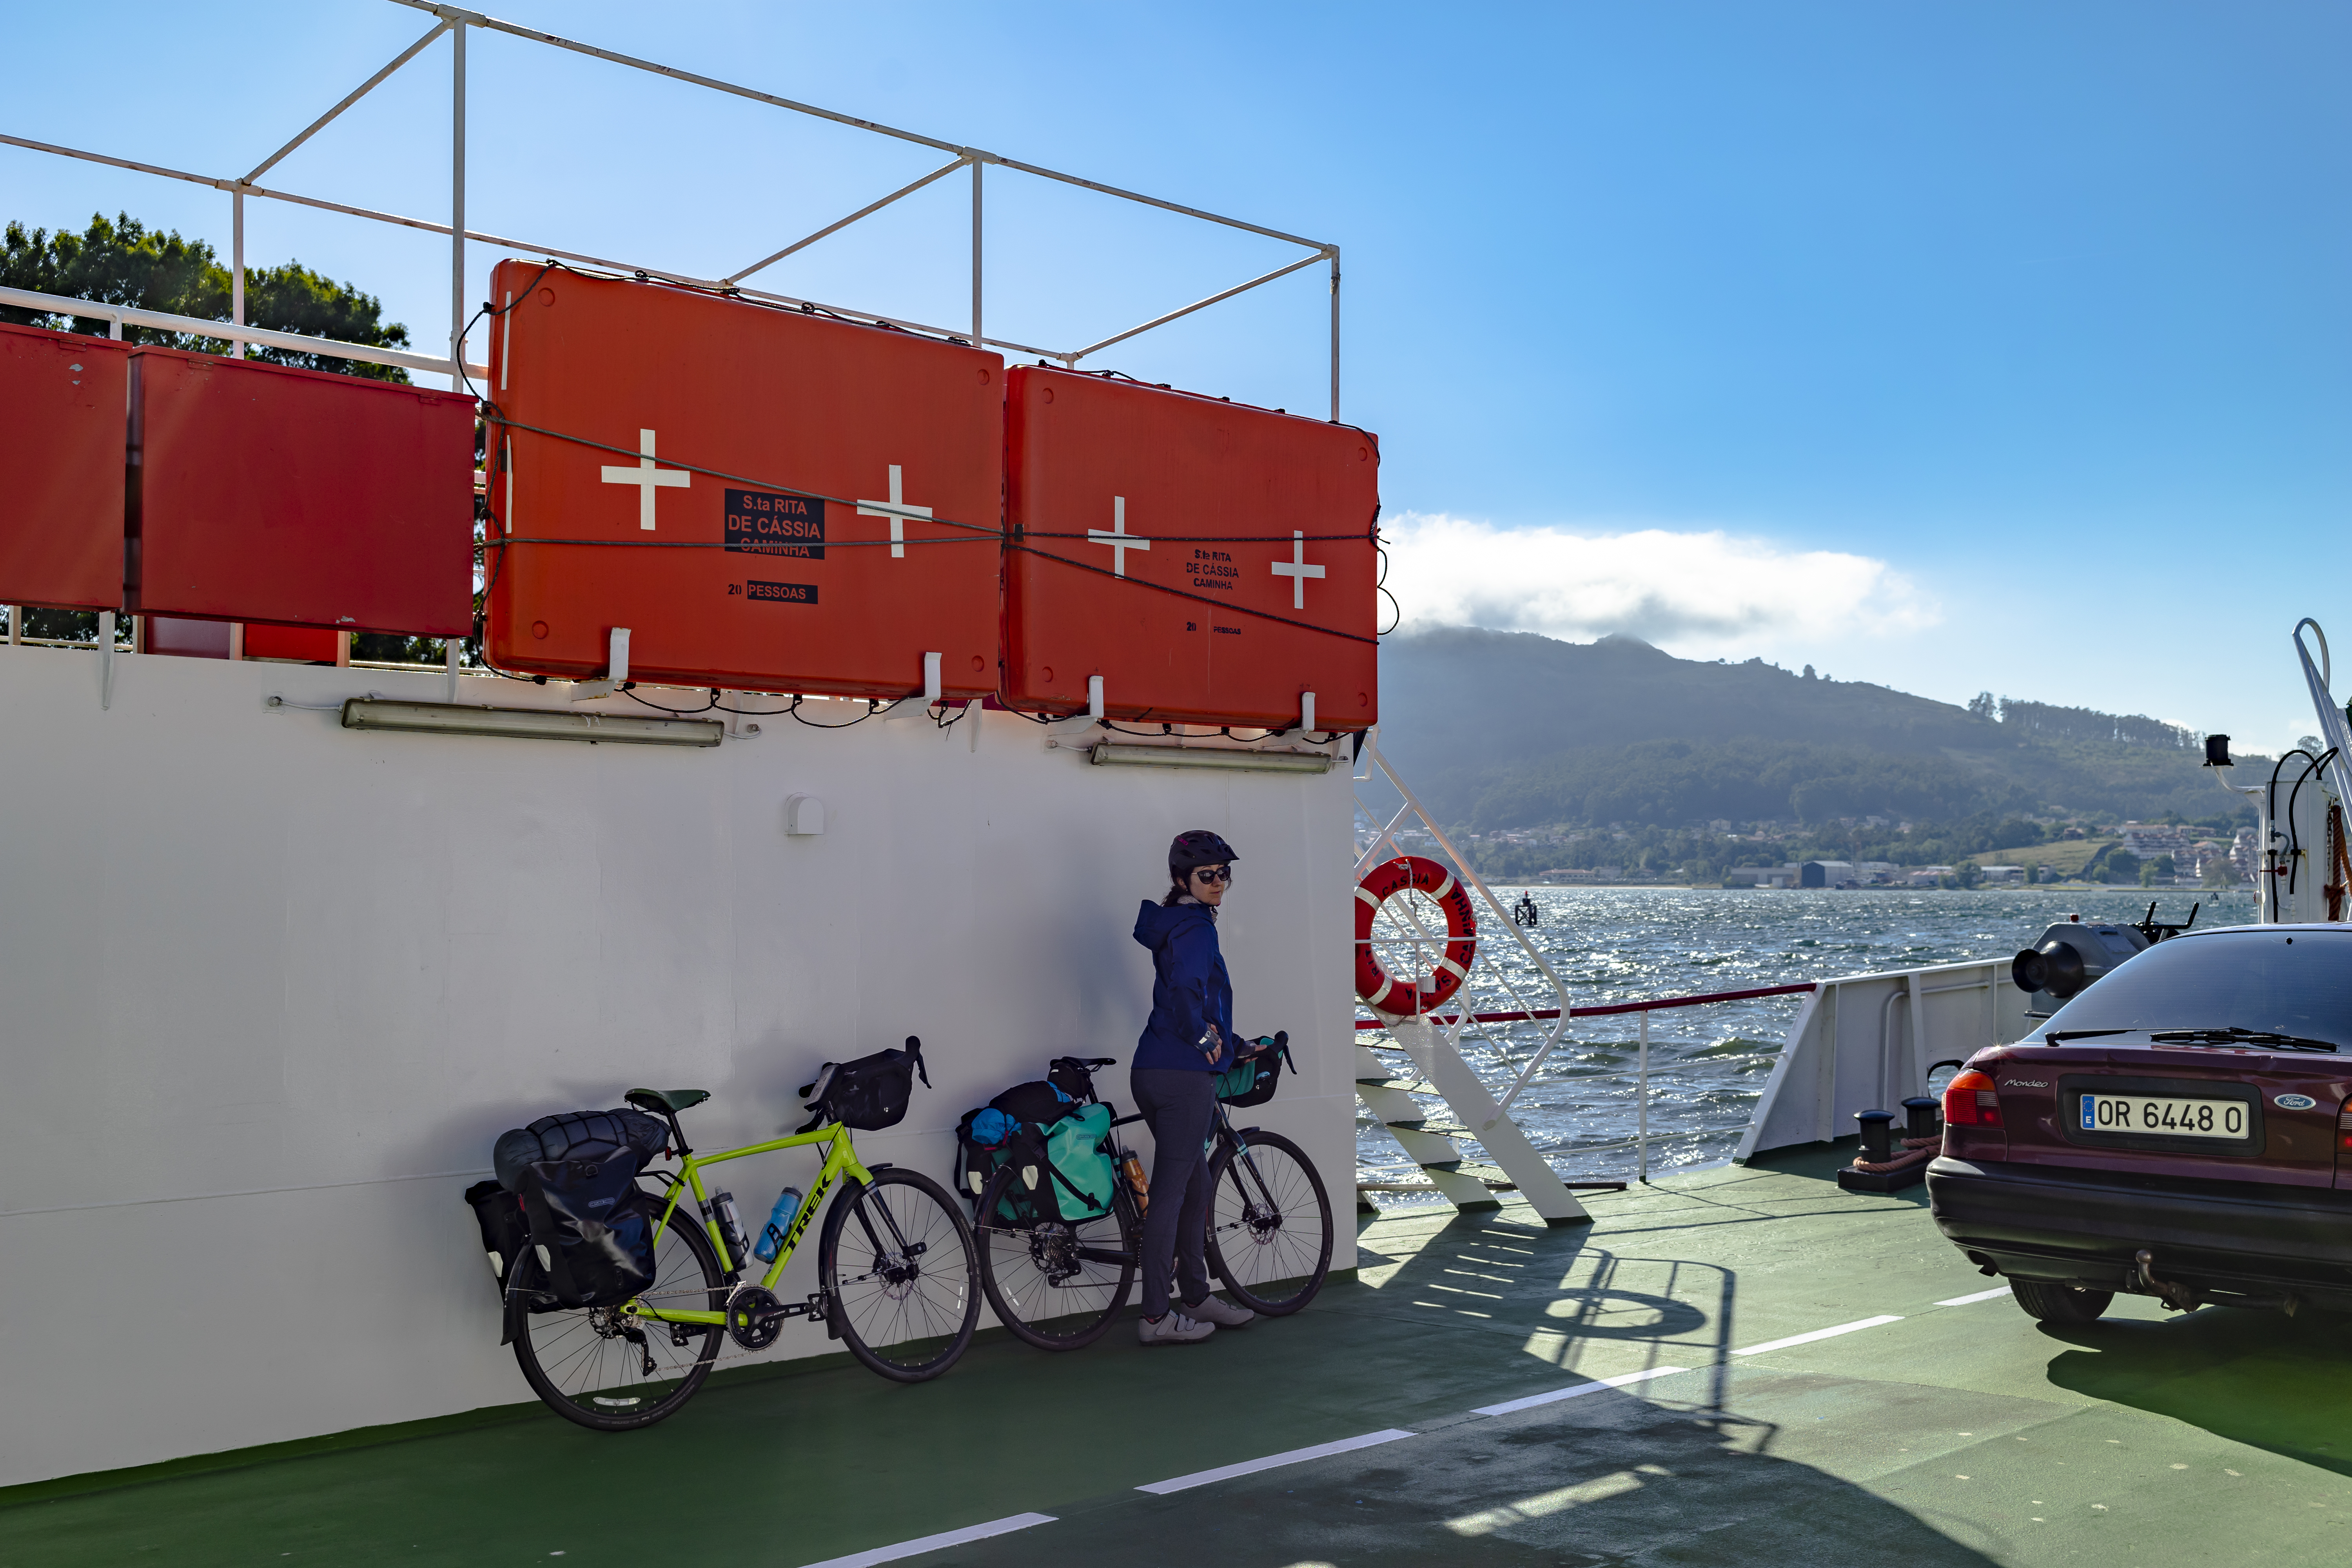

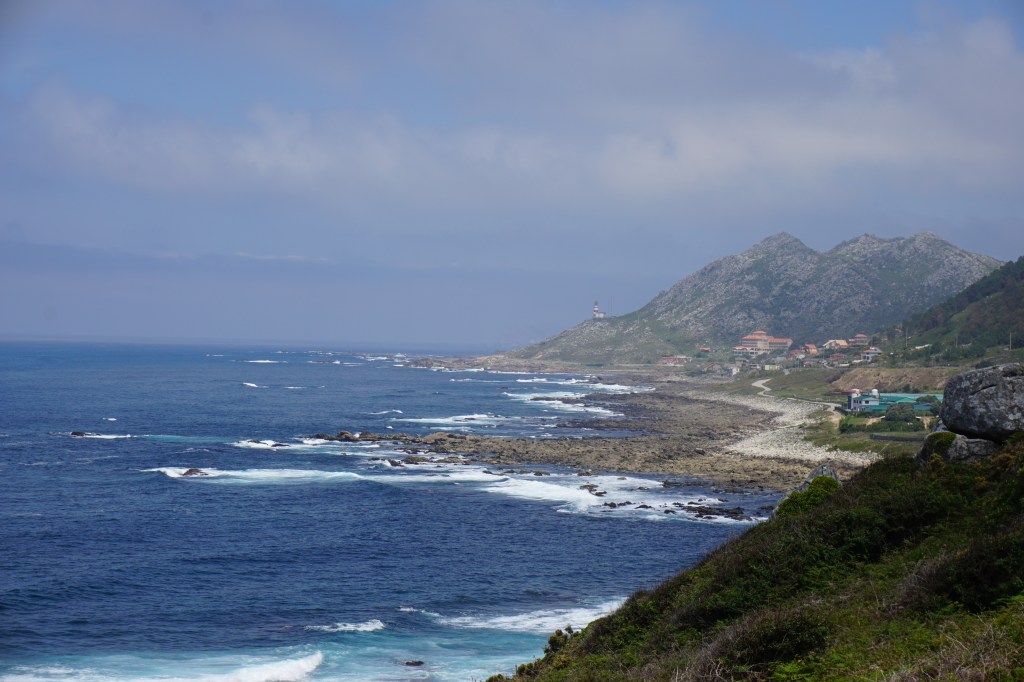
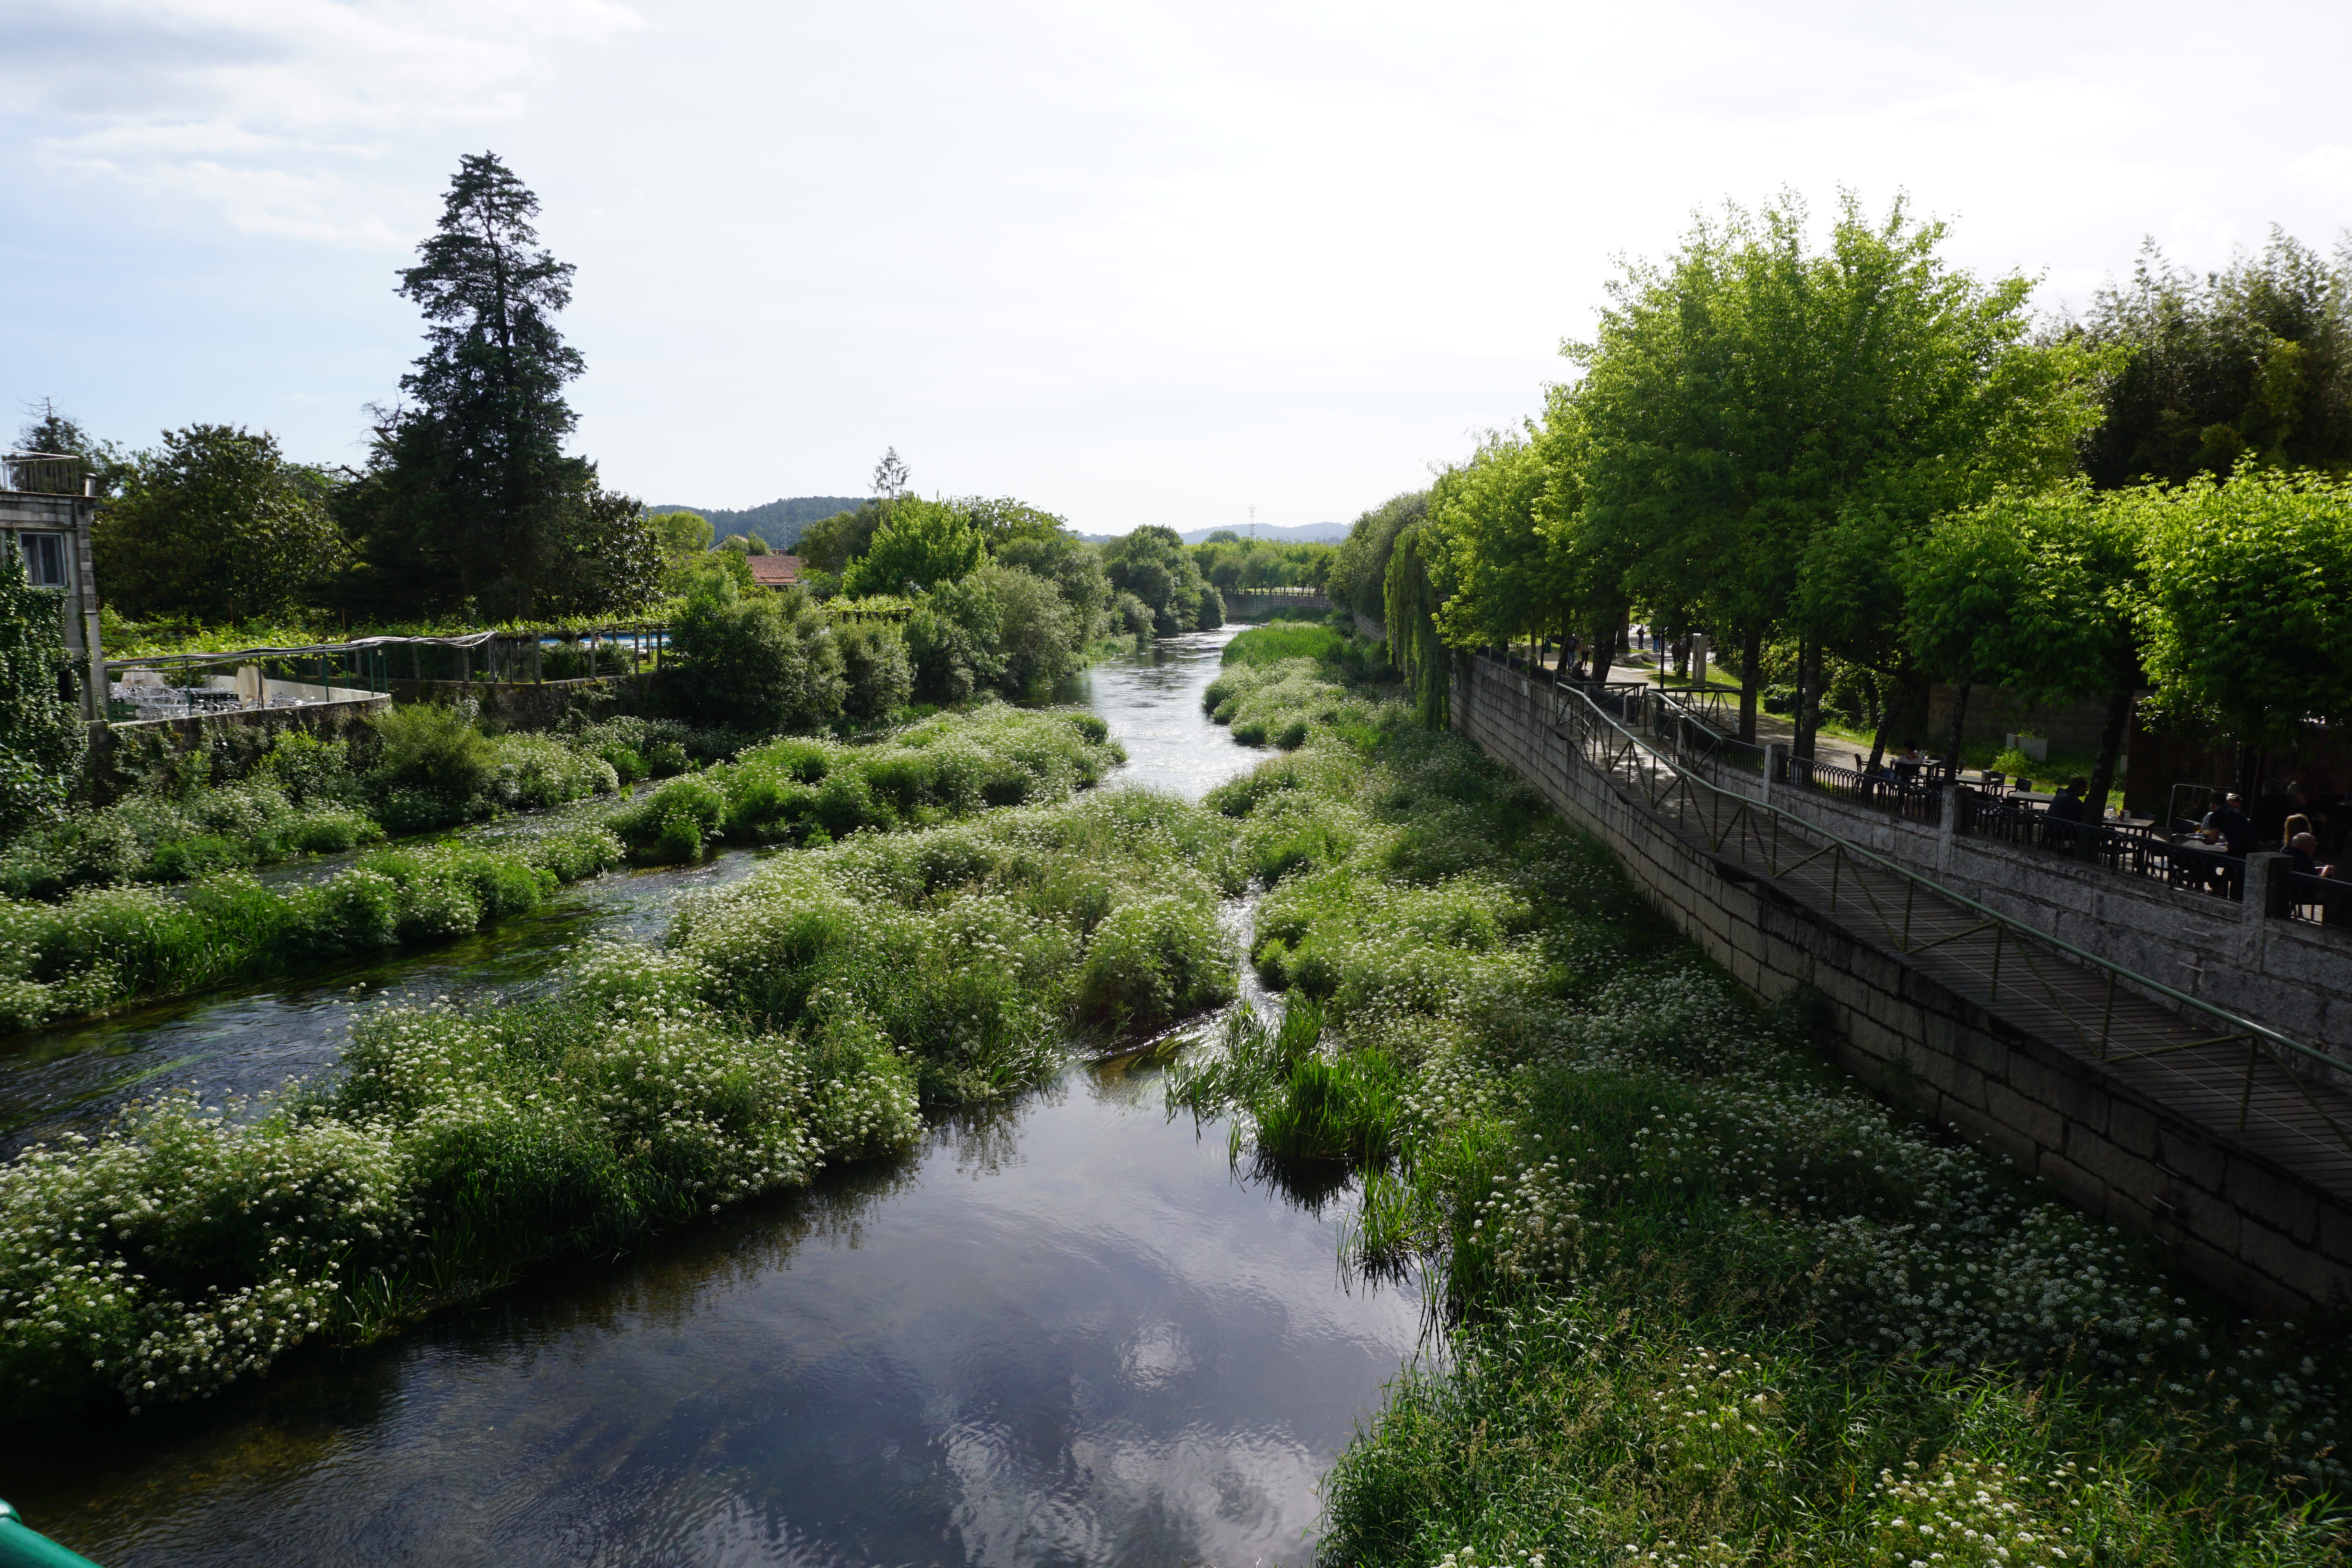
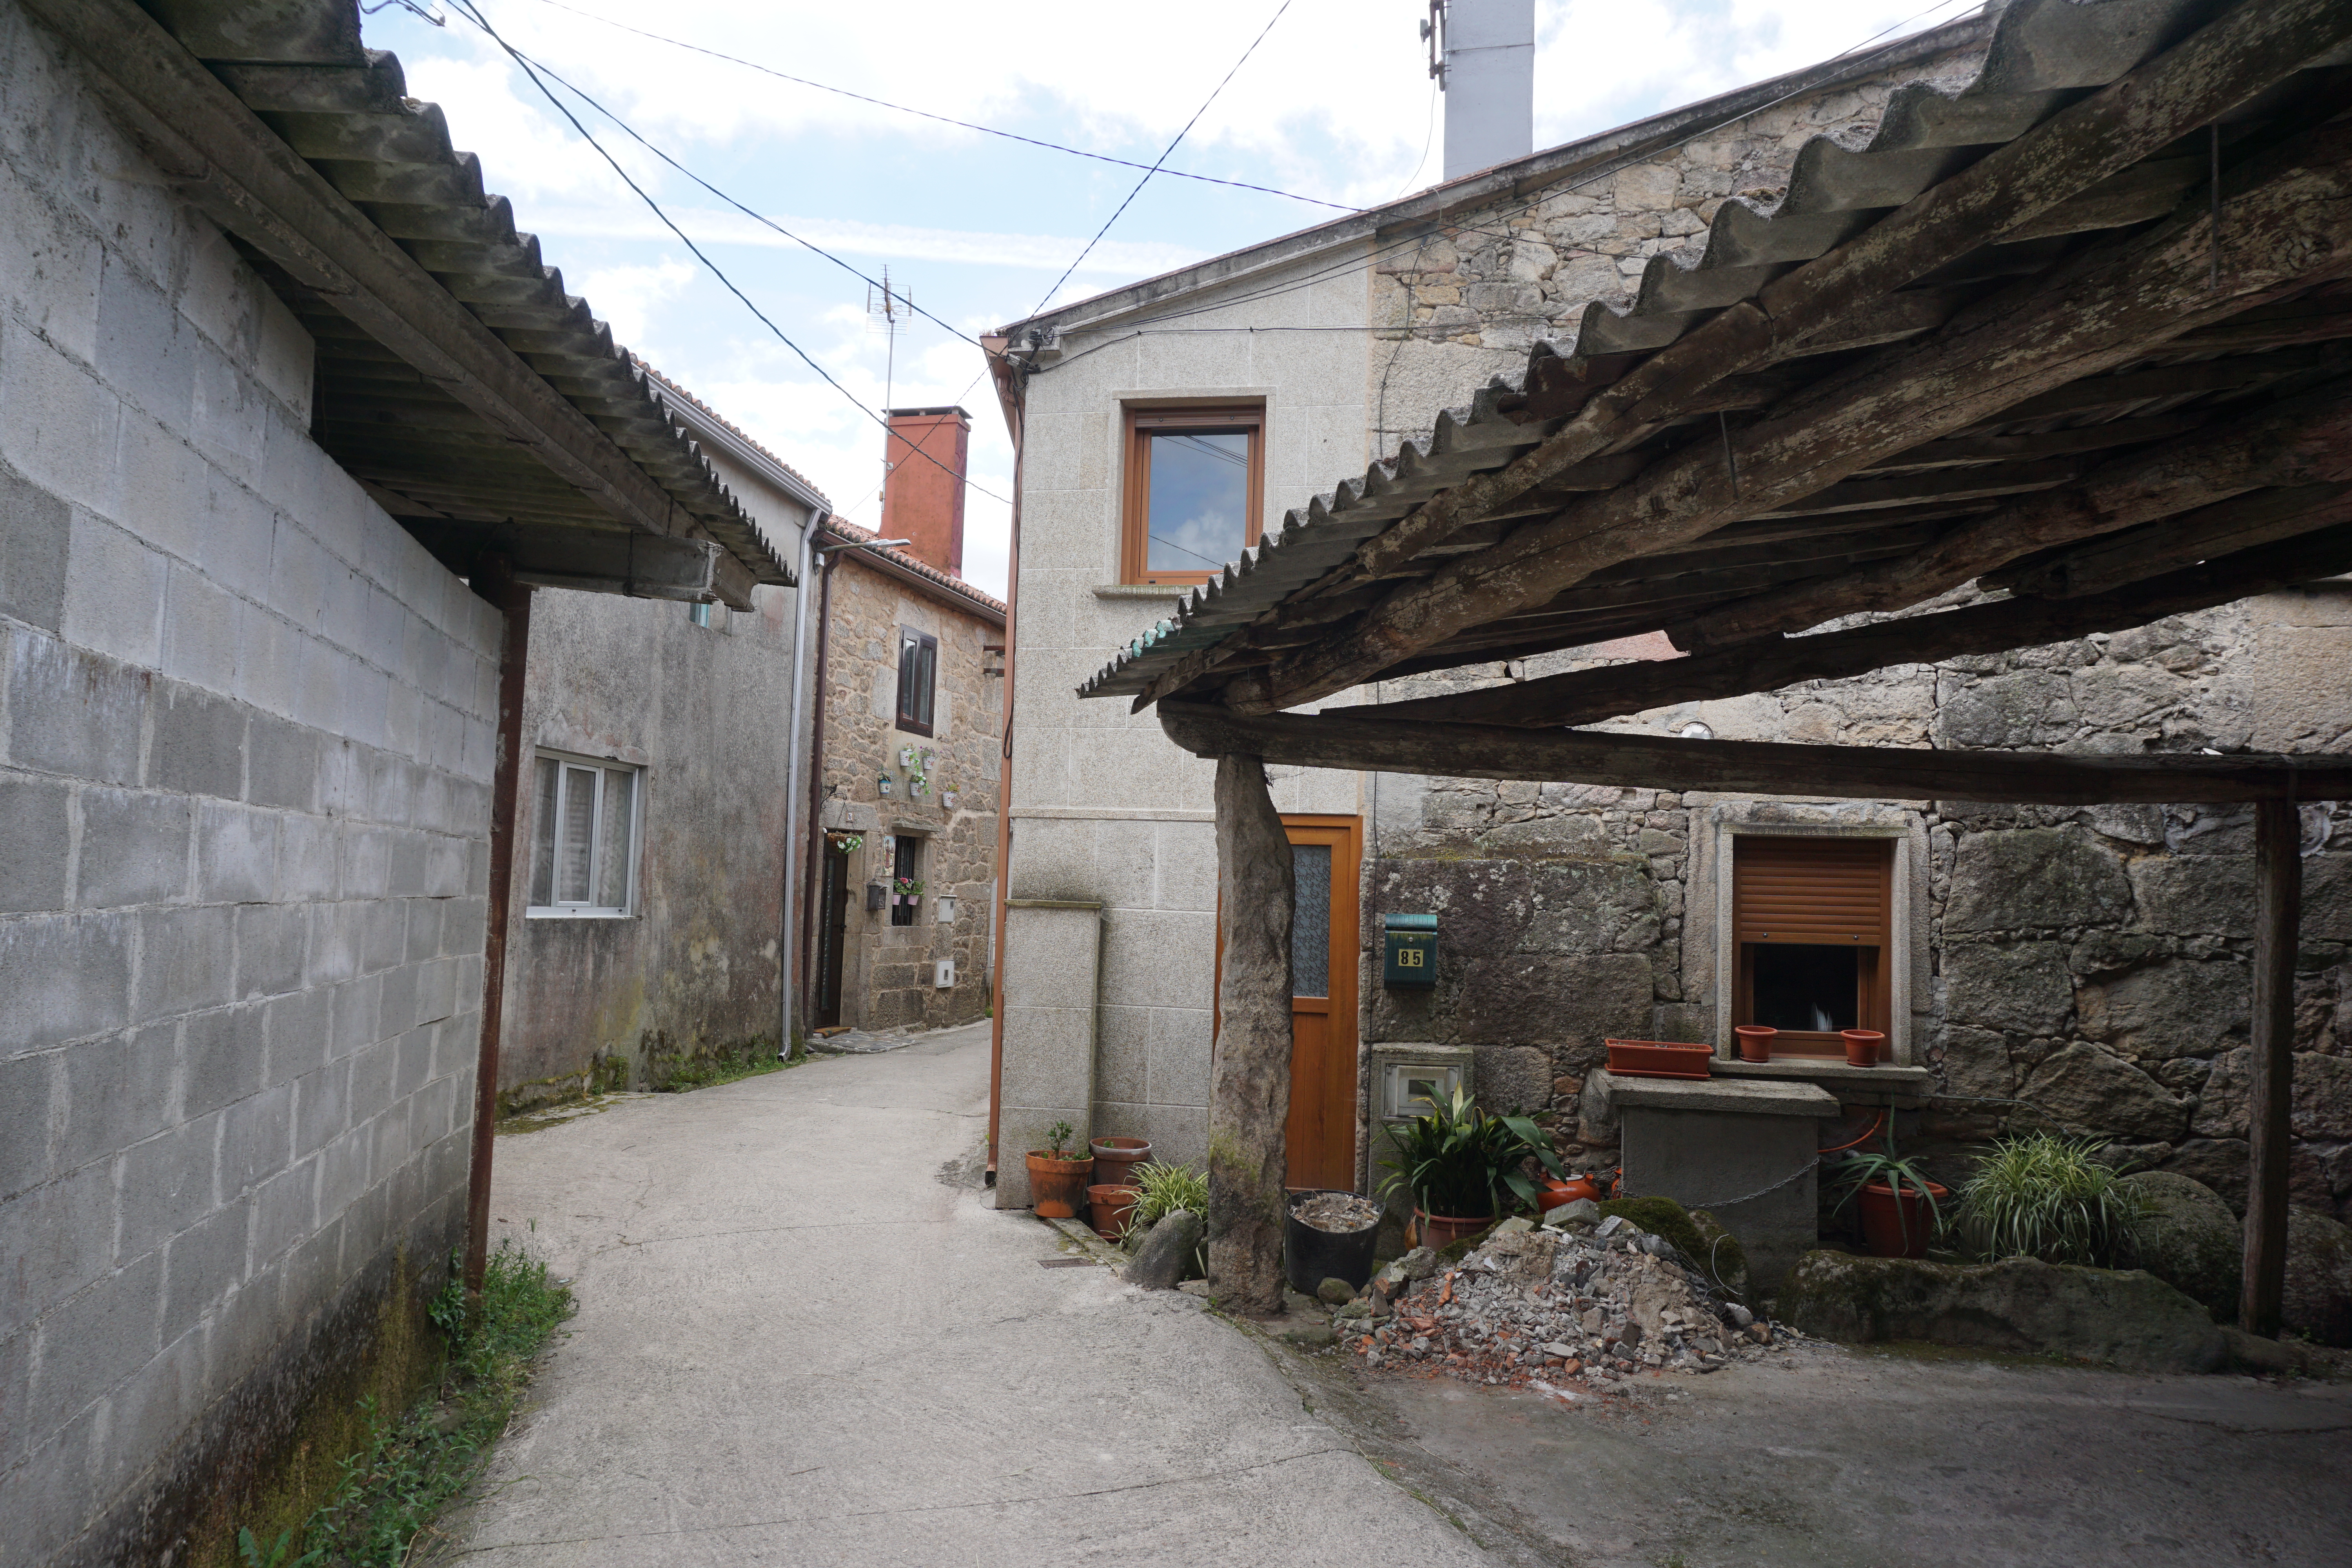
Day 2: Esposende to A Guarda Day 2 was a bit more challenging for us as it was our first day going on more rugged terrain, meaning dirt paths with rocks, tree roots and steep uphills. We had gravel bikes, not full suspension, which made some of this challenging. However, there were places that I would not have felt comfortable even if I had been on a full suspension mountain bike loaded down with panniers, primarily due to the number of large rocks scattered all over the trail. We walked our bikes for portions of this day, approximately 5-10% of the distance (we learned from this experience to avoid futures sections of the trail marked on the map as being very steep and unpaved, taking short side roads about a mile or two long in order to spare our bikes.) More of the route along this stretch was spent winding through narrow roads in picturesque small towns a little further from the shoreline. It was important to really keep an eye out for the yellow arrows which mark the route along the way, especially when traveling at a quicker pace by bike! Probably one of my favorite experiences for me along the Portuguese Coast was toward the end of the day, when we rejoined the ocean and came across many goats along the path! So many goats! This was such a beautiful location as it was but the goats really took it up a notch for me. We ended the day with a ferry ride across the Miño (Minho in Portugal) river that defines the border between Portugal and Spain, and then had a feast of a dinner while watching the sun set over the ocean.
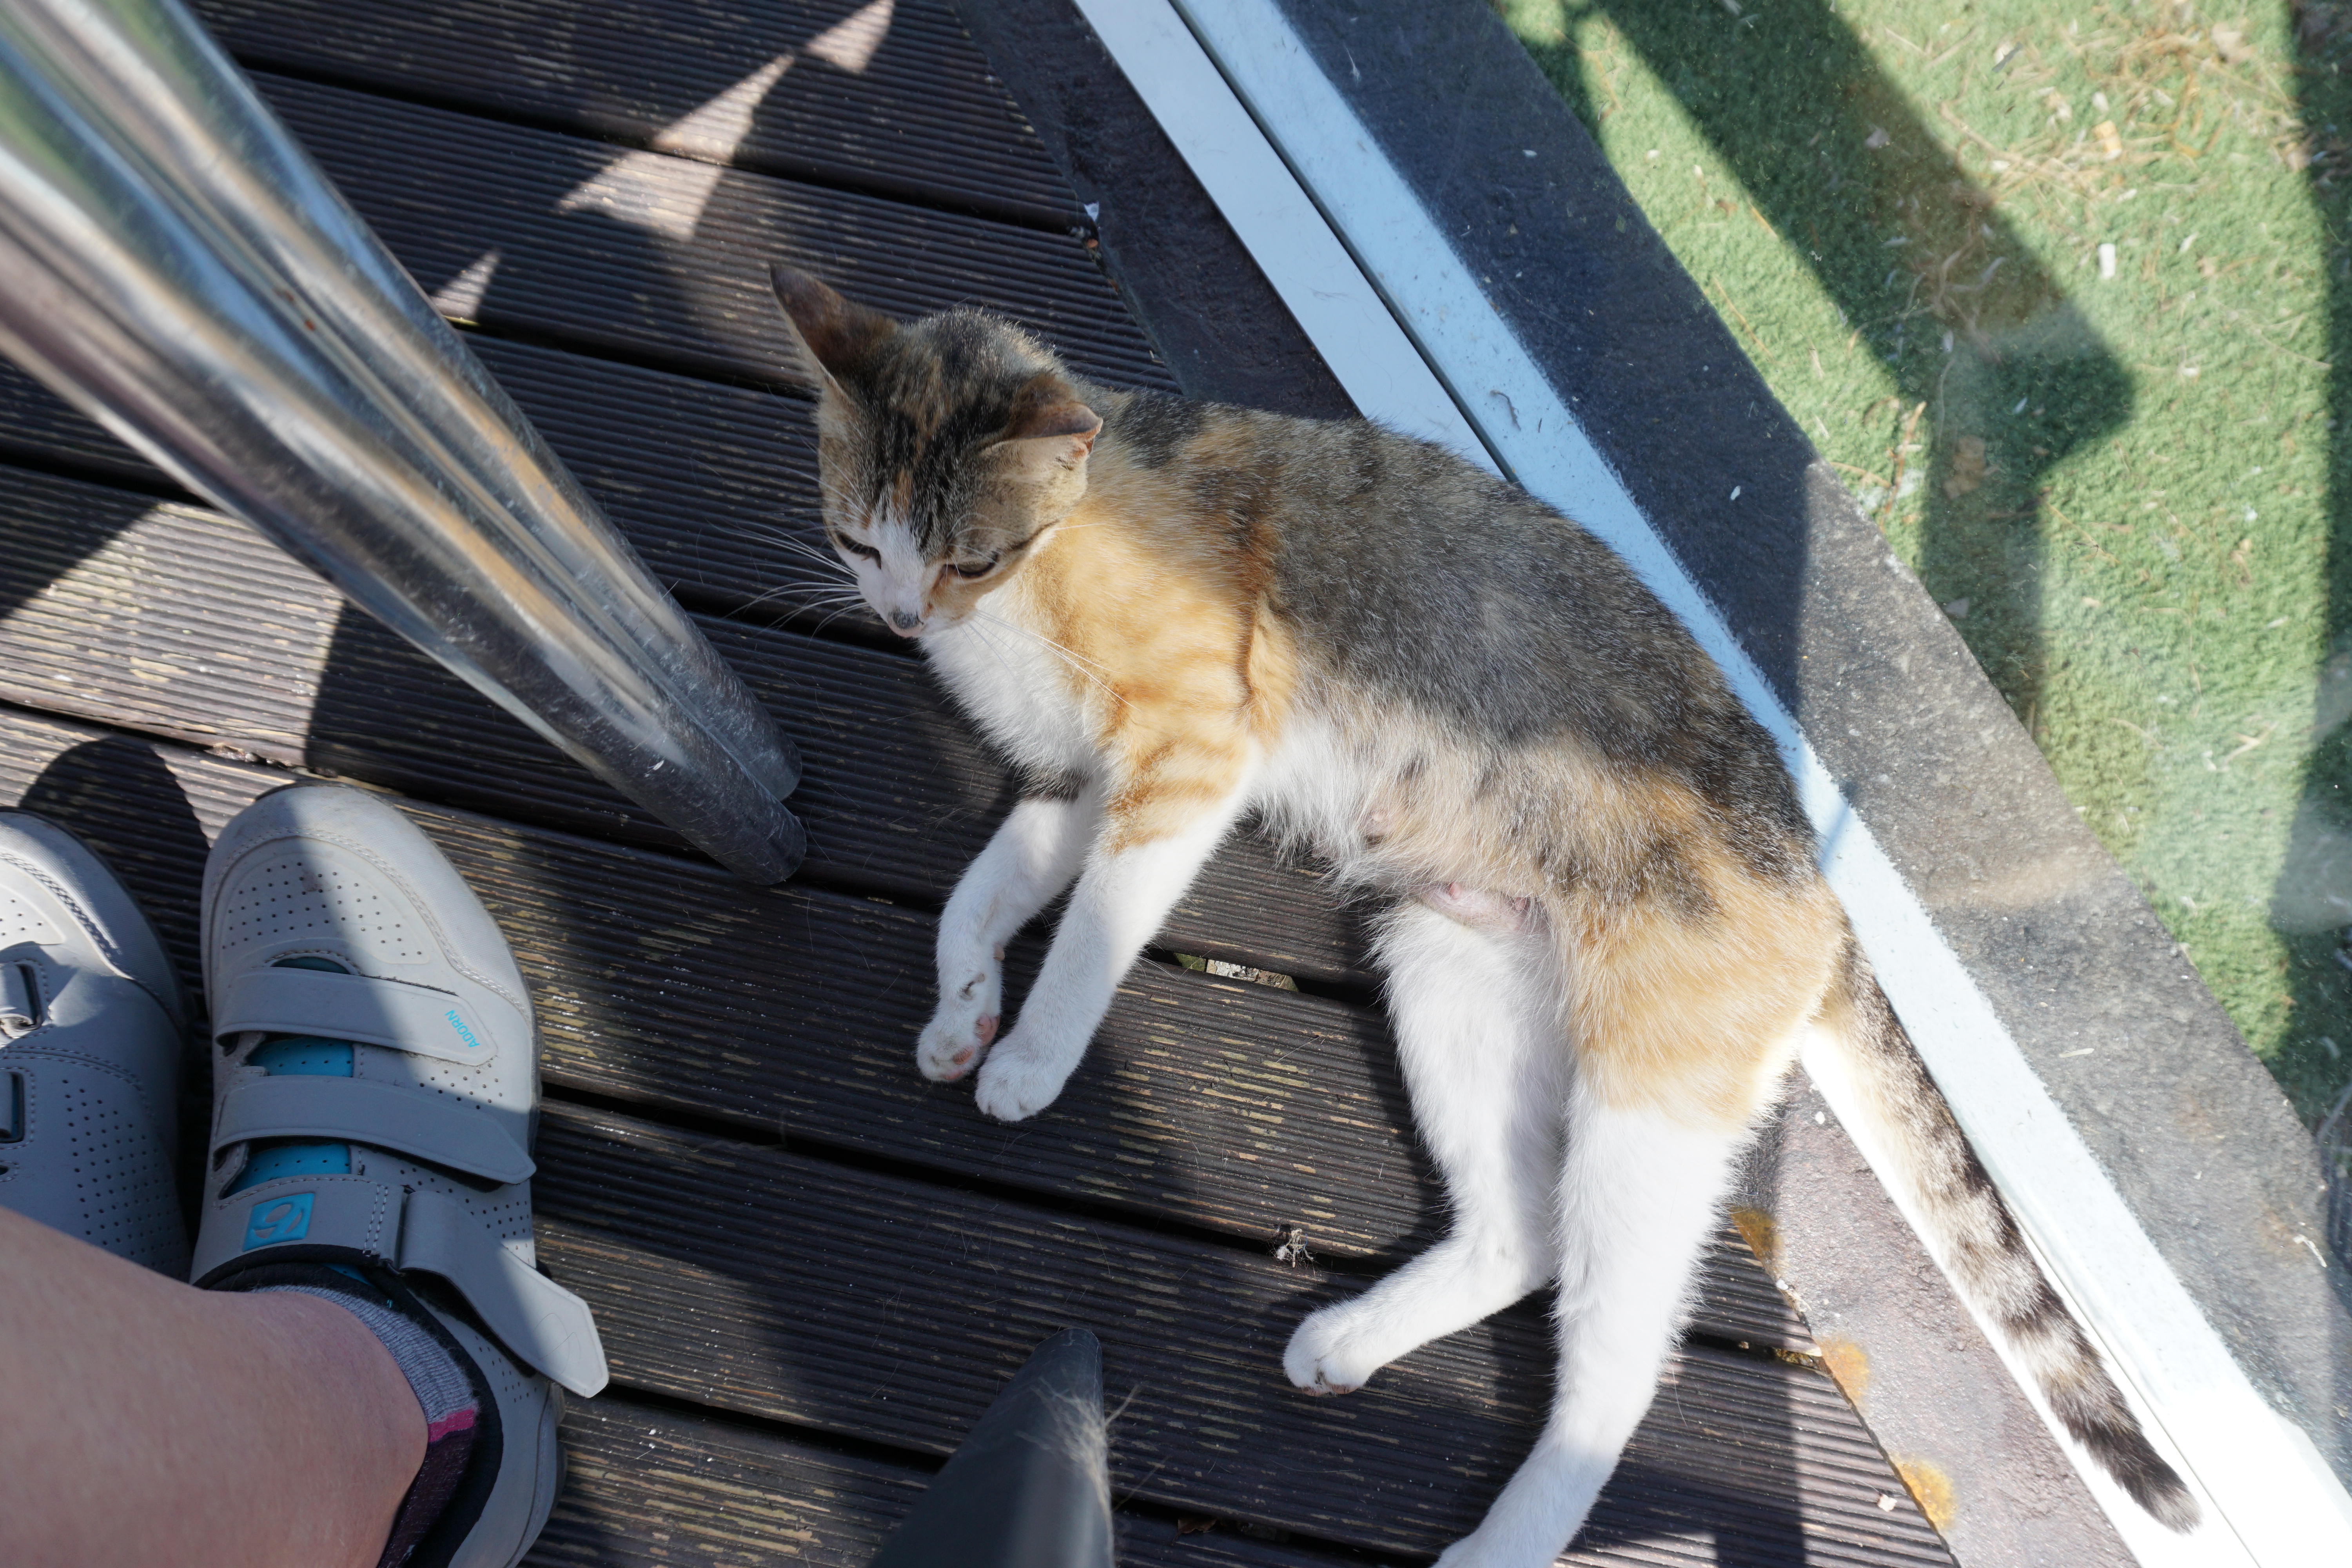
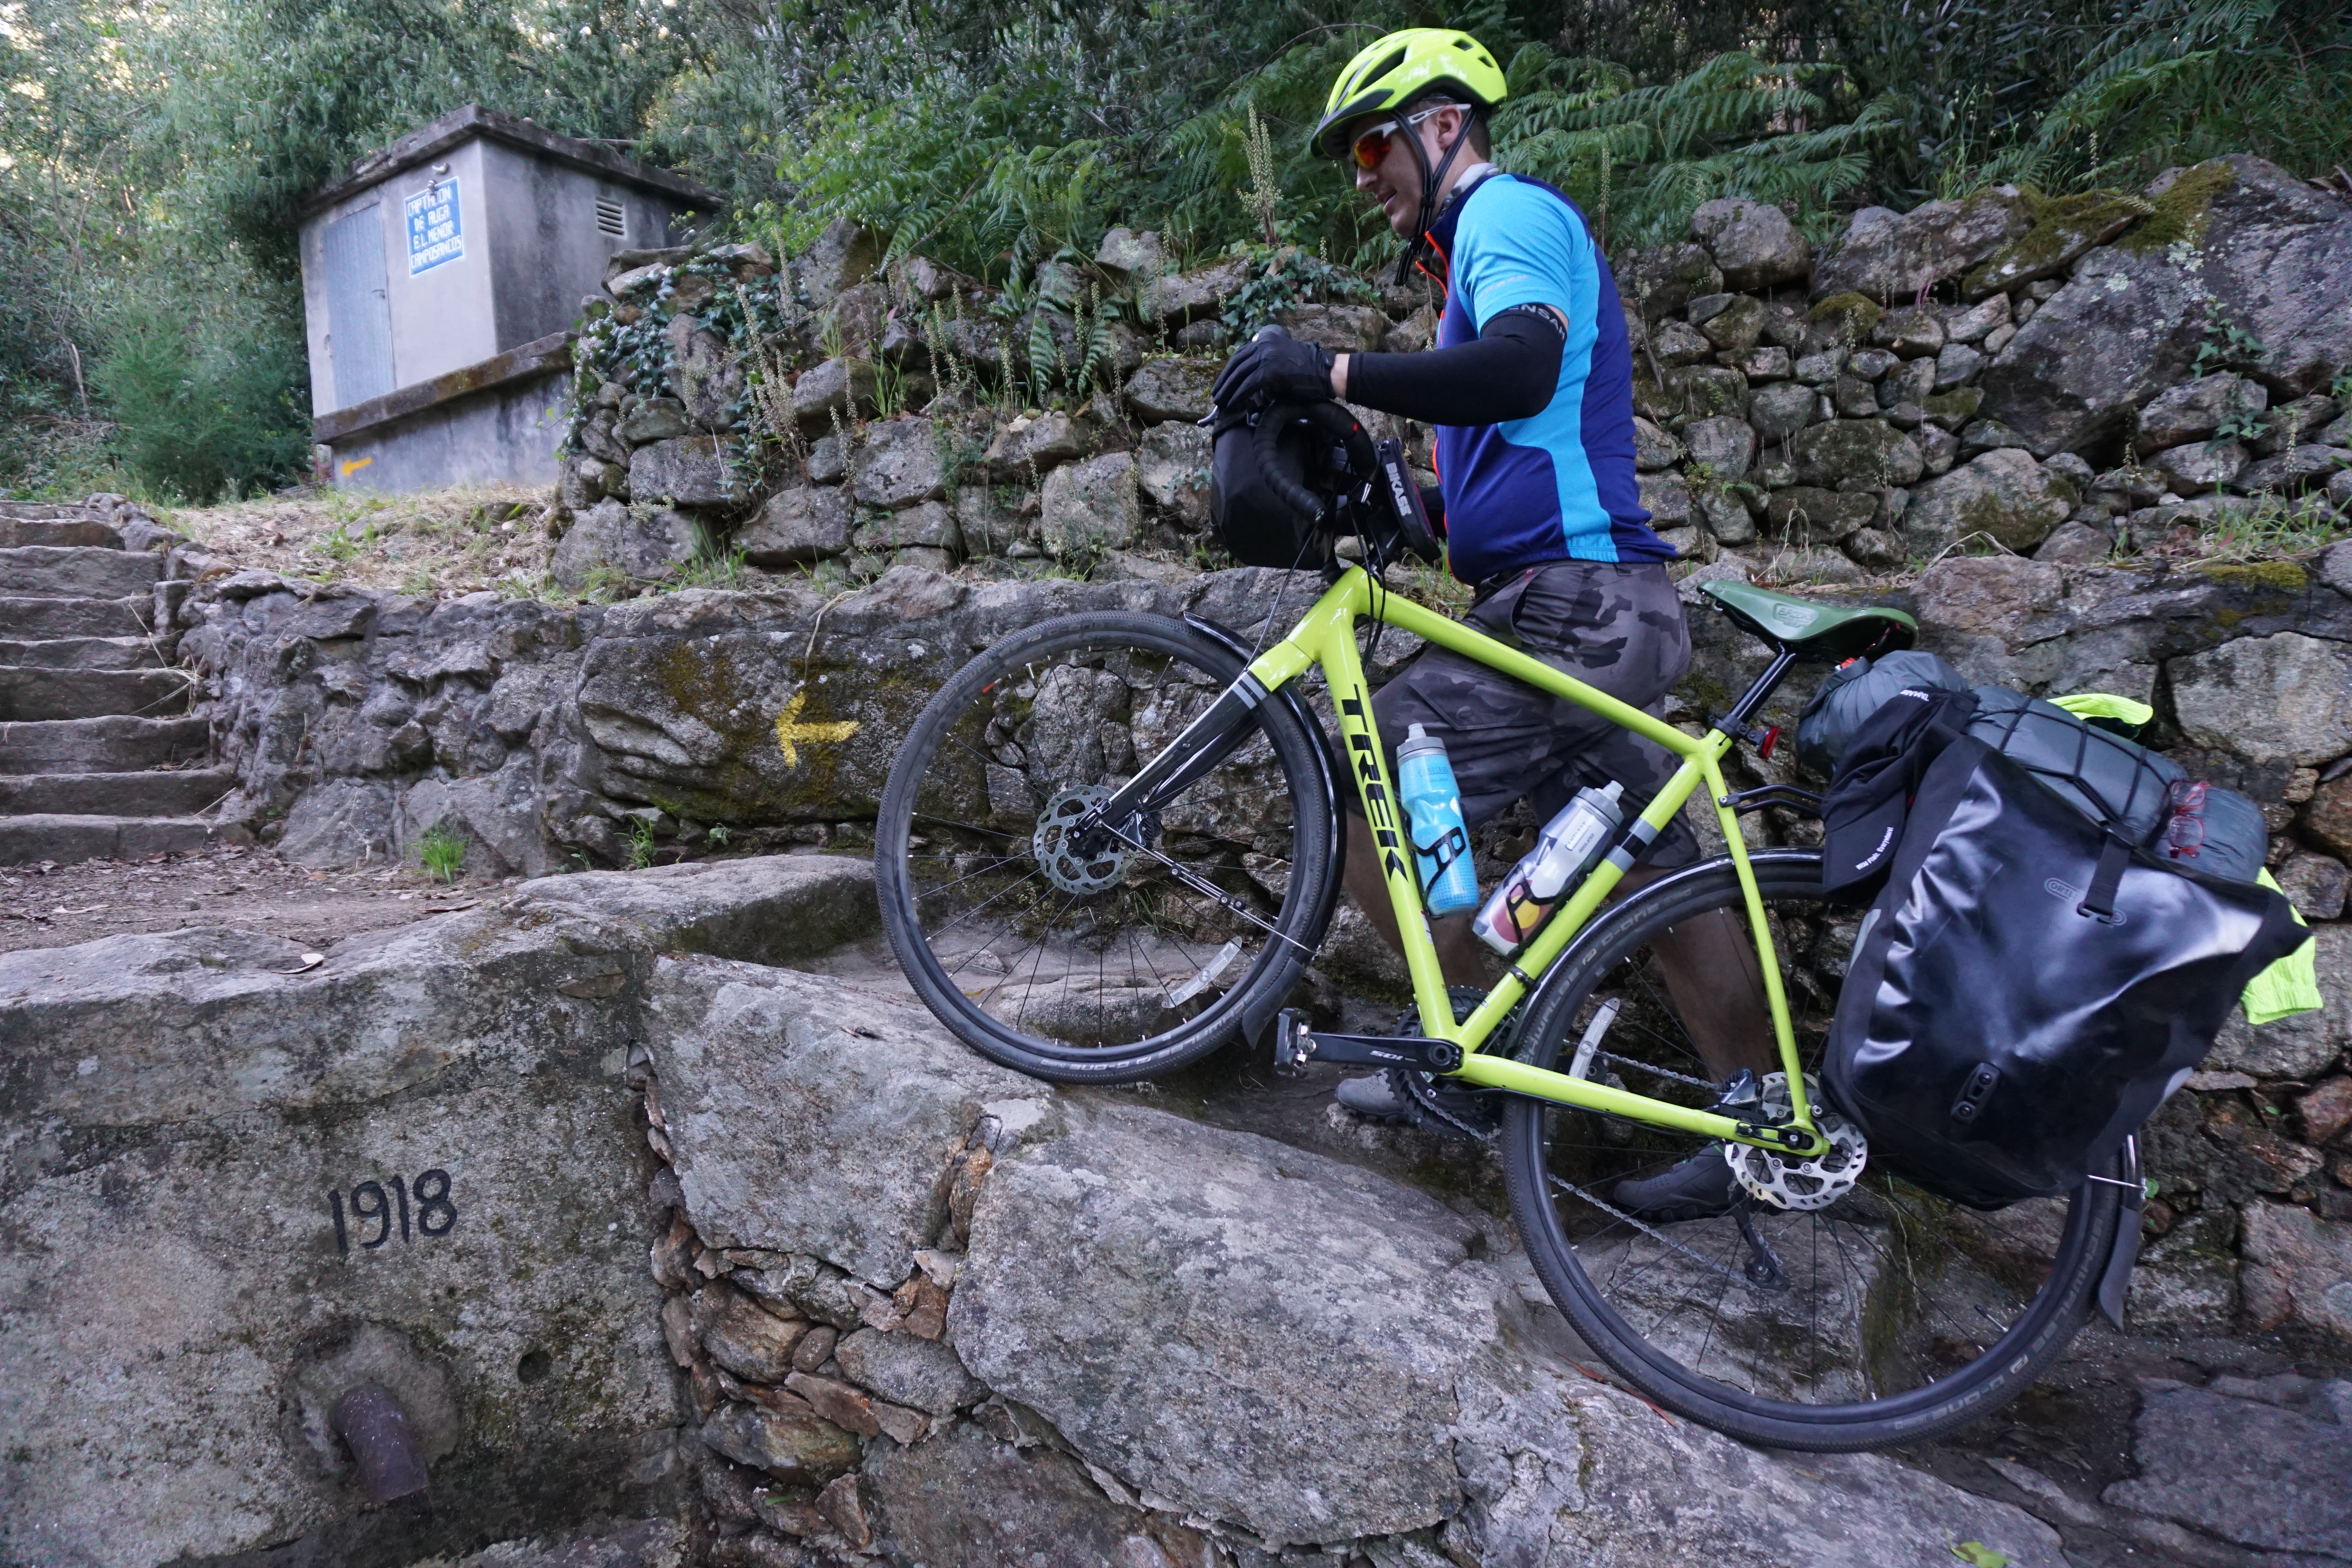
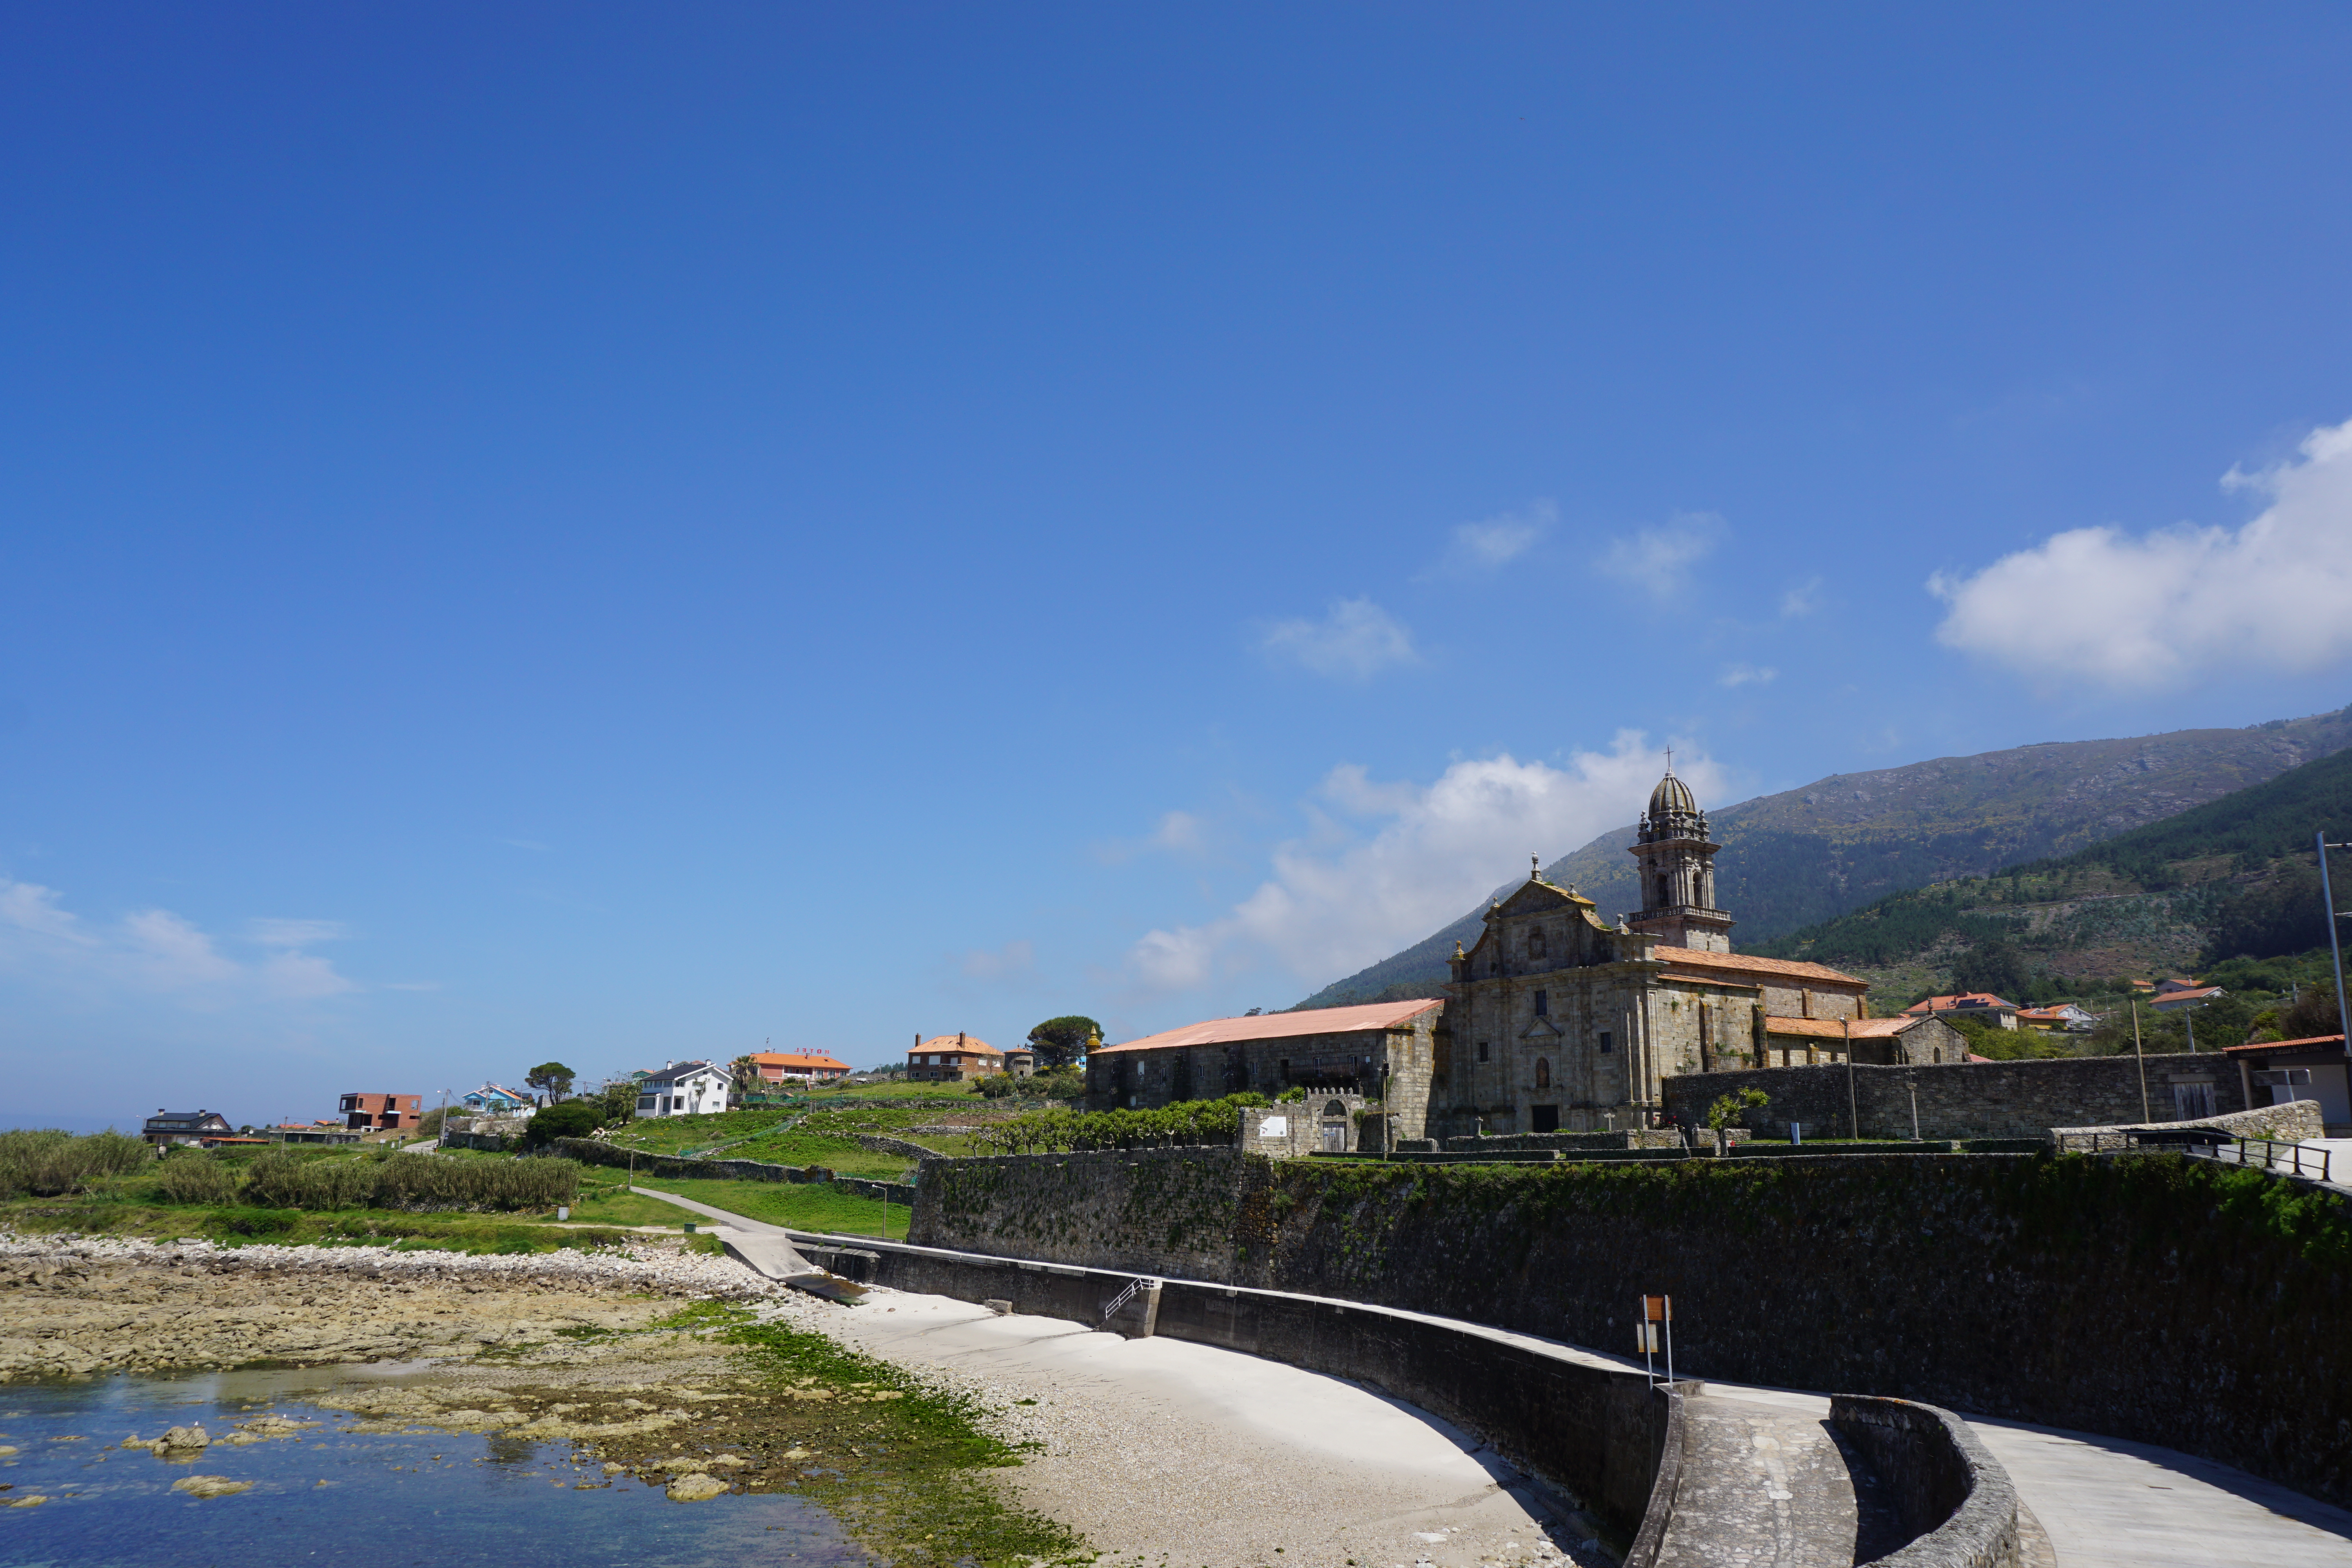
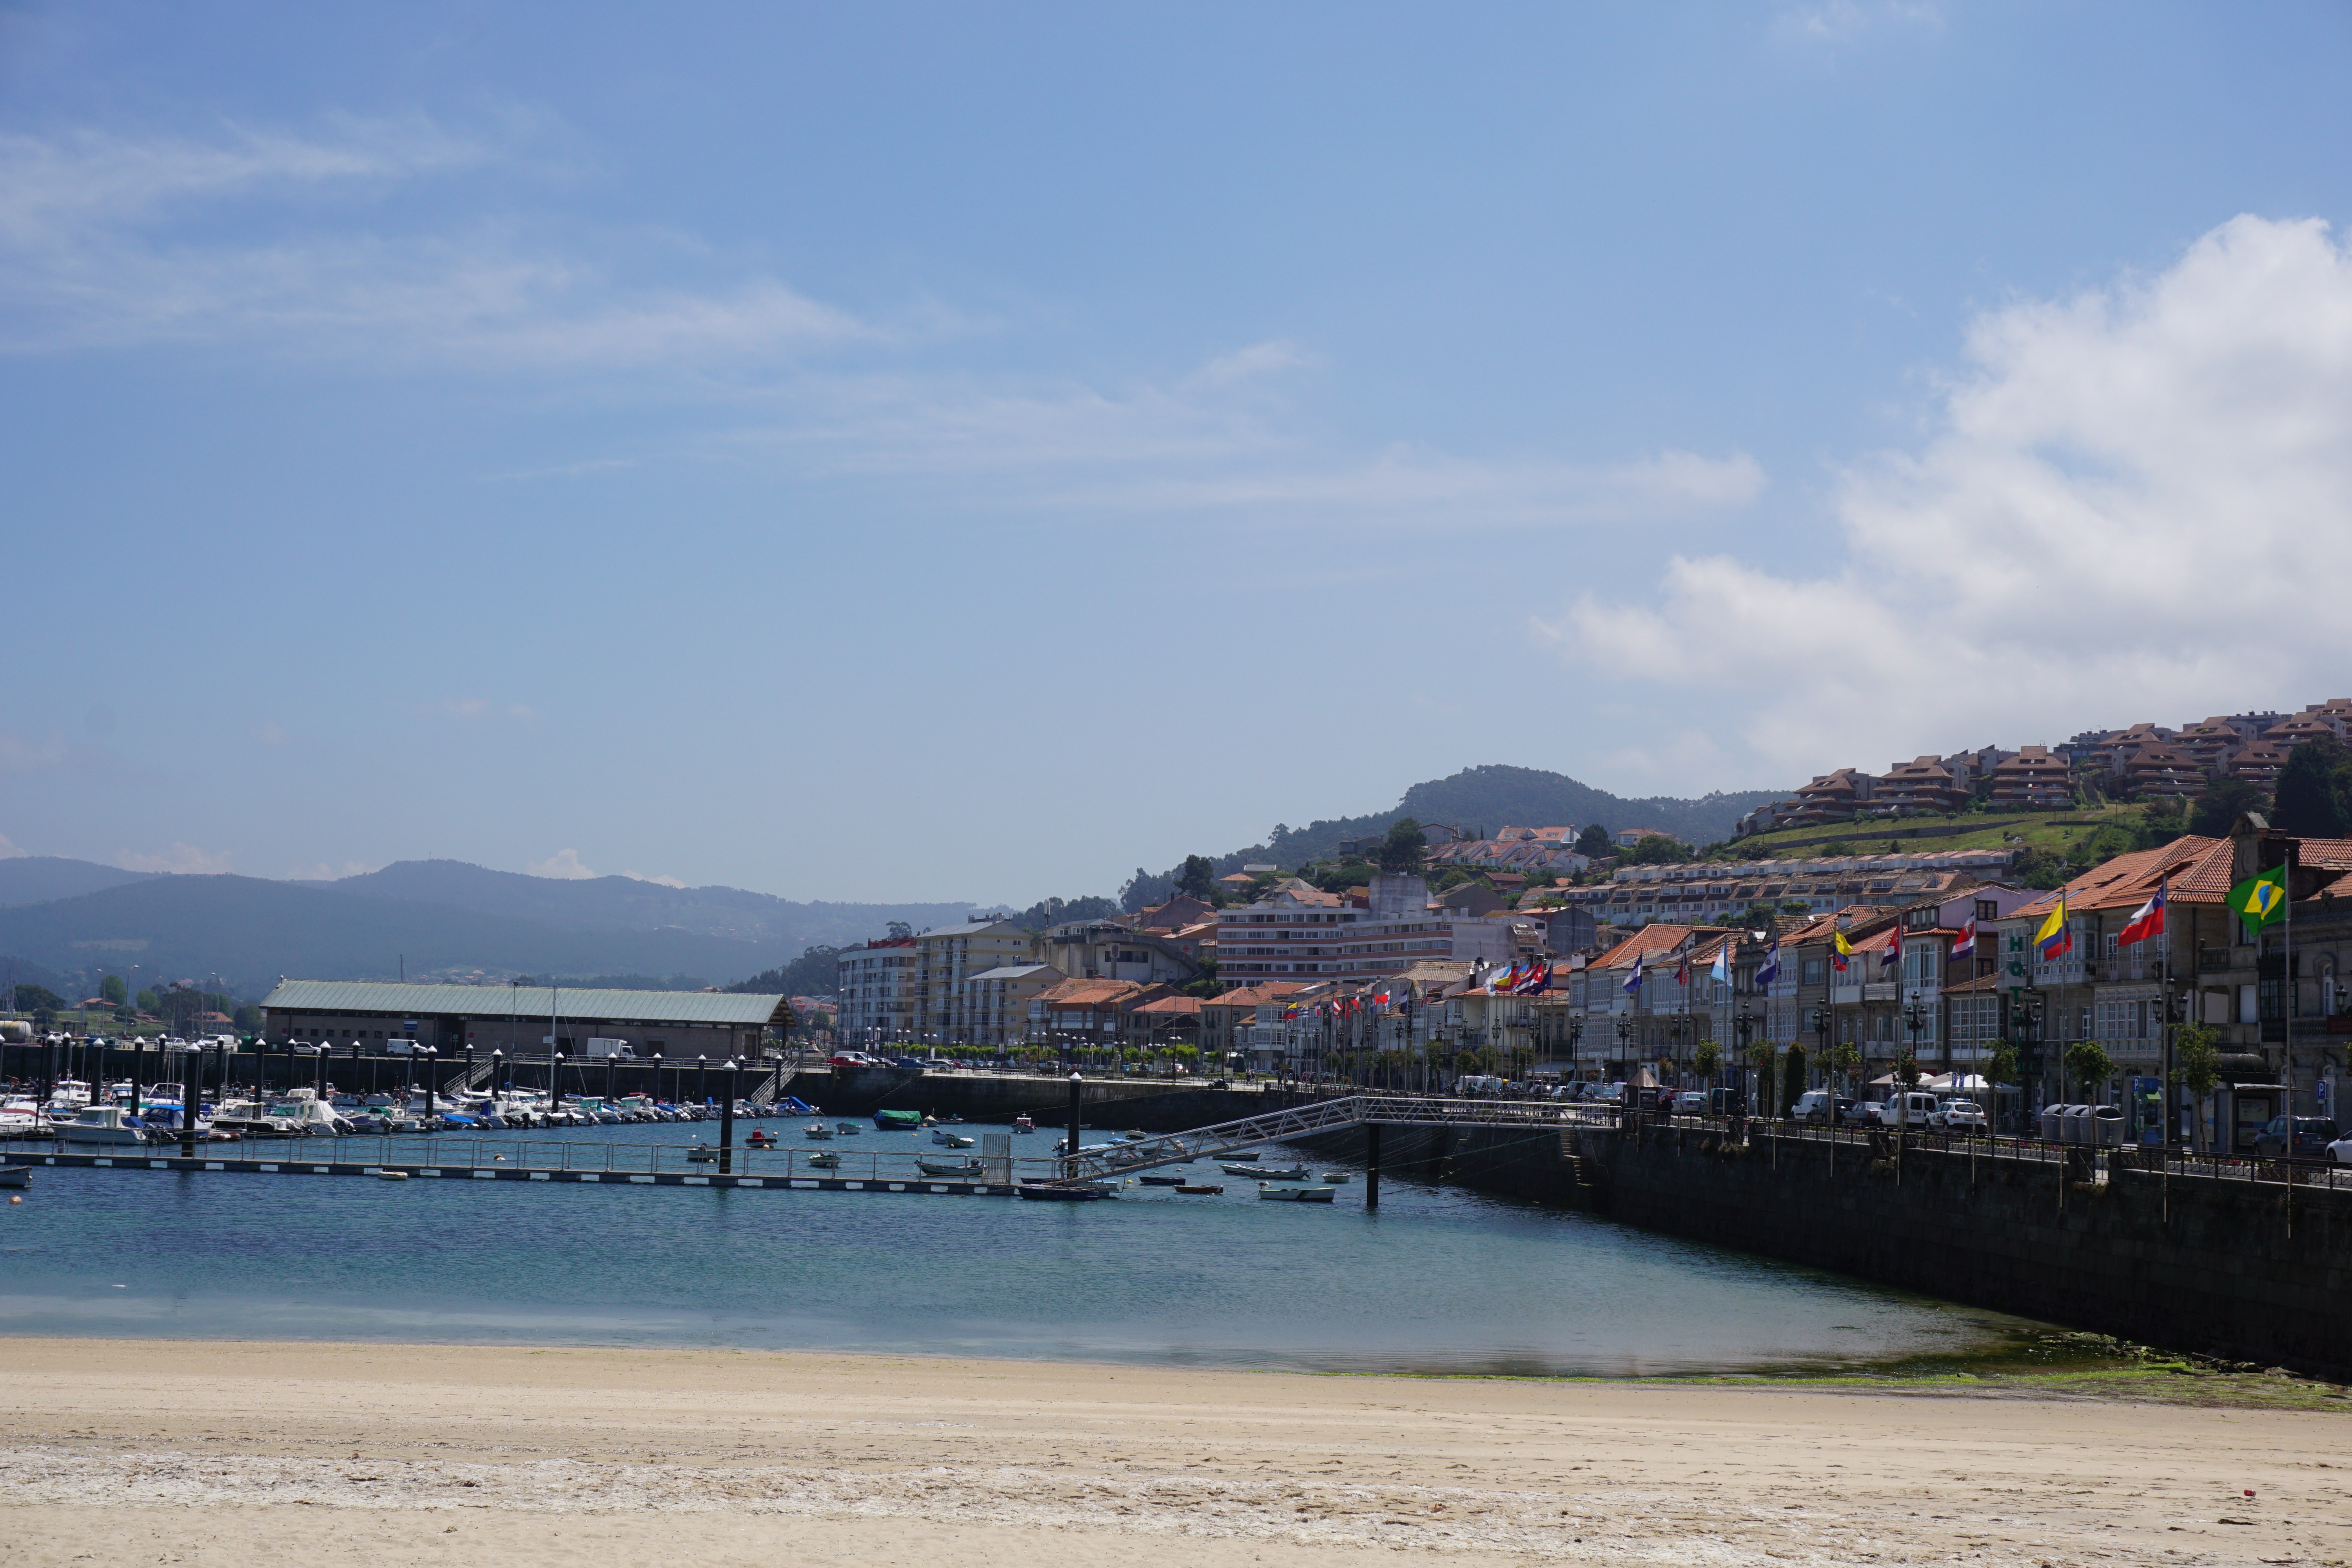

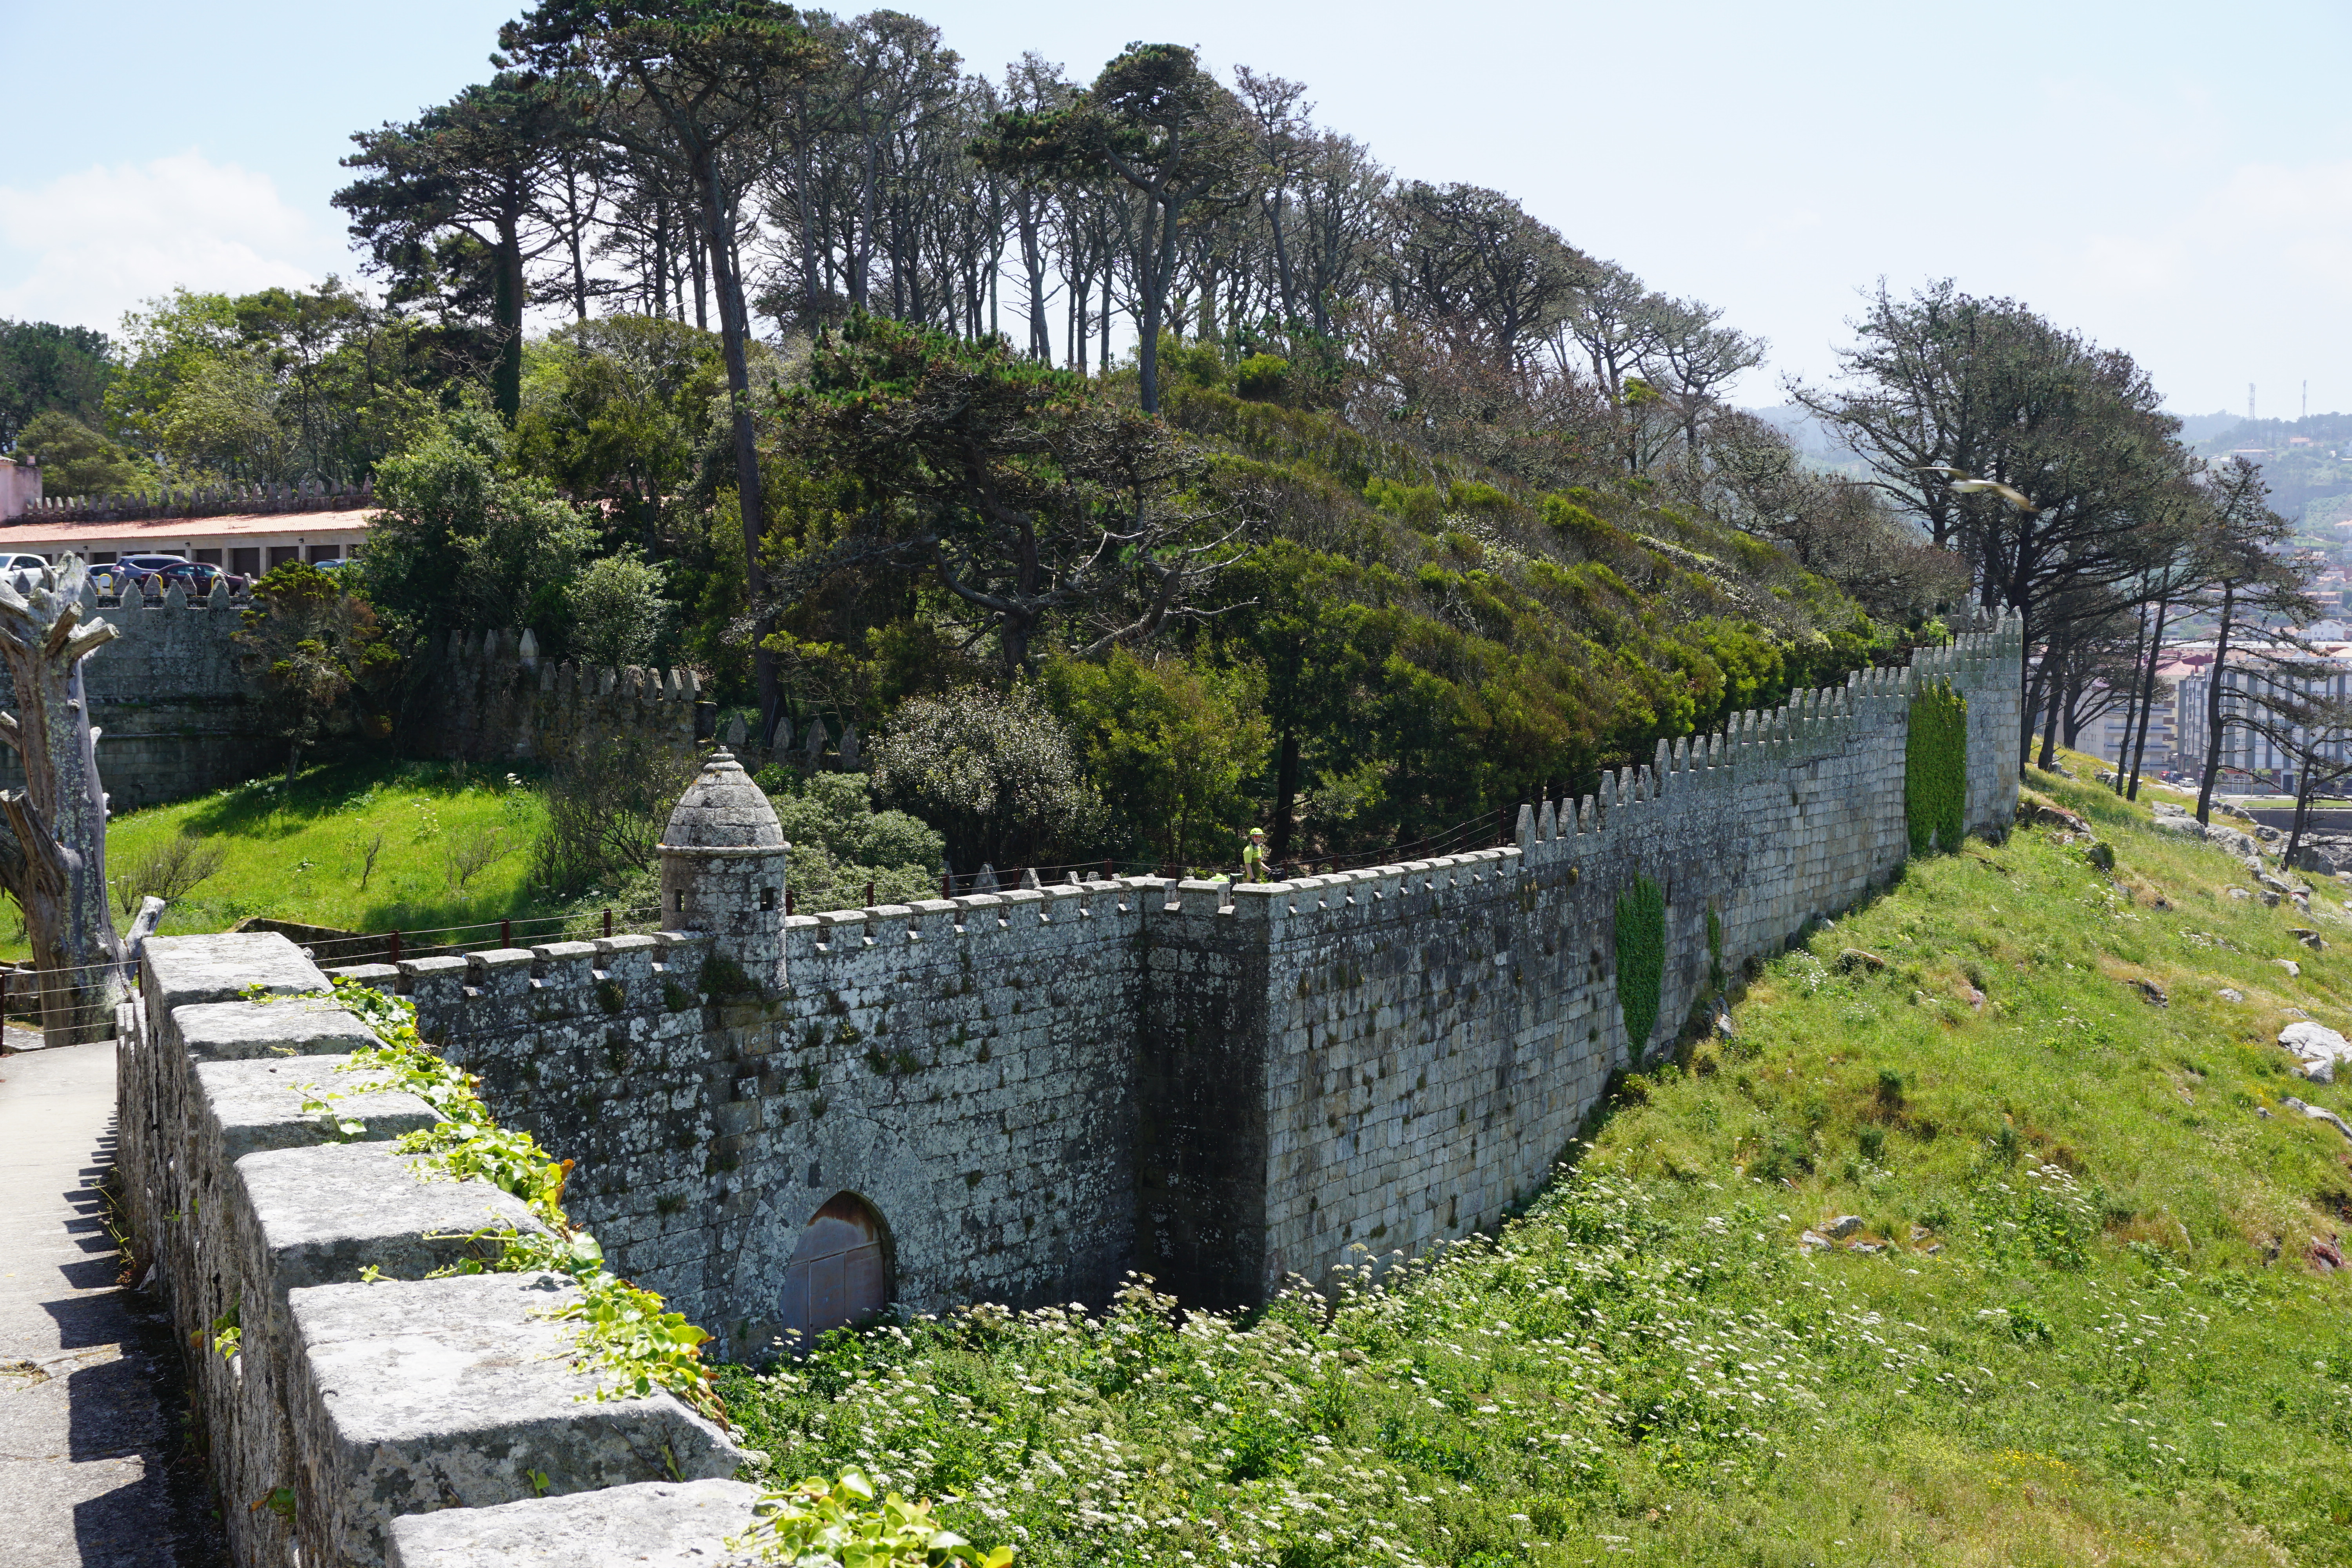
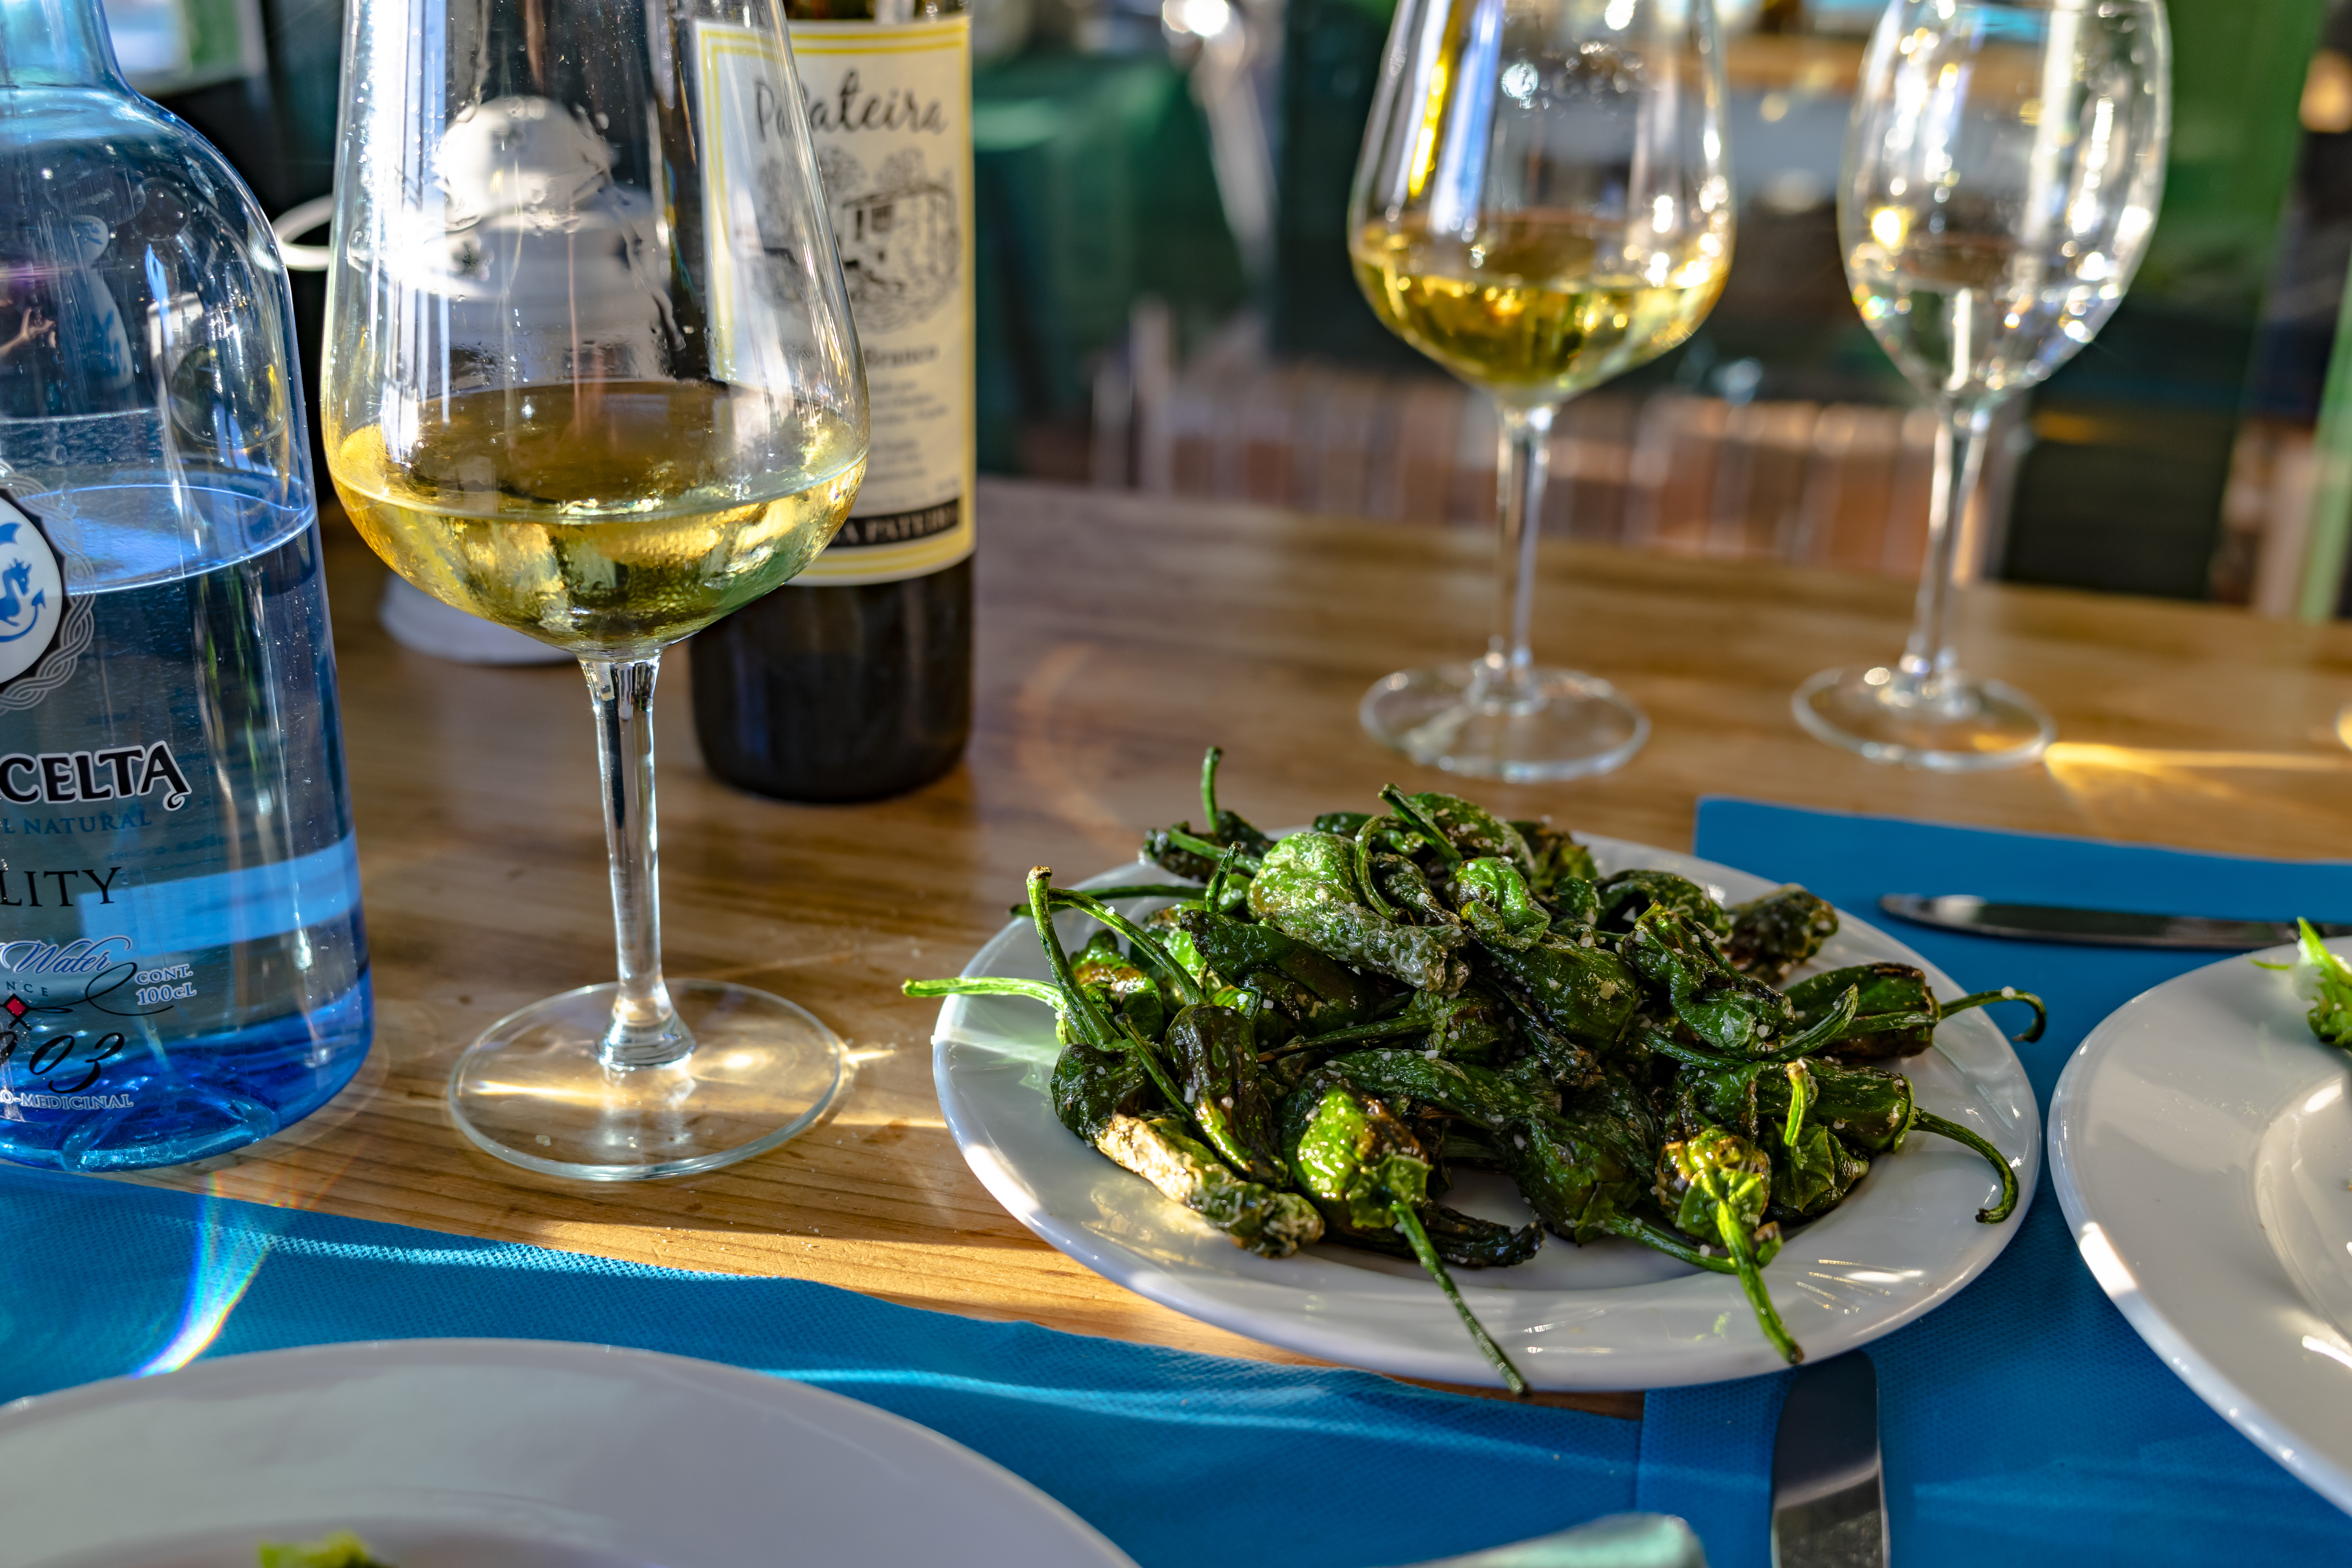
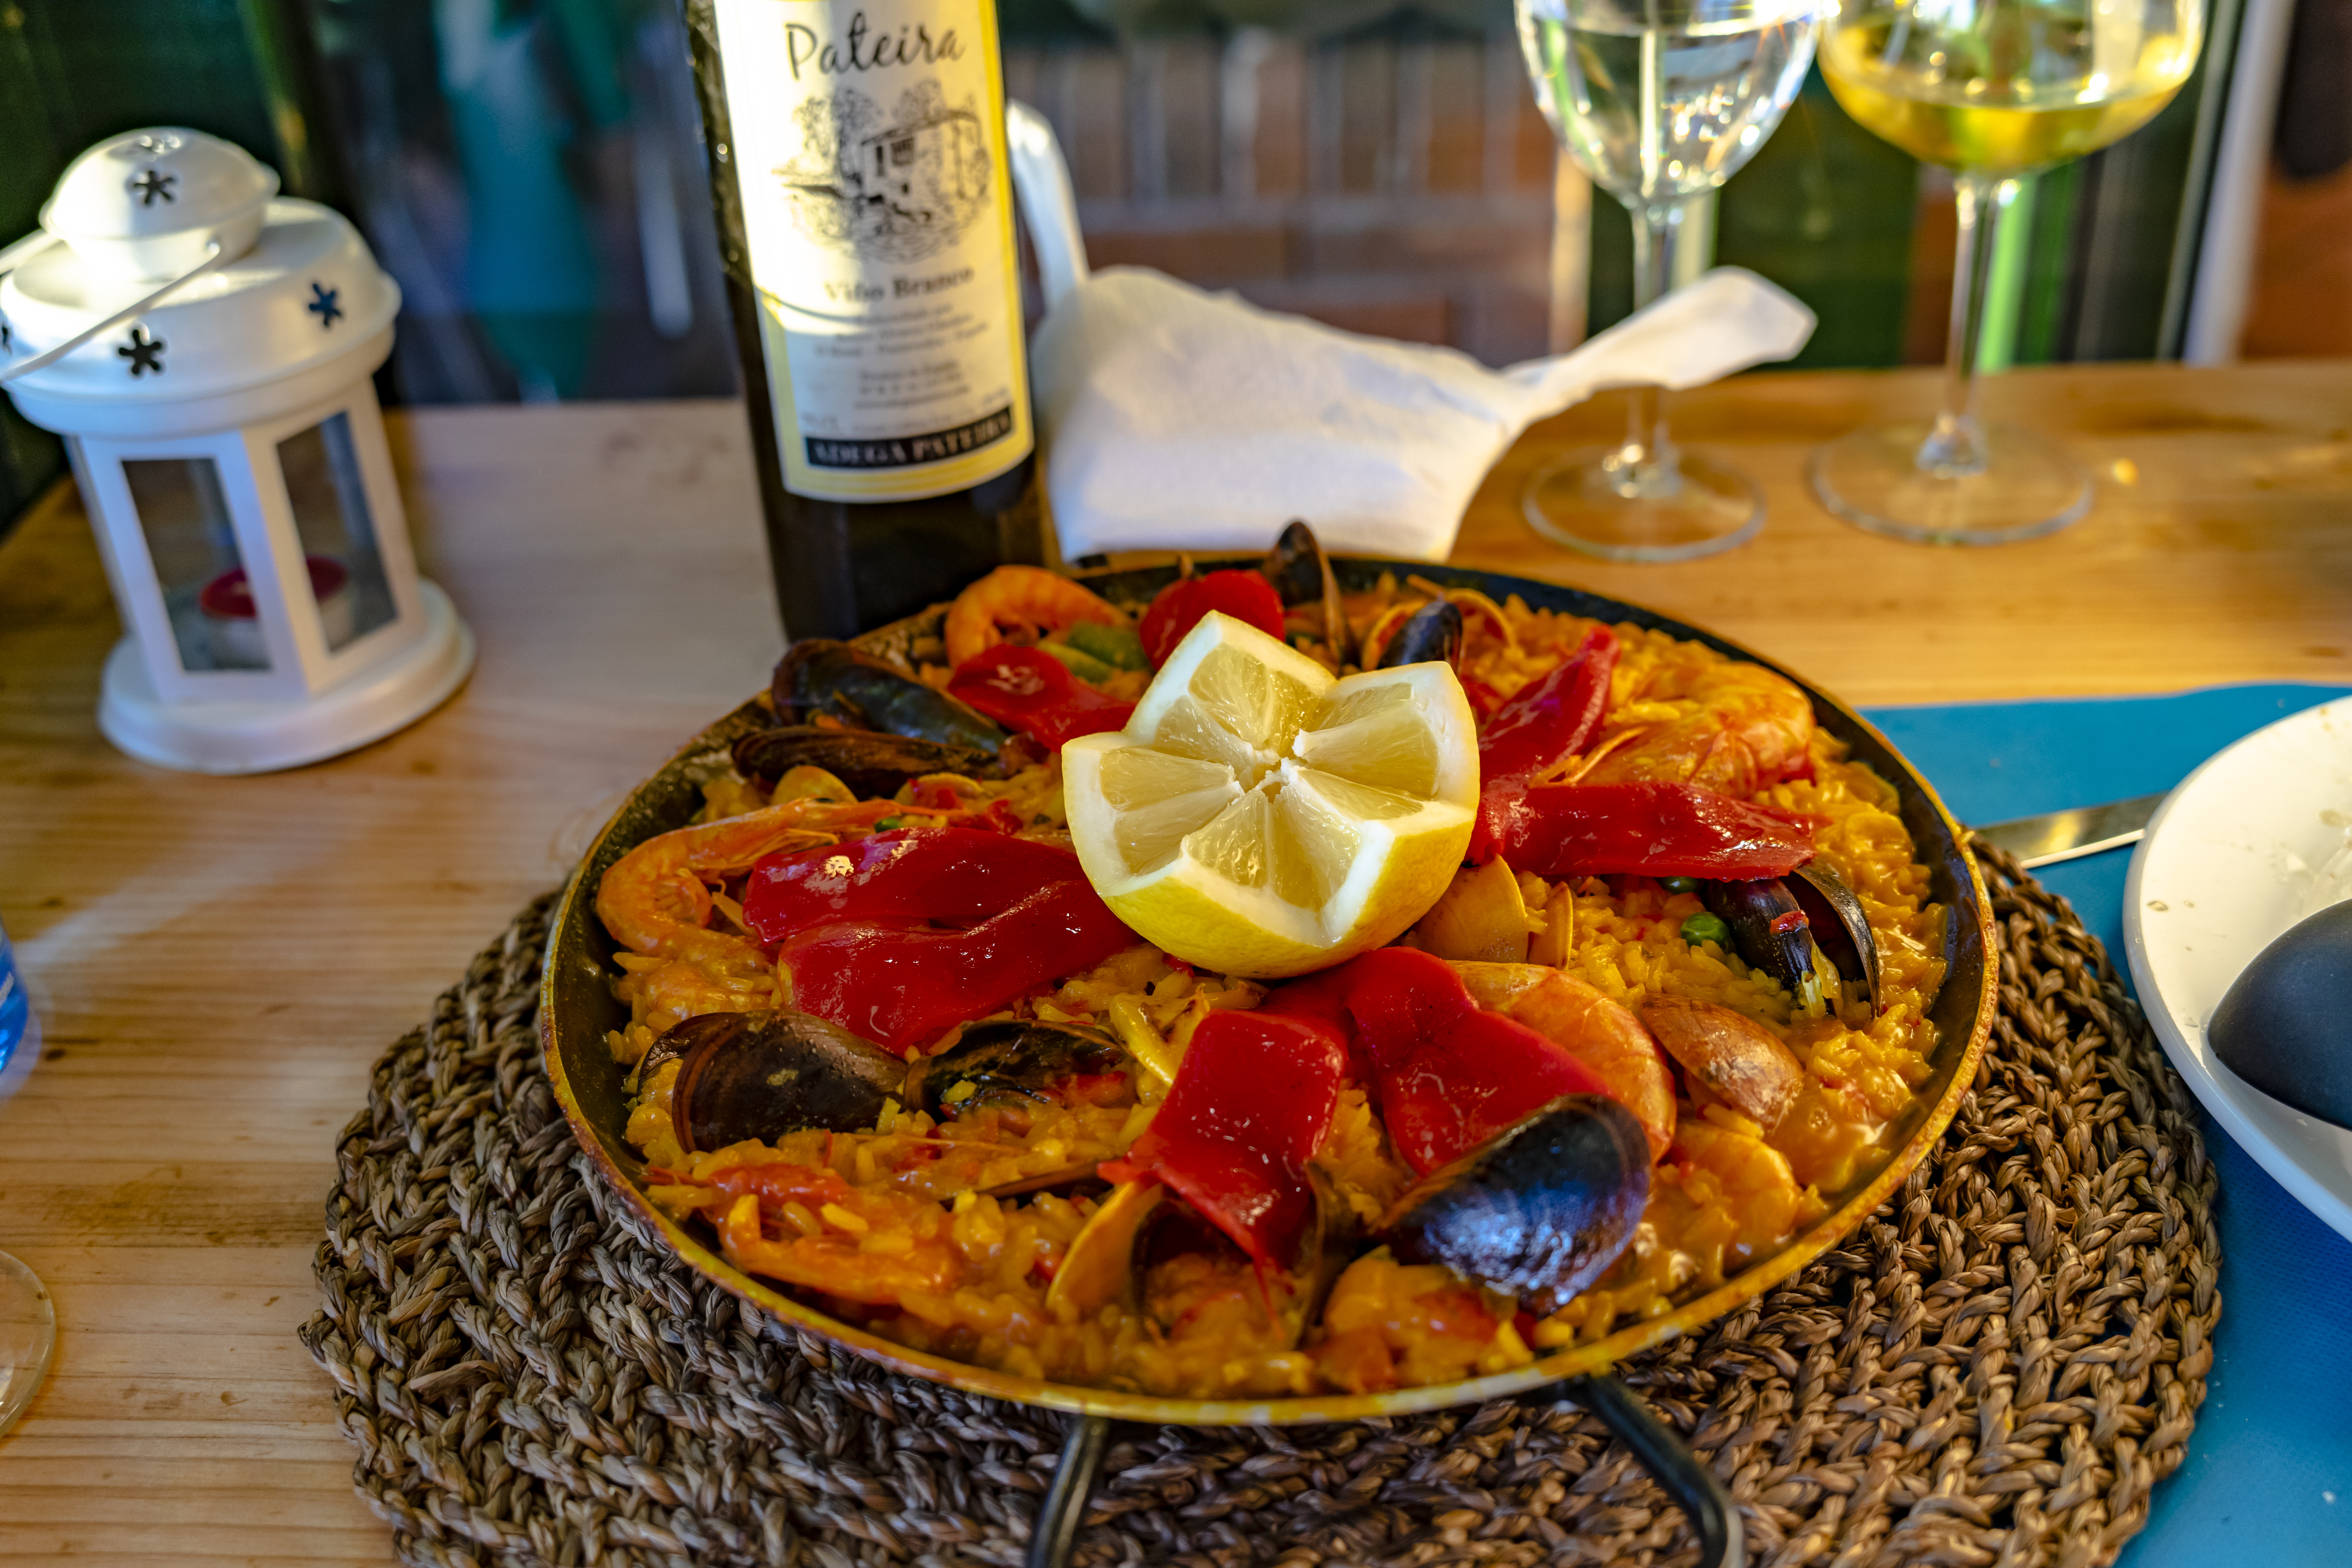
Day 3: A Guarda to Vigo Day 3…our hardest day of all! Mostly because we took a bit more time sightseeing in the morning and had most of the more challenging portion of the route at the end of the day, which snuck up on us quite quickly. The day started out quite lovely, meandering through meadows with a lunch stop accompanied by an adorable kitten. After lunch, we stopped in a small business owned by a local artist and found scallop shells to take with us for good luck along the Camino. Then we ended up passing by Baiona, a quaint little town with a harbor. I would have loved to spend more time resting here, or even to spend a night here. In this town we came across a castle and rode our bikes along the rampart and parapets that surrounded it (highly recommended!). After this point, the rest of the trip to Vigo was quite strenuous through dirt trails up steep hills that we couldn’t avoid. This was our longest section to hike-a-bike and our most elevation gain in a single day. We arrived in Vigo at 9 pm, had dinner and went straight to bed.

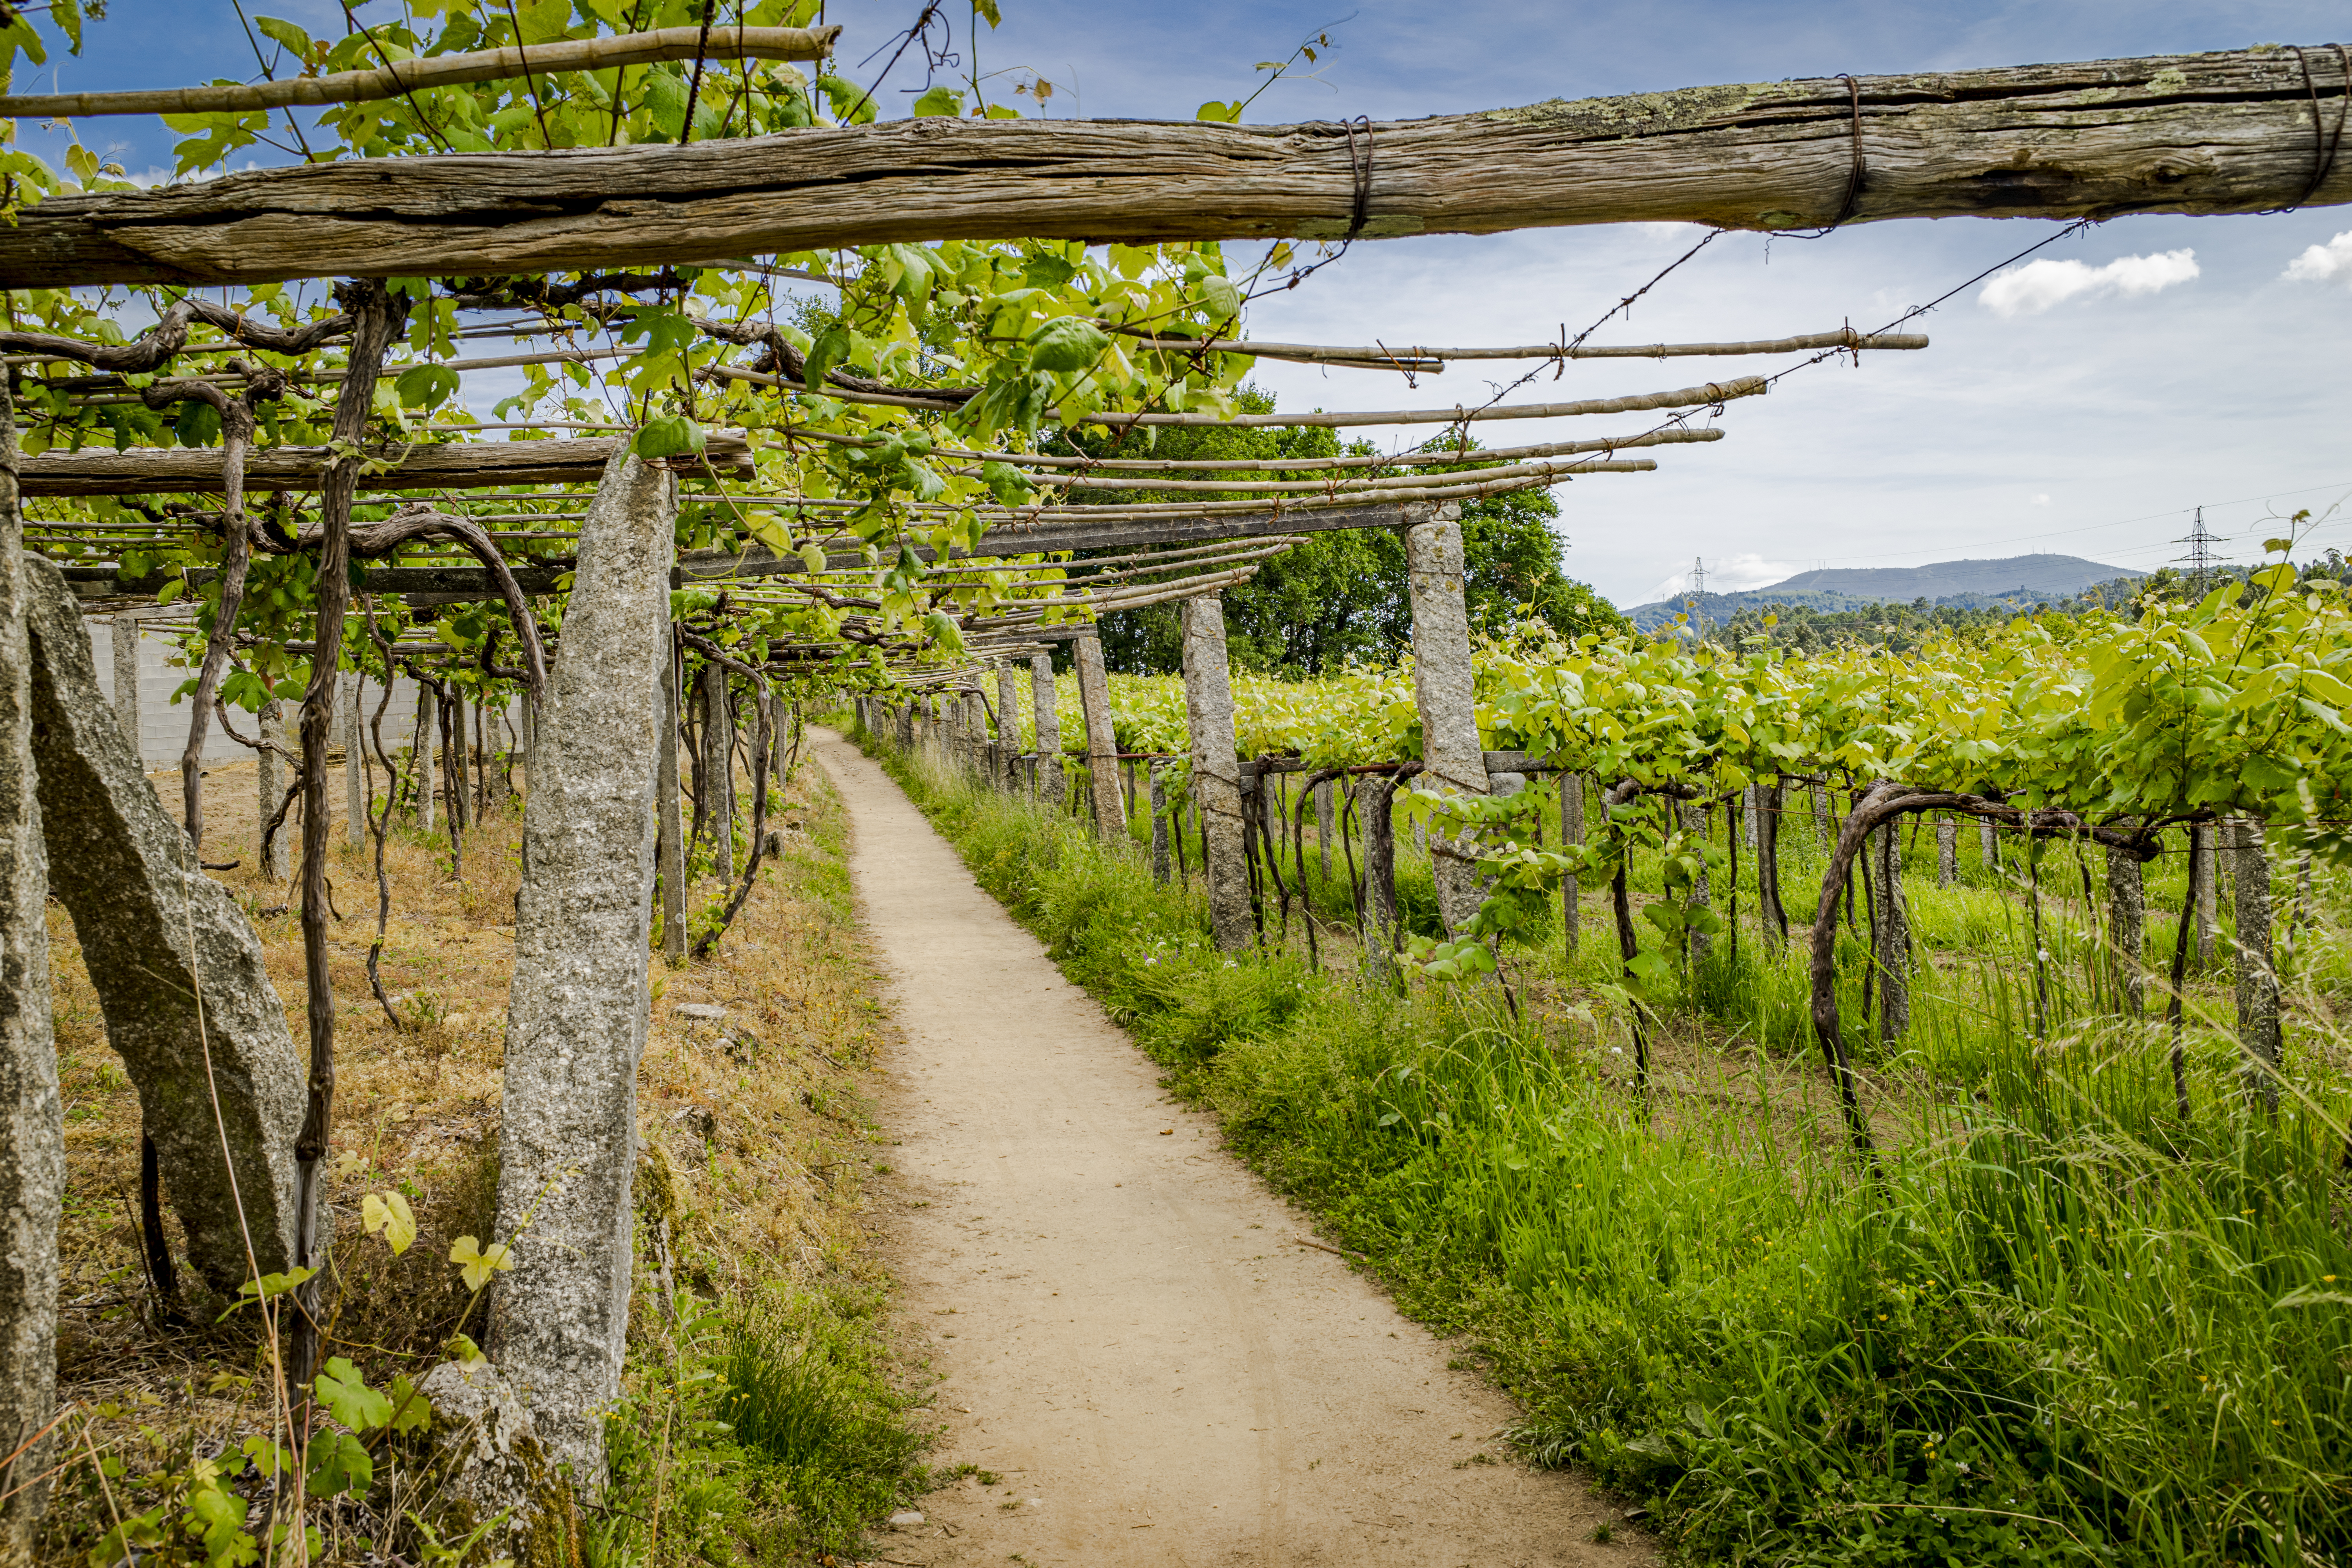


Day 4: Vigo to Caldas de Reis Day 4 started off with a bit of climbing again, but mellowed out as we passed through many vineyards. The narrow paths surrounded by grape vines were a welcome change of scene. We enjoyed waffles covered with soft serve ice cream during one of our rest breaks. Finally, we finished the day with dinner in Caldas de Reis and ended up seeing many other pilgrims here. This was likely because Vigo is the starting point for pilgrims wanting to complete the last 100 km of the Camino by foot along the Portuguese Route.


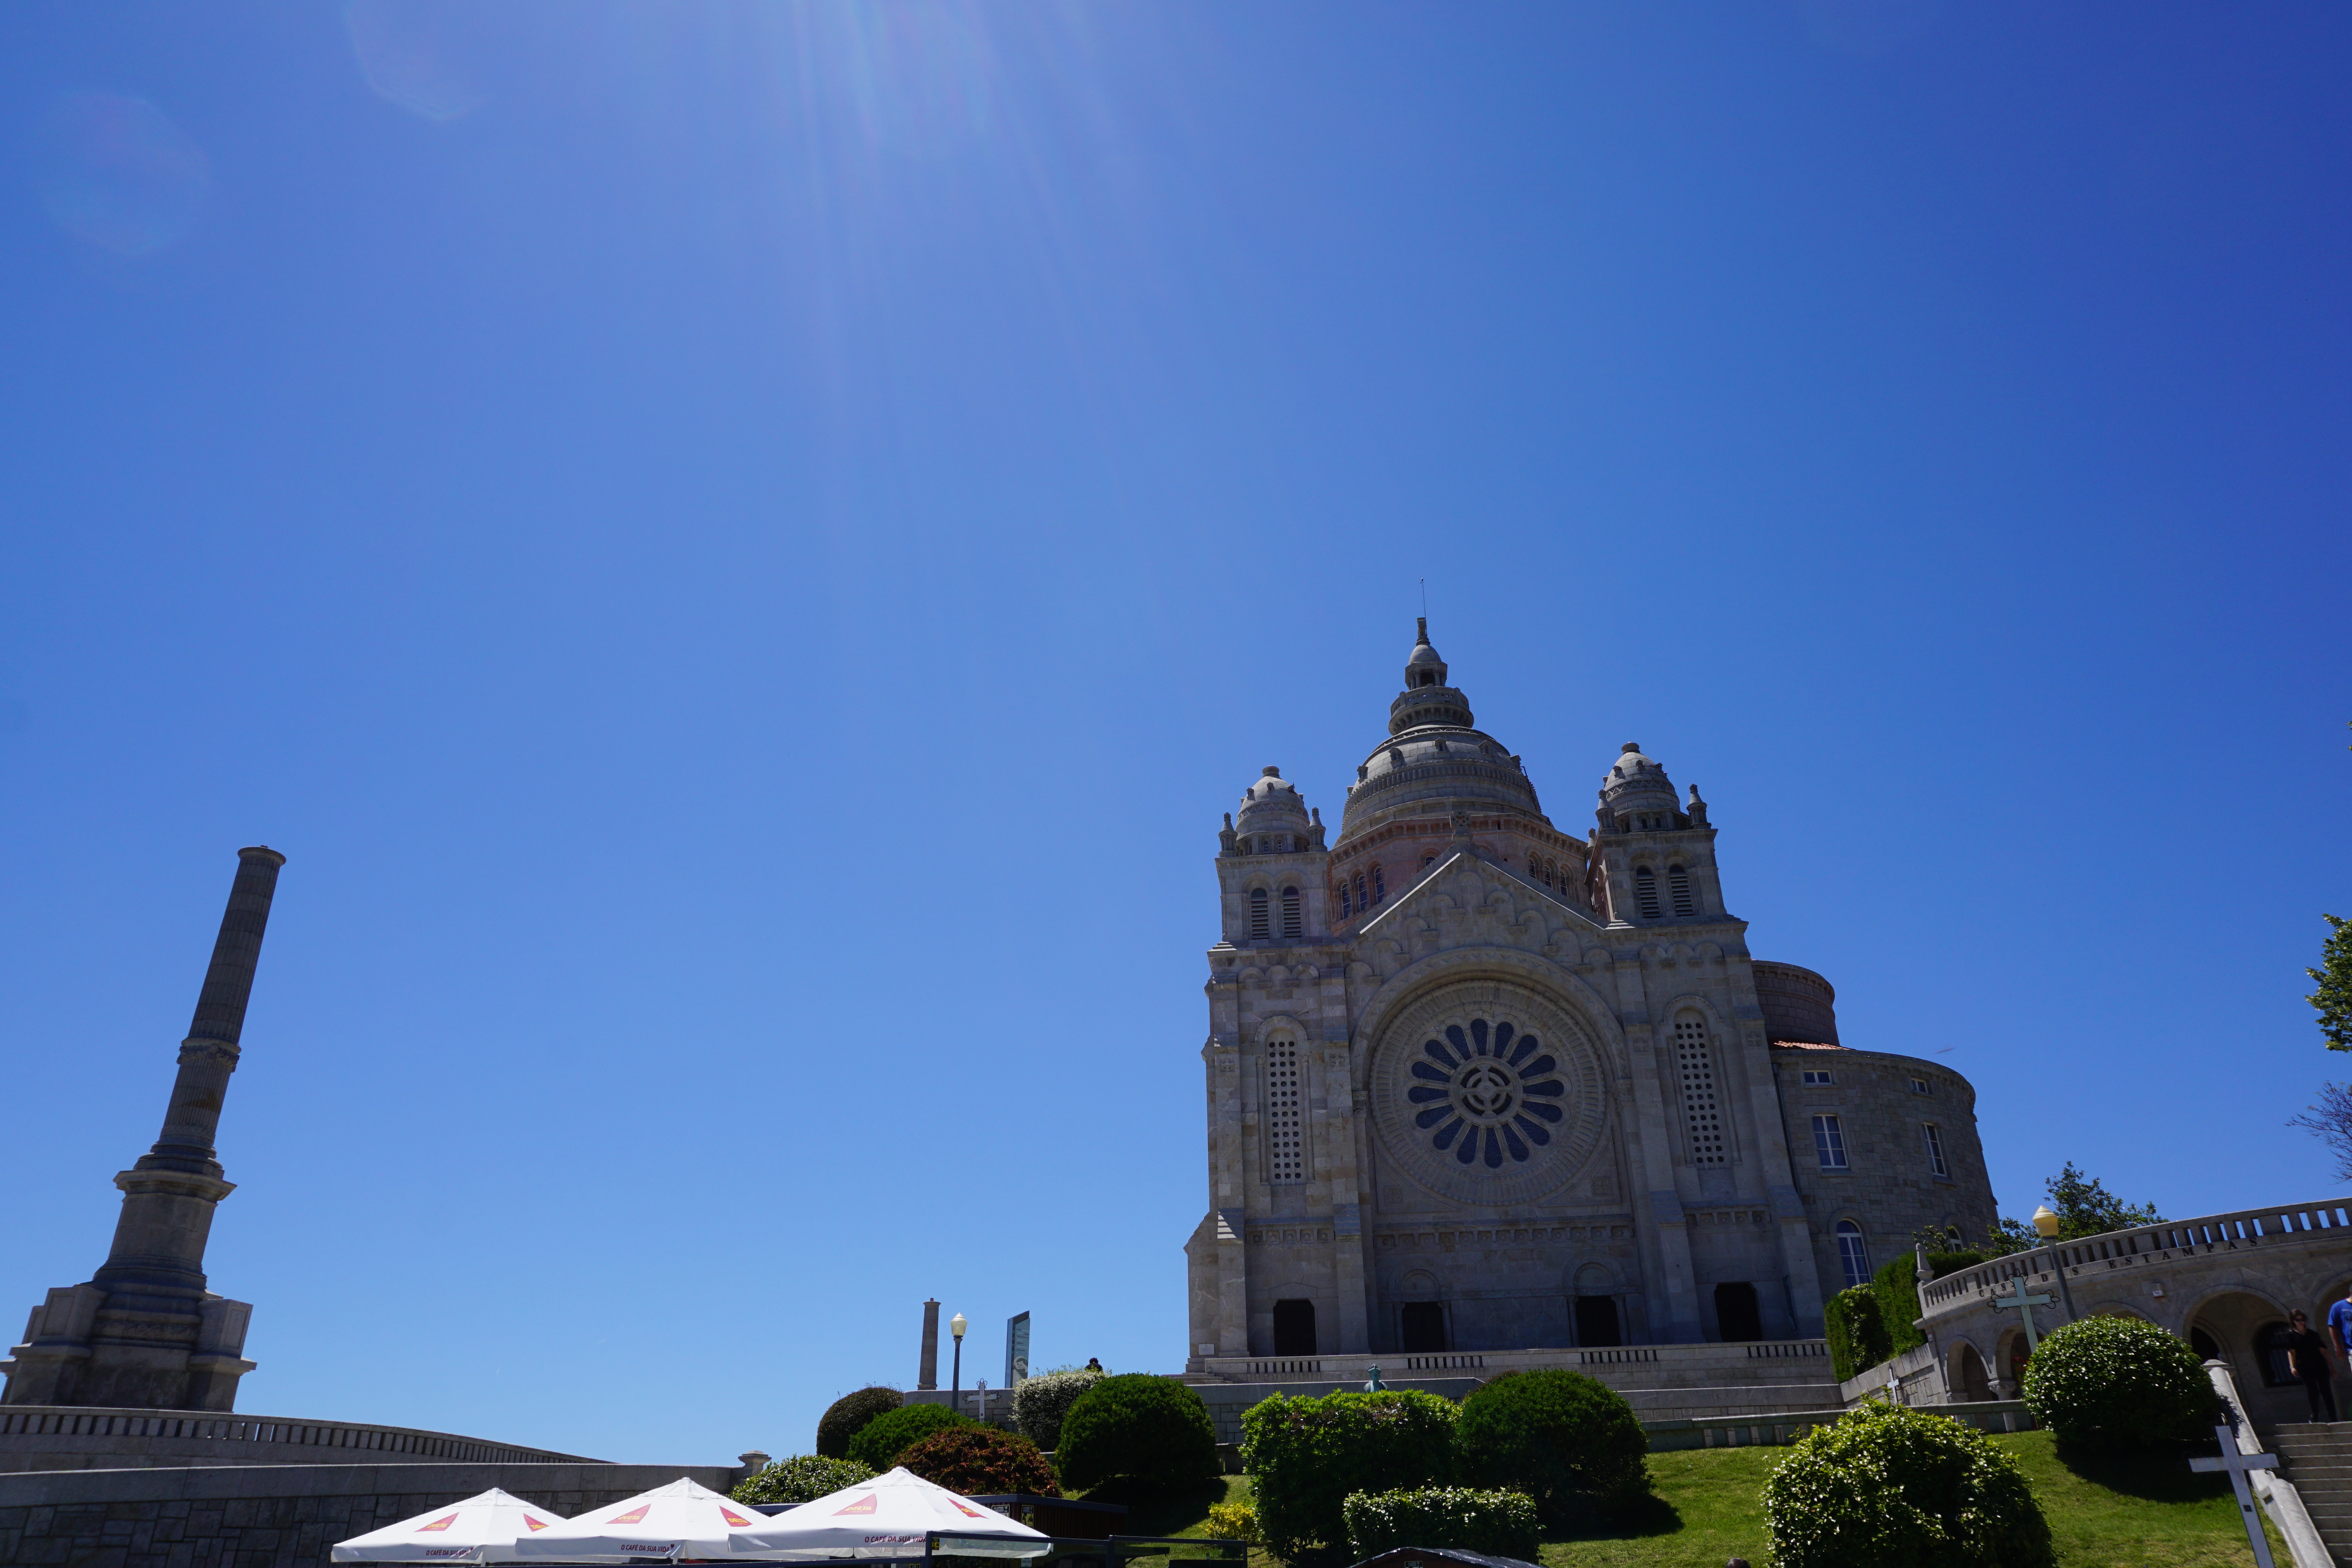
Day 5: Caldas de Reis to Santiago de Compostela Day 5 was our shortest in terms of total distance, but still had a decent amount of elevation gain. We were definitely feeling the last four days of biking as we slowly headed into Santiago de Compostela. The town here quickly gets very crowded as you get closer to the Cathedral. The streets are teeming with tourists and souvenir shops, so much so that we dismounted our bikes and walked the last half mile (it is worth it to add an extra day exploring this area and picking up your mementos). When we finally reached the Cathedral of Santiago de Compostela, the plaza was filled with pilgrims resting, eating, and taking photos of their final destination. We came across one other pilgrim on bike that we had seen several times during the last five days and offered to take each other’s photos. It was enjoyable to sit down, rest our legs and watch other pilgrims arriving at the Cathedral with big smiles on their faces. Unfortunately, due to the number of pilgrims traveling the Camino these days, there was a very long wait in line to receive our compostela that evening. Additionally, the Cathedral was under repair and we were not able to see a mass inside the next day. If you’ve seen movies or read about the Camino before, you may know that one tradition is to swing the Botafumeiro (metal container or censer) at the end of the mass as a cleansing ritual. It is a very moving experience to see this as the culmination of your trip, whether it be for religious reasons or not. A mass was held at a nearby church for pilgrims instead.
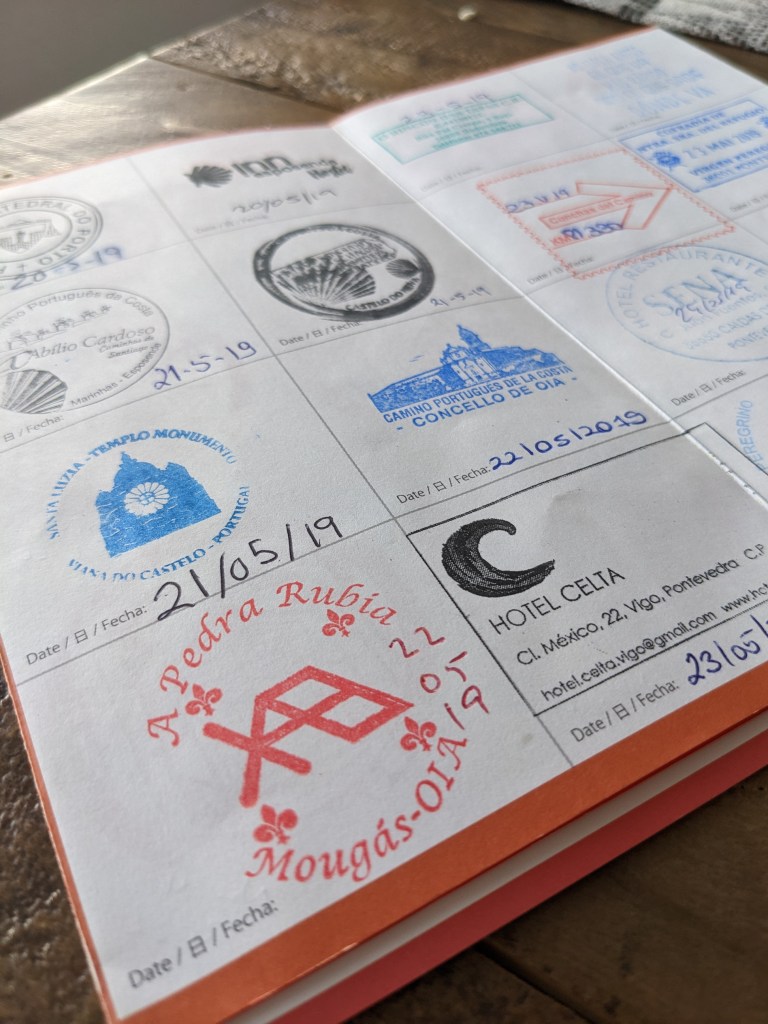
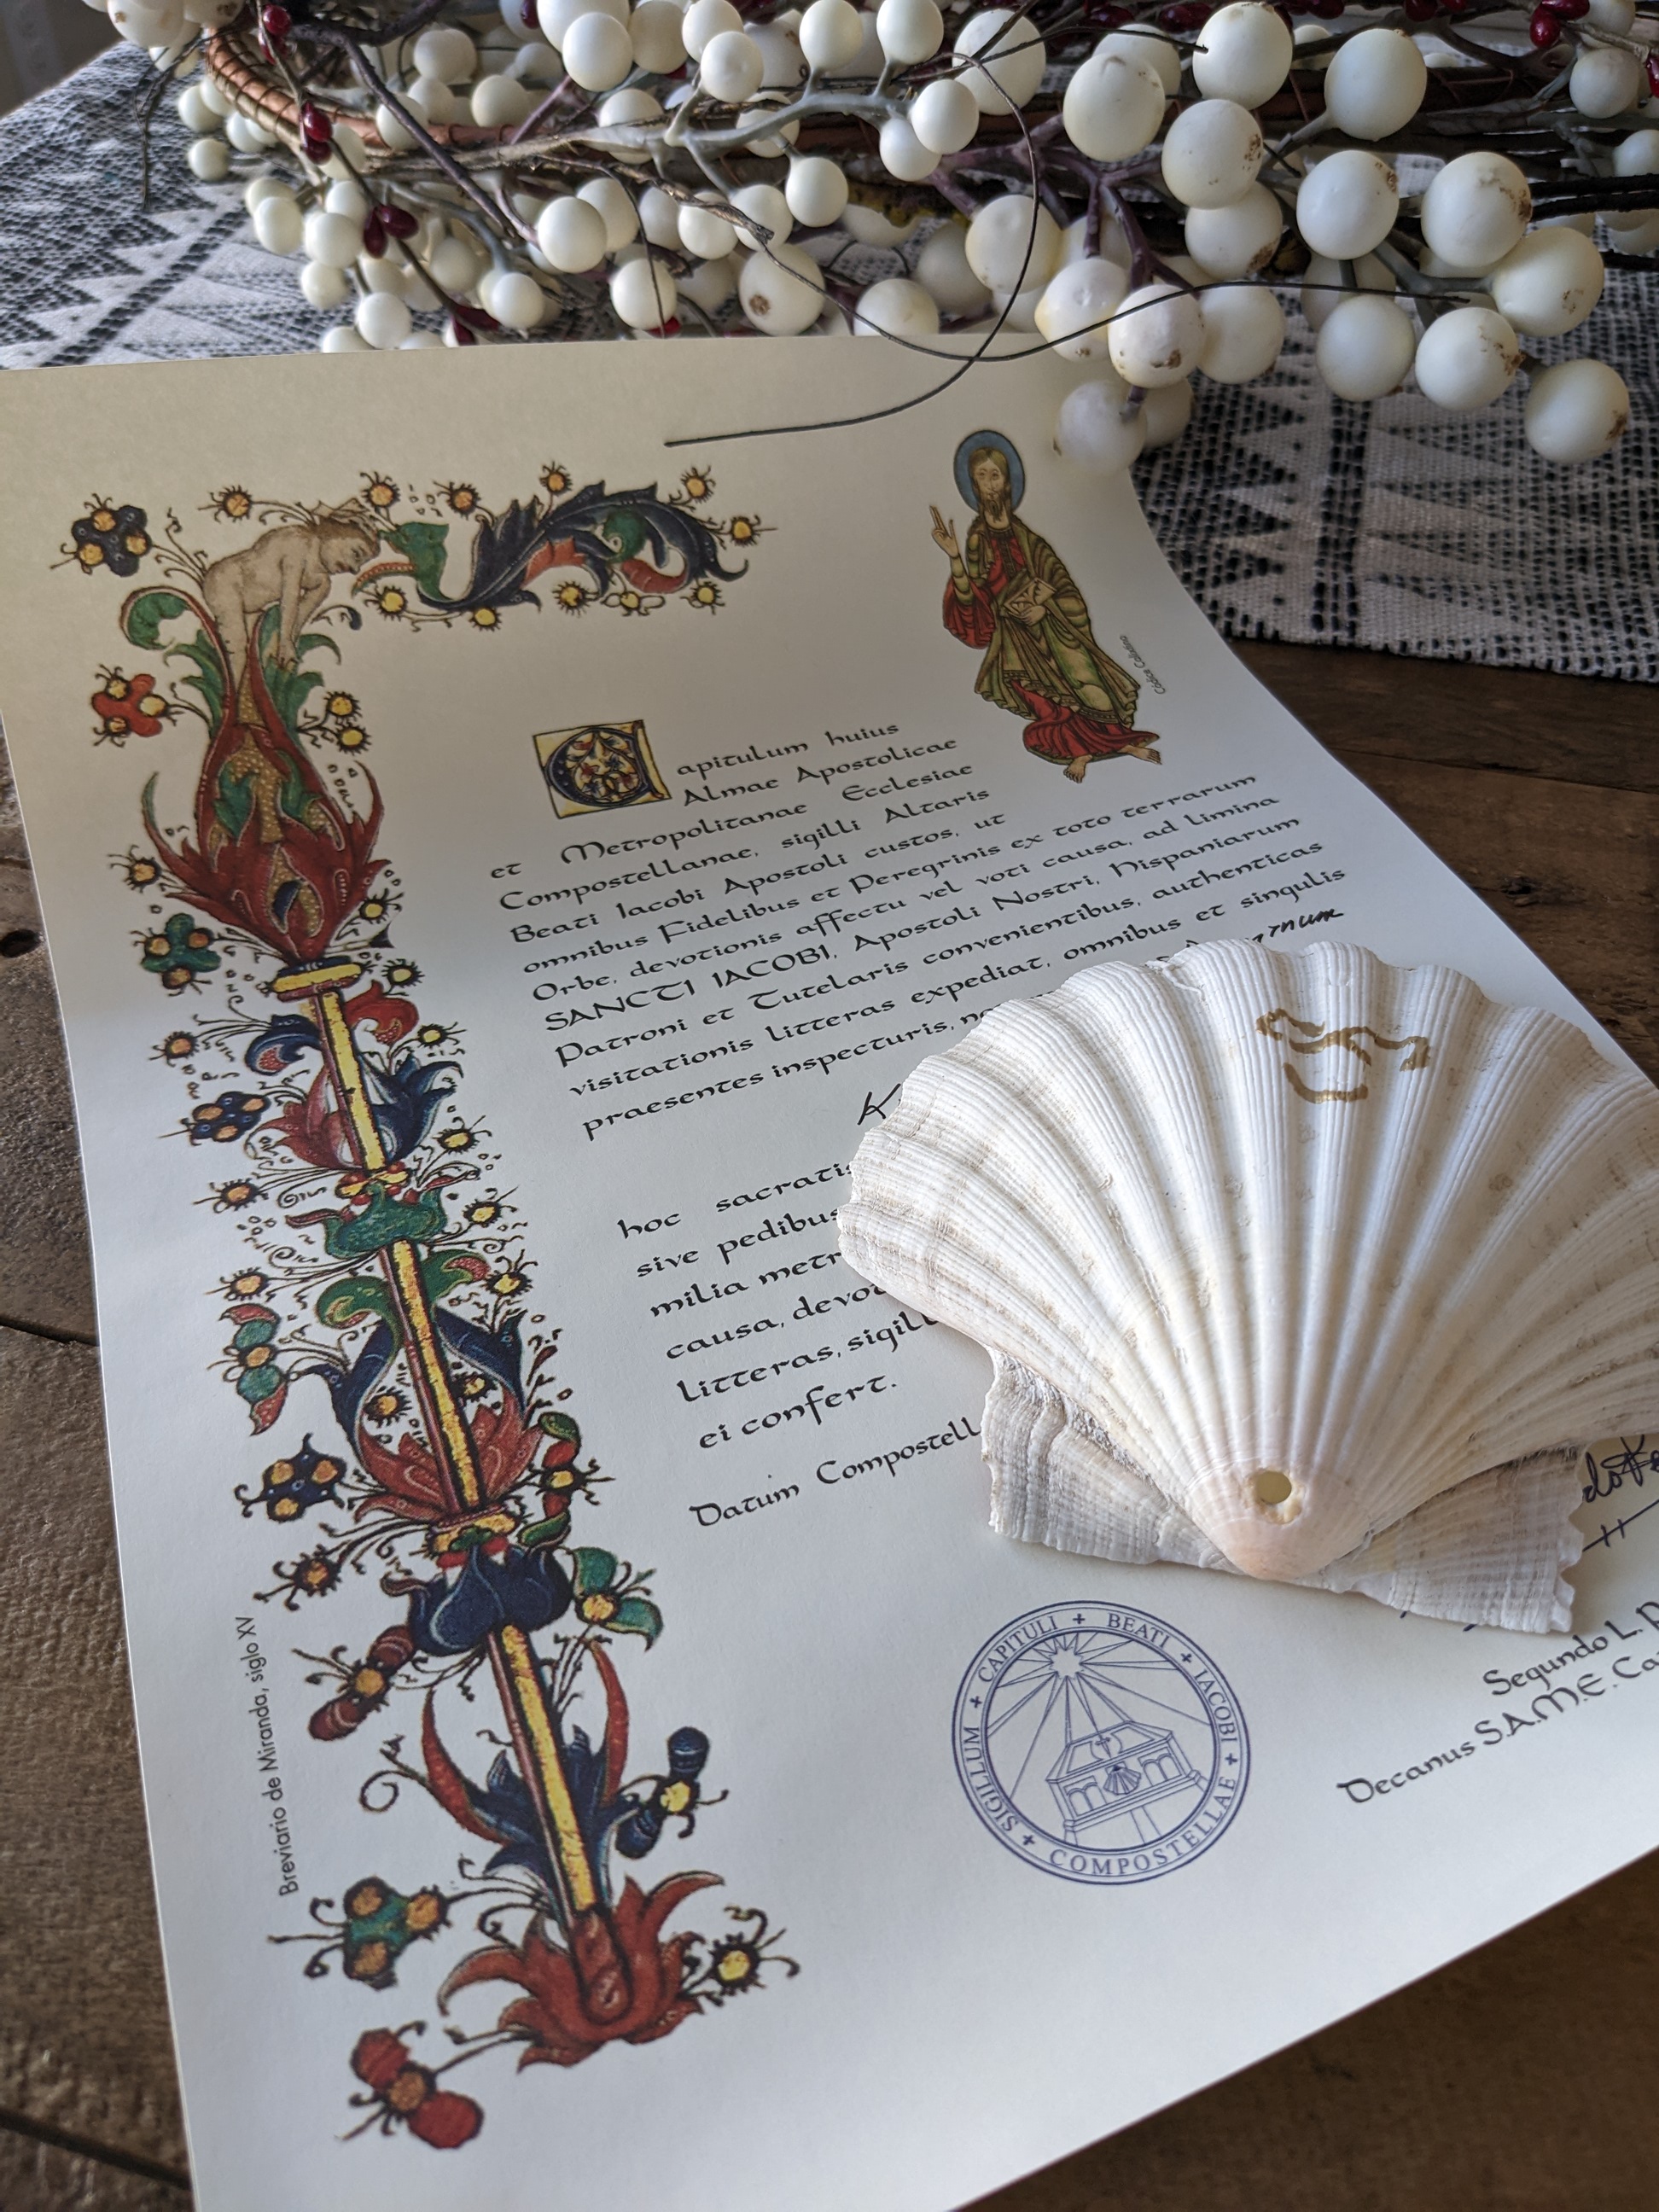
The above photos show the credencial (passport) with stamps along the way, the Compostela (certificate) and a scallop shell we carried on our bikes, which has become an iconic symbol of the Camino.
What I packed
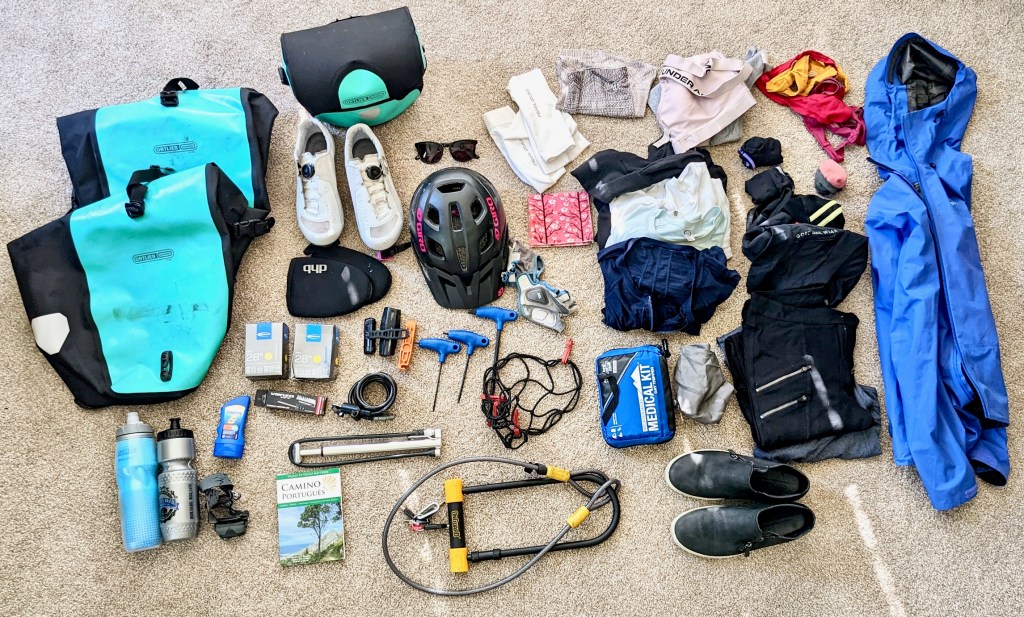
- Camino Portuguese Village to Village Map Guide by Matthew Harms
- Credencial for collecting stamps
- Trek Checkpoint – this is a ‘gravel’ bike with disc brakes, no suspension and slightly larger tires than a road bike. Most other cyclists were on hard-tail mountain/hybrid bikes. The front suspension would have been nice for some of the dirt paths and the cobblestone streets, but the Trek Checkpoint worked well for about 90% of the Camino and I was happy with it.
- Clothing (as much as I could I packed clothing that would function on the bike as well as for casual use around town)
- Padded shorts(2-3)
- Short-sleeve tops (1-2)
- Long-sleeeve tops (2-3)
- Arm sleeves for UV protection (1 pair)
- Leggings to wear over shorts for cold days and also around town (2)
- Socks (3 pair)
- Underwear (3)
- Sports bras (2)
- Rain Jacket (Arc’teryx Beta SL Hybrid)
- Multifunctional headwear (eg Buff)
- Waterproof pants
- Toiletries
- Medications/first aid kit
- Sunscreen
- Gear
- Clipless cycling shoes
- Cycling gloves
- Helmet
- Sunglasses
- Shoe covers for cold days
- Lightweight walking shoes
- Headlamp
- Spare tubes (2)
- Water bottles (2)
- Bike lock (U-lock and cable)
- Panniers (Ortlieb Back-Roller Free)
- Cargo rack and cargo net
- Handlebar bag (Ortlieb Ultimate6 Pro M)
- Bell (important for letting others know you want to pass)
- Rear and front fenders
- Rear and front lights
- Camera
- Phone and charger
- Tire levers
- Portable tire pump
- Allen wrenches
- Velcro straps
Considerations for bringing your own bike
- There is a lot to consider when bringing your own bike, as we did from the United States.
- The cost will vary greatly depending on each individual situation: airline used, number of layovers/transfers, priority status, number of people/bikes, weight of the bike, etc. For our particular situation, using British Airways and Ryan Air, it was about $500 USD (in 2019) additional to bring our own bikes for two of us.
- We had one large rectangular hard case container to fit two bikes and one wheel, plus a round wheel case to hold 3 additional wheels.
- Consider the different options for bringing oversized luggage on a place. When we could, we checked the large bike case as a piece of “sporting equipment” as it was cheaper than checking as an oversized item.
- When we needed a taxi to get from the airport to the hotel we had to ask for a large van to fit the large bike container as well as our own luggage.
- Bringing our own bike case also meant we had to start and end our trip in the same location, as we left the bike case behind at the first hotel we stayed at.
- If you bring a bike case, you must be prepared to disassemble your bike and put it back together.
- To the point above, basic knowledge of bike repair is essential for a bike touring trip to prevent you from being stranded miles from a bike repair shop.
- This was a lot of work but brought peace of mind when it came to our first trip touring by bike since we knew how the bikes fit us, how they would perform, and how our gear would fit into the various bags we brought to attach to the bikes.
Thoughts on the French Way by foot vs. the Portuguese Coastal Route by bike
- The French Way is the more traditional route and sees a larger number of pilgrims. This route is likely to be more crowded but can be a more significant historical and cultural experience. You will find more small businesses catering to pilgrims along the French Way.
- Going by bike vs by foot means you will not have the same experience of getting to know other pilgrims as you would by foot. Very few pilgrims travel by bike and it is difficult to go side-by-side and converse with a fellow pilgrim when on a bike. I enjoyed this experience because I had a partner to join me, but it might have been a bit more lonely without that. Be sure to consider what experience you want when you plan your trip.
- Going by bike also meant we stayed at fewer albergues, or pilgrim hostels. I stayed at these locations when I traveled the French Way and met many other pilgrims that way. It’s a worthwhile, one-of-a-kind experience. However, on a bike, since we were arriving into town later than most pilgrims on foot and weren’t pre-booking, we were concerned about our ability to find lodging at albergues before they filled up. We were also never sure if we’d be able to store our bikes safely at the albergues. Alternatively, we stayed at very affordable hostels and hotels and never had trouble finding a place last minute.
- Traveling by bike makes it easier to recover when going off route, or when you need to travel a bit further for available lodging. You can also cover more distance in less time.
- If you love the ocean and shoreline, you will very much enjoy the Portuguese Coastal Route!

Leave a comment